You’ve probably looked at a lot of the items around your home and thought to yourself, oh yeah. I could pour on that. Fortunately, you’d be correct!
If it’s not a person, animal or food, it’s pretty likely you can pour on it. That opens up a lot of opportunities for creative projects to spice up your home or expand your business. See how one artist spruced up their kitchen with this tutorial: Not Your Average Pour: Decorating My KitchenAid Mixer
In this article, we’ll outline some things you shouldn’t pour on, and a lot of things you can pour on.
What You Should Not Pour On
Before we jump into the things you can pour on, let’s talk about a few things you probably shouldn’t pour paint on.
- Electronics – specifically ones that are not liquid resistant or that cannot be properly taped off. If you want to pour on an appliance or electronic of some sort, in theory, you can. However, be extremely cautious. If you’re not confident that you can protect any vents, charging ports, or other openings that lead to the internal electronic parts, it might be a good idea to either pour a skin and apply it when it’s dry, or skip pouring on it. Most electronic and/or appliance warranties do not allow for liquid damage, and probably don’t cover damage caused by creating artwork on them.
- Vehicles. It’s not necessarily that you shouldn’t pour on vehicles, but you should do some research before attempting it. Auto paint is different than acrylic paint in many ways, and if you don’t prep the surface right, use the right paint, or seal the paint correctly, the paint is not likely to last.
- Dinnerware. Acrylic paint can chip or wear off over time so although it’s generally non-toxic, you still probably don’t want it in your food. Additionally, many of the sealants available are not food safe, which means there’s a possibility of toxic chemicals leeching into your food or drinks. Even epoxy resin is not necessarily food safe, although ArtResin has had their product vigorously tested and has some guidelines for using it safely to serve food.
These are the biggest no-nos that come to mind, but as a general rule, try to avoid pouring on anything that could damage a person, a warranty, or a vehicle and you’re good to go!
Flat Surfaces
Flat surfaces are the easiest surfaces to pour on, since you can easily control the flow and manipulation of the paint depending on the size of the surface.
There are a lot of different flat surfaces that you can use based on your budget and desired final product.
Check Surface Prices on Amazon
Canvas
When you think about pouring, you most likely think about pouring on canvas. Canvas comes in different forms, including stretched and unstretched pieces.
Prepping Your Canvas – If you purchase a stretched canvas from a store like Michaels, you most likely are purchasing a canvas that has already been prepped with gesso. If your canvas is not prepped, don’t worry; you don’t necessarily need to prep the surface unless your canvas is very rough. If you’d like to prep your canvas, you don’t necessarily need to buy gesso either; a thin layer of acrylic paint (not mixed with medium) will do the trick just as well.
There is a lot of conversation around the proper amount of time to allow a canvas to cure before sealing it, and it seems like there is data to backup most of the more reasonable time frames. Some artists wait two weeks for a thin to normal coat of paint, while others insist that paintings cannot be sealed for at least a month. We have experimented both ways, and have had success with both.
Cure Time – So, how long should you let your painting cure? It’s up to you. But we recommend not sealing before, at the bare minimum, two weeks if you have the proper amount of paint on your canvas. If you have used a lot of paint and there’s a thick layer, you need to wait for at least 4 weeks, if not longer, to make sure that your painting has really dried.
For more information on dry time, check out this guide: Acrylic Pouring Drying Time Guide
Cost – In regards to cost, canvas varies widely in price. If you’re an online shopper, you can pick up a set of 14 8×10 Arteza canvases for $21.99 on Amazon. Some stores, like Michaels, offer their “Level 1” stretched canvas for anywhere from $3 to about $40, depending on the size you’re looking for.
The cost of the canvas will depend on your desired size and quality. Stores like Michaels and Blick often have specials, so keep an eye out for special coupons so you can stock up!
Pros: Readily available and usually ready to hang.
Cons: Can be pricey, may sag if not stretched properly.
Check Prices for Canvases On Amazon
Canvas Panel
Canvas panel is a little bit different than a stretched canvas or loose canvas, because it’s attached to a flat surface, typically cardboard.
Why We Don’t Recommend – Canvas panel isn’t ideal for pouring because of the cardboard backing. Cardboard, when saturated, will warp or break apart. This means that unfortunately, when you pour on a canvas panel, your painting will likely warp and possibly crack.
Tips on Use – Some artists recommend spraying water on the back of your panel after your painting has cured, and then placing the panel under a heavy object like an encyclopedia.
Cure Time – As far as curing, canvas panels should cure for at least three weeks before sealing. Unlike stretched canvas, canvas panels don’t have direct ventilation to the underside of the canvas itself, which means they need more time to cure.
Cost – In comparison to stretched canvas, canvas panels are pretty affordable; you can purchase an 18” x 24” canvas panel from Michaels for around $7. The affordability of these panels makes them a tempting surface, but be prepared for a challenge if you decide to use them.
Pros: Inexpensive, easy to frame.
Cons: Warp easily, longer curing time.
Check Prices for Canvas Panels On Amazon
Ceramic Tiles
Ceramic tiles are an inexpensive, easy to come-by pouring surface that can be sealed and used as coasters, garden decorations or backsplashes. Learn a bit more about how to create stunning custom coasters through our Coasters Course.

Cost – White, glossy 4”x 4” ceramic tiles are available at stores like Home Depot and Lowes, and typically cost about $18 per box of 104. Or, you can get larger 12”x12” tiles for about 98 cents apiece.
Preparation – These tiles don’t need to be prepped before you pour on them, save for a good cleaning to remove any dust or glue from shipping.
Some tiles have textures that aren’t conducive to direct pouring because they have pits or waves. Similarly, some tiles have coatings that don’t allow the paint to stick. If this is the case, you can prep the tiles with a coat of acrylic paint or even Polycrylic.
Making Coasters – If you want to use tiles to make coasters, you’ll want to look for tiles with flat backs instead of grooved ones. You can make these coasters table-safe with cork or felt (self-adhesive pre-cut cork is very easy to use). You can also pick up some pre-corked ceramic tiles for coasters on Amazon for just $9.99.
If you plan on creating coasters with tiles, it’s a good idea to seal them with resin to keep them durable and heat-resistant. If they’re purely decorative and you don’t want to spend the money on resin, you can also seal with Polycrylic. Either way, it’s a good idea to apply a sealant to the top and sides of the tile so that the paint stays put.
Need some inspiration for coasters? Check this out: Creating Ocean Coasters with Acrylic Pours
Pros: Inexpensive, readily available, versatile projects.
Cons: Can be difficult to paint on depending on the type, will break if dropped.
Check Prices for Ceramic Tiles On Amazon
Glass, Mirrors & Plexiglass
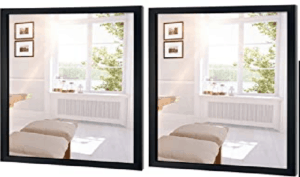
If you’re looking for a surface that’s easy to frame and transparent, choosing glass, mirrors or plexiglass is convenient and inexpensive.
Pouring on glass sounds intimidating, but it’s actually a great way to buy a ready-to-frame surface. Most picture frames come with a piece of glass in them already, so you can be sure that the glass already fits the frame when you buy it! If the edges of the glass pane are sharp, it’s a good idea to sand them down before you pour so that you don’t have to sand after your paint is on, which can cause it to flake.
Pouring on plexiglass is similar. For the sake of cutting plexiglass, it’s best to stay under an 1/8th inch thickness if you would like to avoid using a larger saw to cut through it. Plexiglass can be found at most hardware stores, and they may even be able to cut it for you.
Still feeling a little intimidated by glass? We’ve got you covered: How to Seal Acrylic Paint on Glass: A Quick Guide
Mirrors are another great option if you’d like a framed final piece. You can either pour with the mirror layer still on, or apply paint thinner to the back to remove it. Since some mirrors can’t be removed from their frames, you can tape off the edges so that you have a clean, crisp pour.
Pros: Inexpensive, little to no preparation required.
Cons: Can be sharp, very fragile.
Check Prices for Mirrors On Amazon
Wood
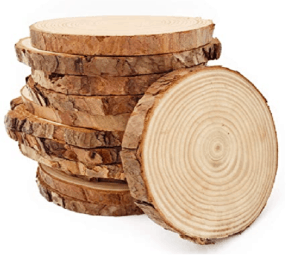
Not only is it possible to pour on wood, but you can make some truly beautiful, functional pieces this way!
Wood slices can be poured on and sealed to create unique coasters, or smaller slices can be drilled and turned into ornaments. Wooden cutting boards can be poured on and sealed to create amazing serving pieces. Wood slices and cutting boards are readily available, and that makes them ideal for pouring.
Check out some amazing acrylic wood art here: 5 Acrylic Pours on Wood that’ll make you trash that Canvas
Porosity in Wood – There is one major consideration with wood that isn’t as much a factor in the other surfaces mentioned above; porosity. Wood can be tricky because it absorbs paint, making it more difficult to move and manipulate the paint. Additionally, the paint may not appear as vibrant if poured directly on untreated wood (although this effect can be appealing too).
To avoid these issues, you seal the wood first with Polycrylic, which will provide a smooth surface for the paint to flow over.
Sealing Wood and Cure Time – When sealing wood, it’s important to take into consideration whether it’s sealed or not. If you haven’t sealed the wood, the paint will take longer to cure since the wood itself will become saturated. Before sealing, wait at least three weeks to make sure the paint is no longer wet.
If you seal the wood and then pour, you should still wait at least 2 weeks for the final seal so that your paint has ample time to cure.
Cost – Wood can be inexpensive, but larger, thicker pieces and cutting boards can cost quite a bit. Before you move to those kinds of pieces, we recommend experimenting with inexpensive wood slices first so that you can become familiar with the way paint behaves on wood.
Have access to some found wood? Test out your pour techniques with this guide: How to Create Stunning Pours on Driftwood (a Step-by-Step Guide)
Pros: Can be inexpensive, unique and decorative without additional framing, durable.
Cons: Porous, can cause colors to darken if not sealed.
Check Prices for Wood On Amazon
Serving Trays
Serving trays with sides and handles are perfect for pouring, and make great serving pieces, candle holders, decorative centerpieces or trinket dishes. Plain, unpainted trays can be found at most craft stores, or you can pick up an already painted tray and paint over the existing design.
It is important to tape off the inside walls of the tray before pouring, since it is an absolute that paint will flow onto them while you’re manipulating the tray.
Before you Pour- For all serving trays, it’s a good idea to check the bottom of the tray to make sure that the corners and bottom are completely sealed and liquid-tight; otherwise, when you pour, the paint will come out of the bottom of the tray.
Additionally, if you purchase an untreated/unpainted wooden tray, it’s important to remember that it will behave the same way as wood slices or cutting boards; apply a thin coat of sealant over the wood before pouring to avoid saturation.
Special Considerations- It’s important to measure your paint carefully when pouring inside of trays; since excess paint doesn’t just flow over the edge of the surface like it would on a piece of glass or canvas, you’ll end up with a too-thick coat of paint that will crack when it dries.
When sealing your serving tray, you’ll want to keep in mind what the use of the tray will be. For example, if it’ll be used for something like jewelry or as a centerpiece, you won’t need to worry as much about the thickness of your layer of sealant.
Seal Carefully- If your tray will be used for serving food or drinks, try to apply the thinnest coat of sealant possible. That way, food and drinks can still be safely carried with a barrier around them to keep them in place.
Pros: Usually inexpensive, multi-functional pieces.
Cons: Can leak if not sealed properly, special care must be taken not to pour too much paint in.
Check Prices for Serving Trays On Amazon
Countertops
Yes, you really can pour on countertops! There are quite a few artists that have created beautiful faux-marble countertops using the acrylic pouring technique, either the traditional way (mixed with a medium like Floetrol) or by mixing the acrylic paint with epoxy. Before you go pouring on your counter tops, try creating that faux-marble look on a smaller scale: Creating Faux Marble Coasters
Home Improvements- This is a really fun way to create custom countertops at a fraction of the price of replacing them with actual marble or granite. You have complete control over the pattern and colors, and you can add touches like gold leaf to really make it your own.
Beginners Beware- However, countertop pouring is not a beginner, or even advanced, project. We don’t recommend pouring countertops until you’ve mastered your recipe, the desired technique you want to use, and the use of resin either as a sealant or as a pouring medium.
The reason this is a professional-level pouring surface is because of the sheer size of the project. Unlike smaller surfaces, you cannot manipulate a countertop by tilting it; you must be able to manipulate your paint or resin using only your hands, a brush or air. You also have to account for curing time when creating countertops; unlike installing new countertops, you won’t be able to use your counters for at least 48 hours if you’re using resin as your pouring medium, and for as long as 3 to 4 weeks if you’re using the traditional pouring method.
Creating a Station- If you choose to pour your countertops, you can either remove them or keep them in place, but tape off the edges with painter’s tape and plastic. If you’re using the traditional pouring method, we highly recommend removing the countertops completely, since keeping them installed while waiting for paint to cure, and then resin, is virtually impossible.
Check Prices for Tray Tables On Amazon
3D Objects
Have you ever walked through a store and found a really cool cup or little statue and thought, that would look so neat if I poured on it. Next time you’re at the store, pick it up… it’s time to pour!
Curved Items: Cups, Bowls, Other Round Objects
First, let’s cover precautions while pouring on curved items.
- Acrylic paint and additives used for acrylic pours are not food safe. This is very important to remember! You can pour on cups, bowls and other dining ware, but if you pour on the part that’s meant to touch the person’s food or mouth, it will not be safe to use for food consumption.
- Even if you seal the pour, you need to check with the sealant’s manufacturer first to make sure that the sealant is food safe. Don’t rely on the internet to give you that information. There is a lot of mixed information floating around regarding sealants, like resin, that are “food safe.” Much of this is conjecture; don’t risk it, reach out to the company first.
- Protect your work surface and prepare for a mess. When you pour on a flat surface, your paint will still flow off of the edges if they’re left bare, but that movement will be minimal and easy to contain. With a curved surface, you will experience more movement and dripping, even when you initially pour. We recommend taking the cautious route and protecting an area at least twice the size of your piece.
Browse 3D Pouring Surfaces on Amazon
Now, let’s talk about how to pour on cups, bowls, and other types of servingware!
First, you’ll want to decide if your piece will be for decoration or food service. This is an important distinction when it comes to preparation!
For Decoration: Prep the object by cleaning the outside thoroughly and allowing it to dry completely. It should be free of all dust and dirt or other debris. You can use washi, masking, or painter’s tape to create interesting patterns if you choose.
For Food Service: Before you begin prepping an item for painting that you intend to use for food service, think about how you will protect the consumer. For example, if you’re pouring on a cup, you can use a sturdy painter’s tape to tape off the rim of the cup and the inside. You should tape the rim with at least 2 ½ to 3 inches of space from the rim to the paint to allow for a paintless place for the consumer’s mouth.
Next, let’s talk about the process of pouring a curved object!
- After prepping according to the directions above, prepare your pouring area by placing down protective film or a paint receptacle of some sort. Make sure that this is at least two times the size of your piece.
- On the surface, you’ll want to have a way to elevate your curved object. If you’re pouring a coffee mug or bowl for example, you can use a smaller, overturned cup (one that you wouldn’t mind ruining) to prop up the object you’re pouring on.
- Mix your paint mixture as normal. If you prefer, you can make the mix slightly thicker to help reduce quick runoff; just don’t make it too thick, or it will not flow or dry properly.
- Using the technique of your choice, pour on your object. You’ll want to do this slowly and carefully to allow the paint to move fluidly and not “splash.” You may need to repeat this process a few times to get the pattern you’d like.
- Allow the piece to dry for at least three weeks before sealing to prevent cracking, yellowing, etc.
Once it’s time to seal your object, make sure to do so in a well-ventilated area, following the manufacturer’s directions!
Dinner Plates
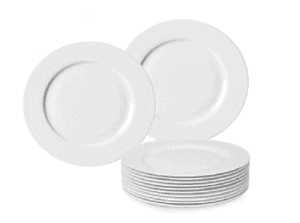
These fit into both “flat” and “curved,” and also a third category – not food safe.
Food Safety is Key- Pouring on the top of a dinner plate, no matter how you seal it, is simply not a good idea. Even if you were to use a food-safe sealant, sealants are typically only considered food-safe if they aren’t compromised with things like excessive heat and knives… Something that dinner plates are subjected to during most every use.
Bottoms Up- If you’d still like to get the beautiful look of poured plates, you may consider purchasing clear glass or plastic plates, and pouring on the bottom of them instead. You’ll still want to seal with a food-safe sealant and tape the edge to prevent any paint or sealant bleeding onto the food surface, but this is a great compromise if you’re looking to make a set of plates.
Check Prices for Dinner Plates On Amazon
Pouring on Spheres
Remember…it can be done! Pouring on a perfectly round object (or even a cylindrical one) requires extra time, but it’s completely possible.
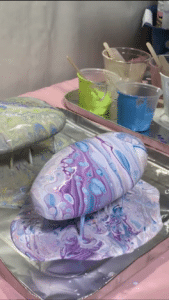
Plan Ahead- For a round piece, you’ll need to plan out your pour in a couple of different stages to allow each section to dry in between. So, if you pour on a small section of a sphere, you’ll need to allow that section to cure completely; you can then rest the sphere on the completely cured side to pour the next side, and so on.
Pouring on spheres like the “crystal” garden balls found on many a lawn, is possible and beautiful. Try pouring multiple tree ring pours on a garden sphere for a unique conversation piece! We’ve made tree ring pouring easy with this five step guide: Five Simple Steps to do a Tree Ring Pour
Check Prices for Spherical Surfaces On Amazon
Pouring on Statues, Boxes, and Items with Many Corners
You can create vibrant decorations for your home and garden by finding new or previously loved items and pouring on them!
Pouring on Statues
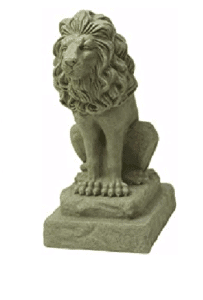
There are two things to consider if you want to pour on say, a garden statue:
- Texture: Most outdoor statues, and some indoor statues, are porous and have a lot of cracks and crevices. Don’t let this be a stopping point, but do take this into consideration while planning your pour! Unless the surface is extremely porous, you can use a few coats of unmixed acrylic paint (meaning, not mixed with a pouring medium) to create a smoother surface on the statue before pouring on it.
- Environment: If you’re planning on displaying your statue outside, it’s a good idea to consider a sealant that offers UV resistance so that your piece doesn’t yellow easily. Additionally, you may want to consider things like extreme heat if you live in a warm climate, or extreme cold.
Preparation- Just like pouring on a sphere, a pour done on a statue should be done in a few different stages to get the best results, unless the statue doesn’t have a lot of curves and nooks. This way, you can manipulate the piece into a more favorable drying position in between each stage so that the previously poured paint isn’t negatively affected.
Go With the Flow- Because statues have lots of opportunities for paint pooling, it’s important to pay special attention to how your paint is flowing. Make sure that the surface is coated evenly, and that paint doesn’t collect in any one area; otherwise, your paint may crack or peel.
Check Prices for Statues On Amazon
Pouring on Boxes
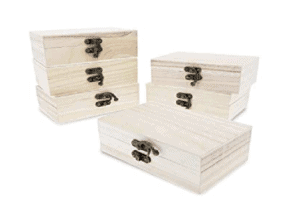
Boxes may seem easy to pour on, since they’re flat; but the corners can present an interesting challenge.
Side by Side- Just like the statues, you’ll find success in pouring one side of your box at a time. Breaking up the process into stages where you pour a side, allow it to cure completely, and then pour the next side, will help you have more control over the final piece.
If you’re pouring on a hinged box or one that doesn’t have a liquid-tight seal, you might want to consider taping off the inner edges of your box so that errant paint doesn’t leak inside.
Open Up- Speaking of hinged boxes, you’ll also want to consider how your box opens and closes, and avoid thick paint on the open edges of the box. If your paint is too thick, the box won’t close correctly. It’s also a good idea to remove any removable hardware like hinges, screws, or decorative metal handles before you pour, and put them back on afterwards for a clean look.
Check Prices for Boxes On Amazon
Pouring on Other Objects with Corners
Since we’re referring to pouring, which has limitless possibilities, you might come across an object with nooks and crannies that isn’t on this list. In any circumstance where you’re pouring on a 3D object, remember:
- Don’t allow your paint to pool, and don’t apply a thick layer of paint anywhere on your piece that isn’t directly exposed to air for drying purposes.
- Consider where your piece will be displayed and seal accordingly.
- Adjust your paint mixture to be slightly thicker so that your paint doesn’t run or drip right off of your piece.
Final Thoughts
Fluid art is infinitely versatile. It sounds so cliche to say things like “the only limit is your imagination”, but truly, that’s the deal here. As long as it’s not alive or fragile (electronically or otherwise), there’s a pretty good chance you can pour on it.
Too many choices can be overwhelming, but don’t let that stop you! If you’re not really sure where to start, we recommend starting out with a flat surface first; canvas, mirrors, things of that nature. These are the most forgiving surfaces and the easiest to pour on if you’re a beginner.
If you’re experienced in pouring and need some inspiration, you can find it just about anywhere! Try a local dollar store, join “garage sale” Facebook groups, or even check out a simple “statue” search on Amazon; you might be surprised where inspiration strikes!
Make sure to share your beautiful creations with us in our Facebook group!
Check out All of the Products we Discussed Today on Amazon
- Canvas
- Canvas Panel
- Ceramic Tiles
- Mirror
- Wood
- Serving Tray
- Tray Tables
- Cups
- Bowls
- Dinner plates
- Boxes
- Statue

Sara Wagner is an author and artist from Upstate New York. She is the owner of Studio Blackwater and can typically be found covered in paint, cats, or her two young daughters. You can find her on Facebook and Instagram as @studioblackwater.


Thank you for an awesome “e-book” guide! Your timing is absolutely perfect! I have been collecting & watching all the tutorials, videos etc. since being inspired by the potential of fluid acrylic art in all it’s various forms. My only stumbling block has been buying some of the products locally. I live in South Africa and our plunging exchange rate & crazy import tax has made it impossible to buy from USA on a pensioner income. I recently discovered a paint company in SA that has developed a branch for specialist paints including everything I need to get started. I expect my first delivery in the next day or 2. I am SO excited & can’t wait to finally get pouring!! YIPPEEE!!!!!
With this guide on my screen, I will certainly be experimenting the way I have been wanting to for ages! THANK YOU!!
Wow! Thanks for all the info on ideas I had wondered about and ones I hadn’t even considered. One topic that I think wasn’t covered was metal objects, and I’ve had trouble trying to find information on it. Things like old silver pieces (bowls, small trays, etc.) or any other type of metal. Any guidance on it for prep work and final treatment would be great! As always, fun to read & be inspired 🙂
Thanks for a thoughtful and thorough guide! I’d love to see a step by step on pouring over 3D items like statues. I have tried a few different pouring processes and have never been 100% happy with them. I found the most success with pouring my base coat on, then using the same formula I normally would use for my pour cup paints, but just a tad thicker paint in the pour so it runs a little slower. Have you had to do any adjustments with paint formulas when pouring over 3D objects? Have you attempted silicone?
Hi Tina! I have not attempted silicone personally, but I do thicken my formula just a tad.
A great list! One thing to look for when painting on canvas, is that the cavas is tight/taut. You can bouce a dime on it. If the canvas droops in the center, the paint could pool to the lowest point, distorting your painting, as the paint will continue to move until dry. Heavier paint sinks to the bottom, too, and what you thought you painted will look much different in 5-12 hours.
How you can fix the droopy canvas is to pour a few tablespoons of water onto the back of the canvas, which will shrink and tighten the canvas. The back of the canvas is raw material, and will absorb water, as it dries, the canvas will shrink.
Another thing to note is to check the levelness of the canvas. Sometimes, the canvas may be pulled tighter on one side, and the canvas will not sit level. If you look at the back of the canvas, you will see thin gaps in the corners, which will accommodate small wood pieces, like a shim, to help straighten out, or ‘square’ the canvas.
This is great advice, thank you for commenting!
Dear Ms
You have put my vase on the page, but my name is not on it. Is it possible to do that please.
Namely Claire Vanfleteren, Jan Breydelstraat 8560-Wevelgem
West Flanders, Belgium.
You would do me a great pleasure with that.
If it wasn’t possible, then only the page where my vase is on via my email address.
I keep it because it is good to be appreciated by someone.
Thanks
Claire