It’s time—you’ve watched a ton of videos, read all the blog posts, and drooled over the gorgeous pictures of acrylic poured paintings. So why haven’t you done your first poured acrylic painting yet? Maybe you’re worried about what it will look like, the costs, or what someone else may think?
First off, just breathe. I’ll walk you through your first acrylic pour painting with a few helpful tips. First tip: don’t expect amazing results in the beginning. Mind you, it may be that your first pour is absolutely gorgeous, but don’t be crushed if it’s not what you expected. This is the time to practice, learn how to mix your paints, determine which brands of acrylic paints you like, choose a pouring technique and medium that works for you, color combinations you prefer, etc.
Supplies I Use for Acrylic Paint Pouring
- Artist Loft (in Titanium White and Mars Black)
- Craft Smart (in Metallic Sapphire, Metallic Amethyst, and Metallic Aquamarine)
- FolkArt Metallic Silver
- Floetrol Flood
- Torch
- Three ounce paper cups
- Artist Loft Canvas Panel
- Disposable gloves
Whoever first said “go big or go home” wasn’t creating their first acrylic pour. This is practice, so pick up a few inexpensive canvas panels, and keep the sizes small (4×6, 5×7, etc).
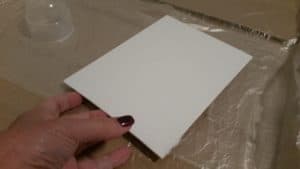
Using these small canvases, will be gentle on your pocketbook. This way you won’t waste paint, you’ll have multiple canvases to work with, and you won’t worry about trying to cover the sides of a stretched canvas. Remember, this is just practice. It’s time to learn about paints and pouring mediums, and possibly some cell formation.
For more in depth info on additional supplies check out our acrylic pouring supplies guide.
Here are the basic supplies you will need to start your first pour onto the canvas.
Paint
You will want a good white such as Artist Loft Titanium White as your pouring medium to paint, but for all other colors, you can go with inexpensive brands like FolkArt, Sargent, DecoArt, Craft Smart, or Basics by Liquitex, so you do not need to care about how much paint you are using (or wasting). With everything, remember — practice at this point.
Torch
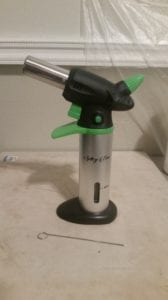
Do you need a torch? My personal opinion is no, not if you have good eyesight; and absolutely yes if your vision is poor. The torch is to remove bubbles under the paint, and you can’t remove them if you can’t see them. You can use a toothpick, paperclip, pin, skewer, or anything else with a tiny tip you may have on hand to pop bubbles—again, only if you can see them.
Canvas
Start with inexpensive canvas panels, which are simply canvas over mdf board. Canvases stretched over a wood frame can be pricey and may even seem intimidating when first starting out painting panels.
Tools
You don’t need a turntable, specialty stirs or forms, silicone or even a specific room for your painting. You can get by with disposable gloves, paper cups, popsicle sticks and either a torch or sharp object to pop bubbles.
Silicone
Do you have to use silicone? No. If you layer your acrylic paint with the Titanium White, you will normally obtain some cells, but, let’s face it, most of us love those beautiful creations that form from silicone.
Plastic disposable cups
You can lay your canvas on top of cups so that you can easily manipulate all sides, and you can then let it stay on top of the cups to dry when you’re done. Plastic cups are perfect for mixing your soft body acrylic paints and medium together, and you can use them to create your pour cup. If you use the small bathroom paper cups, just be careful when mixing your paints. You can easily scrape off wax which will end up on your acrylic pour art.
Medium (Floetrol)
Floetrol is a leveling additive, which thins out the paint and allows it to self level as it dries. This will be used in each color you add to your pour cup.
Garbage bags
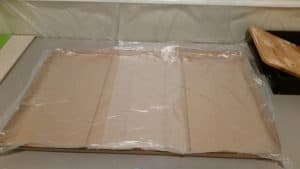
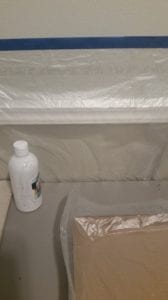
Garbage bags or any plastic sheeting can open up most spaces to painting. Cover the area to keep the paint from damaging the surface underneath. If working in an area with carpet, use a heavy paint tarp as well to protect from splatter or accidental runoff. I also use garbage bags to protect my walls.
On a side note, to complement your Acrylic Pours, I highly recommend using a Cricut Machine (my personal favourite is the Explore Air 2 machine) to design and print yourself beautiful crafts on all sort of supports. Check it out here! Now back to the first Pour Tutorial.
Pour Tutorial #1: Flip Cup Without Silicone
For our sample painting I’m going to show you how to do a flip cup. This is a beginner technique, and you can find other beginner up to advanced techniques in our acrylic pouring technique guide.
For this example I used a 5×7 canvas panel. You’ll only need two ounces of paint in your final pour cup, no matter what colors you choose. Dixie bathroom cups are three ounces, so this can give you a good sense of the cup size you need to work on something this small. Once you get more comfortable with mixing and using acrylic pouring paint, you’ll be able to decrease this amount of paint.
There is no silicone in the example pour, but as you layer the Titanium White, you should still obtain cells! I’ll give you some samples of cells with silicone and tips as we go.
Step 1: Mix Your Paints
Start by mixing your paints. Use one cup per paint color and then mix one part paint to two parts Floetrol Flood medium for each paint color. Mix each well and add a drop or two of water to thin fluid paint to the consistency of warmed honey.
Right before my first pour, I went to the kitchen and warmed up some honey to know what it looked like, and especially what it felt like to stir it with a popsicle stick. I felt really awkward, but it was a huge help!
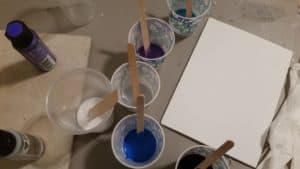
Step 2: Layer Paints In Your Cup
Layer your paints in a three ounce cup, starting with Titanium White. Next, add each color, with white between every layer. Pour about 1/3 of each color per layer, creating multiple levels until you have about two ounces of layered paint in your pour cup. You will likely have paint left over, just set it aside to use for another painting.
For the sample painting shown, I used the following percentage of each color in my three ounce pour cup:
30% Titanium White 20% Silver 20% Mars Black 10% Aquamarine 10% Sapphire 10% Amethyst
Warning! Be sure to always use acrylic pouring medium and a pour cup size close to the total amount of paint you’ll be pouring. If your pour cup is too large, your paints all mix together as they run out of the cup, creating a muddy look with little to no cells. You also run the risk of having too much paint for your liking. For a clean pour cup mix, use the smallest cup possible.
Step 3: Prep Your Canvas
Right before you start your pour cup, coat your entire canvas with the titanium white. The coated canvas allows the paint to slide across painting surface of the canvas and fully cover the sides. Keep it a thin coat.
Step 4: Lay Canvas on Cup and Flip!
Now for the real fun, preparing to create your Acrylic Paint Flip Cup. The easiest way to do this is to lay your canvas upside down on top of your pour cup and then invert both, holding them together as you set the canvas down. Leave the cup upside down for at least 60 seconds. This starts the formation of cells.
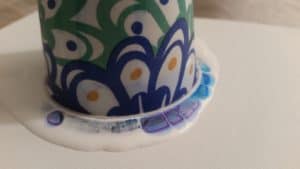
Next, gently and slowly remove the cup.
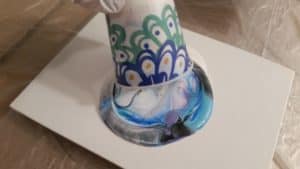
Again, leave the paint alone for at least 60 seconds.
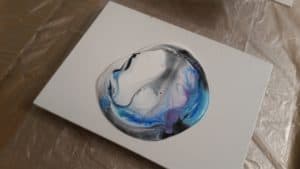
Step 5: Torch Painting (optional)
If you are using a torch, pass it over very quick to pop bubbles. Do not hold it in one place or you’ll burn the paint. You can pop bubbles before or after you tilt, or both. It’s up to you.
Step 6: Tilt Canvas
Next, take your time and gently start tilting the canvas, allowing the paint to flow.
Tilt your canvas to one corner or side, then back to the middle; then tilt to the opposite side, and then back to middle, repeat to each side or corner until the canvas is covered. Basically, you want to keep the mass of paint in the middle of the canvas, slowly stretching it out to the sides and corners.
Once it has spread across the entire canvas, it’s okay to let additional paint run off the canvas as needed. Try to keep your cells on the canvas, while allowing the portions you may not be happy with to run off.
It’s okay to set it down and step back to look at the canvas from a different angle, to determine which side or corner to allow any extra paint to run off.
If you’re using a torch quickly do one rapid pass, or take the time to use your toothpick and gently pop the bubbles as seen below.
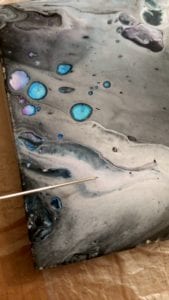
Here’s the hardest part, don’t do anything more, walk away, let the magic happen as it dries.
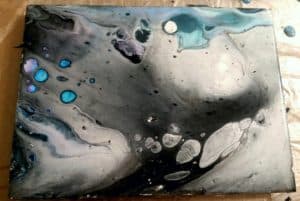
Pour Tutorial #2: Using Silicone For Cells
Okay, so you’re looking at this and thinking, why aren’t there more cells. I wanted to show you that you can obtain some cells without the use of silicone.
To create a larger amount and different types of cells, you can use silicone in the form of treadmill oil, OGX Coconut Milk, or something like Pixiss Acrylic Pouring Silicone. In my opinion, the OGX seems to produce the best cells.
The only difference in the process is you will add silicone oil to the individual colors as you mix them. Like most things, there is a sequence to doing this.
In this next example, I used silicone in the green paint only. Mix your pour paint and medium as normal, get it to the consistency you want (remember warm honey). Next you will add a couple of drops of your preferred silicone oil and stir into paint mixture (four to six) times. Don’t go crazy stirring or you’ll break down the silicone and end up with tiny cells. Just four to six stirs around the cup is perfect.
Then go ahead and create your pour cup layering your paints. Of course you can add silicone to dirty pour in as many colors as you wish, just be sure that you do not add it to the base coat that goes under the pour. As a rule, I never add silicone to my titanium white.
Do your flip cup as described above. You’ll immediately notice a difference when you lift the cup, that is instant cells as seen here even before you torch or tilt.
Just thought I’d do a quick example to show you what it looks like if you use silicone but forget to stir it in. It still works, but doesn’t give you the uniform look that you may be hoping for.
![]()
Lastly, here is the silicone acrylic pour with oil mixed into the green paint only. As you can see we have evenly dispersed cells throughout. Getting your mixture of paint, medium, and silicone down is again why this is practice time.
![]()
Don’t be intimidated by this abstract painting process, there is a learning curve, but everyone learns in their own way and at their own pace. Now is your time to practice and start a whole new adventure in acrylic pour and paint flow.
If you’re a beginner there’s a lot of pitfalls and tips that might help you out. Check out our Top 10 Mistakes (most) Pourers Make and 40 Essential Tips For Acrylic Pouring Beginners to get started on the right foot.
FAQ about First Acrylic Pour
1) What supplies do you need for your first acrylic pour?
For your first acrylic pour, you will need acrylic paint, pouring medium, a surface to pour on, cups for mixing, and something to stir with. Optional supplies include silicone oil for creating cells, a torch for popping bubbles, and a sealant to protect your finished piece.
2) How long does it take for an acrylic pour to dry?
The drying time for an acrylic pour can vary depending on factors such as the thickness of the paint, humidity, and temperature. Generally, it can take anywhere from 24 hours to several days for an acrylic pour to fully dry and cure. It’s important to let it dry completely before handling or varnishing to avoid any smudging or damage.
Since she began creating art in 2007, Tina Swearingen’s focus has evolved from repurposed conceptual art into the creativity and flow of acrylic pouring. Her pours are inspired by the movement and colors of Southern Arizona’s amazing thunderstorms, and the majestic beauty of the Pacific Northwest, which she now calls home.

How do I mix my paints with resin? Will I still need to add the Floetrol first?
Hi Ingrid, I’ve only done a couple of projects with resin, so I’m definitely not the one to provide advice about resin. I wouldnt even know what to ask a professional for you. If I were you I’d ask this on the main acrylicpouring.com blog. I have only used resin as a finisher. From what I’ve seen, on video only, using resin is a completely different process depending on what you are wanting to do with it. Really wish I could be more help, but the best advice I can give is to refer you back to the blog.
Hello Ingrid,
I guess you would call me a mixed media artist as I dabble In acrylic as well as oil and watercolor) I just started acrylic pouring as a change of pace. Would like to send a couple of photos for you to look at to tell me what I need to make them better. How do I do that? By the way I had no flotrol or silacone oil so I was told I could use a little of cooking oil. Any advice would be helpful.
Very clear and well organized info.
Thank you.
VERY good article. When you put the white on the canvas prior to pouring,is the white paint mixed with Flotrol and water? Thank you.
Thank you for this great step by step tutorial.
Could you give the amount of paint for 1. an 8×10 canvas. 2. 9×12 canvas.
How do you calculate the amounts for different size canvas?
I appreciate the help.
Hi Luane, For some reason my response posted below for you. Hope you have seen it. Tina
Thank you very much. It’s been very confusing watching all the videos and wanting to get started. You have cut to the chase in a simple and informative way. Well done!
Hi Carlotta, happy to help. Tina
Do I have to pay for the free course or can I unsubscribe after the free course
Hi Diane, you may have a bad link, as I do not offer any courses, I think my email may be linked to one of the videos. Sorry I can’t answer your question, but I’ll let the moderator know and maybe they can give me the correct link for you.
Yes she did,! Thank you Soo much! This was very helpful and am going to try it
I TOTALLY agree Carlotta!! I was just trying to figure out the BASE to try this out and I was getting so I almost quit before I got started…thank you Tina for giving a “dumb blonde” tutorial.
FYI: I am a natural blonde so I can use that reference 😜
This is very helpful. I have always wondered how much paint I needed for the can as size. I think this is the first time I have seen that type of info. Thank you very much
Your welcome
Luane,
For a 8×10 use 3 oz, and 9×12, 4 oz. This seems to be pretty close to what I’ve found works with most projects. I typically have about an ounce extra of what ever base color I’m using just in case I need extra for the sides.
1 oz for: 4×4, 5×7, 6×6
2 oz for: 8×8
3 oz for: 8×10, 10×10
4 oz for: 9×12, 10×12
5 oz for: 11×14, 12×12
7 oz for: 12×16
For larger canvases, just google “amount of poured paint per canvas size” and click on images. There are many charts out there and most show the same amounts. As your canvases get larger, you need to add in more for the sides, so it’s a little different and the charts show you how to calculate for them. Hope this helps.
Very nicely done. I appreciate your advice about using a small cup for my pours. I’ve been using a cup that is much too large and haven’t been thrilled with the results so I’m looking forward to trying the smaller cup.
One question, you mentioned covering the canvas with white paint. Is this mixed with Floetrol or is it just plain paint?
Using the same size cup as you are using for total paint will make a world of difference. Yes, it’s part of the white with Floetrol mix. Good luck!
Yes,definitely helpful to mention not to use a cup that is too big. I’m sure that’s why some of mine have turned out ‘muddy’. Great tip!
Hi l would also like to know,what is mixed with the white paint,that you start on your canvas with please
Thank you for this great lesson on pouring. Very well written!
Thank you so much!
This is the best and most informative information I have read about. Thank you!!
Thank you! I just read your tutorial. The pour I did turned out great!!!!! The best yet. I didn’t have a torch but used a blow dryer on low and it worked beautifully.
Wonderful! You can use a blow dryer, and using it on low was perfect. You just need to be patient and don’t get too anxious as you can move your paint around in the process. Long distance Hi five!
Thank you so much – very helpful. I have only recently started to explore this medium and I am wondering what difference does silicon make and do you put it in all the colours or only in the white?
Hi Margaret, the silicone helps create the cells. There’s no need to put it in every color. I use 1/4 silicone, simply meaning I add it to 1/4 of my paints per painting. In the sample I did for the article, I didn’t want folks to feel they had to use silicone to create cells. I use treadmill oil, just 2 drops per selected paints.
Also, you don’t need silicone in the white paint, especially if you use Titanium White as it has enough weight to sink to the bottom automatically creating cells.
Can dish soap or elmers glue be used instead of floetrol? And how much do u mix in with paint.
Hi Noelani, first off beautiful name! My 6 week old grand daughter is Noelle 🙂
You may have heard of people using dish soap for cells, my suggestion is to stay from dish soap, it can cause your paint to bubble and peel off the canvas. Instead I suggest using Essential Values Treadmill Lubricant, which you can get from Walmart for 11.99 for a 3 pack. It only takes a couple of drops in 1-2 colors to create beautiful cells.
Yes, you can use “Elmers Glue All” but not regular Elmers school glue. It’s a little thicker than Floetrol so you’ll want to play with it and see which works best for you.
The step by step is helpful, along with the tips I’ve missed watching tutorials. Getting ready to do our first large pour for my daughter’s dorm room. The white paint that goes on first… do you let it dry before the pour or apply and then do the pour?
Hi Kim,
Your pouring white over the canvas, spreading it across the entire top and sides, then while still wet, go ahead with your cup pour. The base white acts as a lubricant for the pour to slide over the canvas and keeps the colors more vibrant.
Red and blue dorm rooms rock, Go UA Wildcats! ????
thanks for the step by step procedure,I will try it for my first step.I make some post card and this is my first step for pouring.PLEASE visit my face book ( noeljoachim to see my post card and invite for your advice.
Thanks for all
Hi, I’ve never worked with postcards, but I’m sure you’ll need to use much less paint. I’d try 1/2 ounce total paint first, then adjust it accordingly.
Hi Tina,
What a concise and simple explanation of the pour technique. A friend told me about pouring and sent a video to show what it was all about. I was intrigued and looked for how to videos, beginner videos, list of products needed, etc. and after many frustrating hours wasted trying to just get the basics I found you!!! I have probably made my hunt too complicated as I usually work in oils or collage and supplies can be very technical but even so I think you deserve a YouTube Emmy for keeping it simple!! Thanks so much, I’m off to create!!
Bobbi in the great PNW
Bobbi, thank you so much! Tina in the PNW/South Sound ????
Thank you about the part on cup size, did not get that information in the videos for beginners I’ve seen and I’ve seen to many to count.
Sarena, your welcome. I created many muddy pours in the beginning and finally figured it out by accident. Makes a huge difference! Happy pouring, Tina
Great tutorial for beginners! I’ve been kinda trying this in my spare time, but not with great results. Definitely going to try this method for pouring! Thank you.
I’ve tried to do this from advice from co-workers,,,didn’t quite get it. This I can do with your instructions. Thank you!!!
Thank you Gloria! Don’t give up, I had to try so many before I got my first success. It’s so worth it, and that first “giddy feeling” is pretty awesome!
I love this step by step. I’m interested in the dried look. This is my first time. Yours looks completely smooth when dry. Is that typical? Mine came out a little bumpy. I love the look and perhaps a varnish with smooth it but I’m interested to see if this is to be expected. Thank you
Good Morning Latifa, thank you! If you are seeing lumps-bumps in your dried painting, there are a couple of reasons this can happen. 1. Make sure you clean the tops of your paint bottles each time after you use them, as dried paint around the opening may pour into your mix cup. 2. Be sure to thoroughly mix each paint-floetrol cup to help break down any lumps from paint OR floetrol. 3. Lastly, if you are still seeing bumps, you can try a paint strainer which will get rid of almost everything. They can be found at most home improvement stores or on amazon.
There is no place for me to upload a pic, but my dried painting also has a couple small bumps too. I like to use the strainers, but didn’t remember on this one. Try again mixing longer and maybe using a wider stir stick giving you the ability to press clumps up against the sides of the cup as you mix. Good luck 🙂
Hi my paintings end drying and then cracking over the whole picture also I can see the canvas underneath please help me what am I doing wrong thank you so much Lori
Hi Lori, there are two thing that come to mind that will cause cracking, first is too much paint left on the canvas after tilting, and the other is using Apple Barrel white paint. Both will cause cracking when it dries. Hope this helps. Tina
First of all thank you for your tips and your tutorial – very well done! How long would you assume a pour will dry on a canvas (about a 6 x 6) before it can be moved or transported in a car? Thanks in advance!
Hi Sylvia, actually I don’t move mine till 24 hours. If super careful maybe 12, the real risk is the unknown pieces (animal fur, dust, etc) floating around that can land on you half dried painting and ruin it. A 6×6 inch should dry quicker too, so as long as it’s protected so it won’t bounce around, maybe in a flat bottom tuperware dish with a lid, then 12 hours is probably good.
Hi Tina… thank you for the step by step. This has helped me in many ways. I do have a couple of questions:
* do you use gesso on your canvases?
* Regarding the titanium white paint…. Do you pour this paint in the middle of your canvas then cover even on a larger canvas? I’ve looked for gallon sized of titanium white … just curious what you use on larger.
Sorry if this is confusing… I’m watching a 2year old. Lol
TIA
Cindy
Hi Cindy, first off thank you. The Artist’s Loft Canvas I typically use, they are already guessoed, so no need to mess with that. I only use guesso if I’m painting on something slick, metal or raw wood.
As for larger quantities, I just found a great new paint medium combo, meaning you don’t have to add anything to it. You simply shake the bottle and it’s good to paint pour, it’s from happymedium.fun called Paint Ready to Pour and the white is Pure White. If your doing a large painting, I’d suggest using a premixed like this, as it just takes the worry out of missing clumps in your dried art. Hope this helps. Tina
Oh my goodness! Thank you so much! I have been using Apple Barrel white AND leaving too much paint on the canvas! No wonder I have tiny cells and cracks everywhere. Can’t thank you enough.
You’re very welcome!
Hi Tina! Love your tutorials btw…question…on all of my pours i notice the paint won’t stick to the outside edges where the paint runs off. I do put down white and make sure I coat those edges but i can still see canvas. Am getting my paint mixture too thin or is it too much silicone? Help!!
Hi Lori, I think I understand what your saying about the edges, there are some of the cheaper canvases that may do this. Here are a couple suggestions if you find its happening on more than one of the same brand of canvases.
1. You can paint the entire canvas with your base color, let it dry, then lay a new base layer and go from there. Just be sure the initial layer dries completely before you start the process.
2. You can also just paint those edges with a paint brush making sure it’s nice and smooth. I would use a slightly thicker mixture on the edges, but then go ahead with the normal process. You don’t need to wait for it to dry before you lay down your base coat.
I think you’ll be fine if you do one of the suggestions above.
Tina
how do you clean the edge of the canvas – while it is still wet or do you wait for it to dry
Hi Maria, Great question! I typically use a piece of plastic taped to the back side of the canvas with painters tape. After I’ve completed my pour, I use an artist’s spatula, but you can use a clean stir stick to scrap off any drips “while they are still wet”. Then I take a lightly dampened paper towel and wipe off the remaining paint being extremely careful not to touch the sides of the canvas. Lastly I carefully remove the tape and plastic before I walk away to let it dry. If it dries you may damage your painting trying to remove the tape. I hope this helps.
Hi ,I’m Rita….love your tutoring videos…..question…what can I use instead of floetrol…..I’m learning how to use different methods wen I pain…..
Hi Rita, I’ve tried other products, but alway seem to come back to Floetrol. Other artists like Elmers Glue All, XIM, Zinsser, and M-1 latex extenders from the home improvement stores. I think most work fine, it’s all about preferences and finding that perfect mixture of medium to paint. What I did was purchase one at a time, then tried varied amounts of paint to medium till I obtained the consistency I wanted. Each one seems to be a little different, some thinner, some thicker. Work with inexpensive paints till you get the consistency you want. I’m pretty sure all of the are available through Amazon, some through Lowes, Home Depot and Walmart. Hope this helps.
What a wonderful video thank you so very much I am a beginner by the seat of my britches most of the time have pretty good luck one question I have which was not Covered in the video is using the little plastic like sink calendars can you please tell me how to mix the paint is it thicker than usual as I seem to not get distinct pattern and I suspect the paint may be too runny I am usually this hobby tremendously also I’ve enjoyed using tile for leftover paint or what drips off and they are turning out beautifully also I was wondering what do you use to seal the painting primarily for gloss Do you find that it’s better to have your paint next ahead for a bit or mix just before you paint With them especially with regard to Cell’s again God bless and thank you so so much
Hi Tina, I was so happy to come across your step by step instructions! My friends and I are going to attempt our first paint pour at our next craft night and I am so excited! We will be using 8×10 canvases since I already have them on hand. I just wanted to know if there is anything we should use as a sealant once they are dry or if it is better without. Thank you!
Hi Devonna, that sounds like so much fun! You’ll need to let them dry for several days, I typically wait a week. Then you’ll take a clean rag, place it in a bowl of soapy water, squeeze it out and wipe off the canvas. This will clean off the silicone. Then use a clean wet rag (water only) and rinse off soap by allowing clean water to gently run over painting. Let dry overnight. Lastly, seal it with your favorite polyurethane gloss varnish or spray.
Hi Tina
Awesome thanks you
Could I do this technique on chest of draws? Do I need to add anything to paints… will definitely practice practice before hand lol
Interested in doing greys whites with pearl mixed in your suggestions/links would be great
Thanks x
Hi there Teena, the answer to your question is yes. I have pour painted on furniture, but never a piece that large myself. As long as you go about it strategically and plan out each phase, I think it could be amazing.
Yes absolutely practice first, and as you get things fine tuned start going bigger. You don’t want to go from an 8×10 canvas to a chest of drawers, instead move to a larger canvas, and maybe even try to pour paint on a smaller piece of furniture first. I’d probably find a second hand nightstand or end table to practice with.
Once you start to proceed on the chest, be patient with yourself. If you intend to cover the entire piece, go slowly and only pour on one flat surface at a time, except for the drawers of course. Allow each side to dry for at least a couple of days before you turn it to the next side.
If it’s bare wood, be sure to seal the wood first, I usually lightly sand, then apply a light coating of an all purpose spray paint..very light coating. Don’t completely spray paint everything, keep it light, just mist over it. This seals the wood so it won’t soak up your paint, and allows the paint to flow better over the wood. Lastly don’t forget to clean off silicone by thoroughly washing the piece before you give it a final varnish.
I hope this helps, good luck and don’t forget to post the final project on acrylicpouring.com 😉
Great and easy tutorial. Question: how long goes an 8×10 usually take to dry?
If your in a dry warmer climate, at least 16-24 hours. I’m in Washington state so because we are in our rainy season, I give mine 2-3 full days to dry.
This is exactly how I need this explained to me. Omg, this is great. A fountain of knowledge. Seriously, thank you.
You are so welcome, thank you and good luck!
Your super-clear directions are so appreciated by all of us, but what I find most awesome is your generosity of spirit! It positively shines through in every suggestion and response you make. Go ahead and polish up your halo.
Deb, thank you for your kind words of encouragement. Every one of the bloggers love sharing our experiences with fellow artists. Each question gives us more joy than I can explain, we thrive on teaching and inspiring others. Let your joy flow Deb, pour away!
Can you seal the painting as in the tutorial with resin?
Laura, yes you can seal with resin. Just be sure to thoroughly clean your dried painting first, as resin will bubble or (not seal) if there is any silicone left on the surface.
Man… I swear I’ve read and/or watched every single tutorial but could never get mine mixture to flow right. But this helped me sooooo much. The white paint all over the canvas first makes so much sense and I always had either way to much paint after the flip or not even close to being enough and all of my attempts (about 10) have turned to a muddy waste. I’m going to try again exactly like this suggests… Wish me luck. And again thank you so much for taking the time to write this you have no idea how much this had helped me!!
If you get bored one day you can look at some of my abstract work prior to pouring..
Facebook.com/tdccanvas
Shay Lyn Collins
You are so welcome Shay. The white (wet) base really helps the pour to flow evenly across the canvas. Once you get the basics down, you’ll be hooked on pouring 😉
Very impressive with the way you organized and and with all the advices you gave. I am a beginner on this, and I live in the Philippines, which means I am limited to finding some of the materials. And I am contemplating buying Floetrol and Resin online. However, I would like to know, is it really necessary to have Floetrol at all times in mixing?
Thank you and looking forward to learning more from you.
new at all this- not wanting to spend a ton of money to start- seeing inexpensive paints- does it matter if it’s matte or gloss?
It shouldn’t matter which you use, it just depends what you want the final product to look like!
Dziękuję za wspaniale zrozumiałą instrukcję. Teraz mogę sama spróbować. Pozdrawiam z Warszawy (Polska) 🙂
Hi, tried my first pour, total disaster, too thick and far too much paint left over, how long can I keep the “mixed” paint for? once the pouring medium is added will it affect the paint, hate wasting money by throwing away, if i cover with foil will it keep longer, will not give up yet!
Thanku so much. Have wanted to do this for so long but it all seems too hard haha till I found your post. Great clear tutorial thanku. One thing that has always struck me is how much paint goes over the edges…surely there has to be a way to use it again?
Lay another canvas or paper over the spilt paint and get another picture or 5? Thanku so much cheers Kaz
Would this application work for countertops? I’ve seen some done and they were have said to have been in acrylic!
Great tutorial. Not sure if you already mentioned this I tried to read all the comments but may have missed this. Do you mix the titanium white with the flood? Then you cover the canvas with it first right? I have done this acrylic pouring before but was not told to cover canvas with titanium white first so I’m going to try it and see the difference. Thank you
Yes you do mix the white with the floetrol. But you don’t have to cover the canvas first necessarily – it helps to make sure the paint flows over the canvas well, but it depends on what you’re doing. In this case it was poured on the canvas first. Hope that helps!
Is floetrol absolutely necessary or could you thin the paint slightly using something else?
There’s plenty of alternatives, check out our mediums guide – https://acrylicpouring.com/what-is-a-pouring-medium/
Thanks for the great instructions. I have craft paint as well as artist quality of acrylics in tubes. When thinning the tubes paint do I thin it first to honey consistency with water and then do a 1:1 mix with the pouring medium? And is the craft bottle the correct consistency to do a 1:1 mix with the pouring medium?
Thank you thank you thank you so much for your informative video and I have done a few with fair results your video was absolutely so if formative I can’t tell you how much it appreciated it it I took the paint that I Scraped off a painting I hated it to a cup and then took what was in the cup and put it on a tile which was beautiful And I save the drippings with their dry and Avenue planning to make some jewelry with them thank you thank you I can’t tell you how much your videos have helped but it is also all of the comments God bless you much bye to live in Washington state so I understand how long it takes for them to dry sometimes the ladies here at The facility or wanting need to teach them ha ha ha ha not yet but if we’d watch your video I’m sure we could do it God bless you
When you are done, do you to a finishing coat, or do you just leave it as is? And if you do use a finisher, what do you use!
Resin finish? Just a clear coat?
Thank you!!
You can use anything your heart desires as a finisher, or even leave it plain.
It is your choice!
Some finish with a coat of resin, for a high gloss finish.
You could even use a coat of modge podge.
Even could use spray clear, in the style you want, gloss, satin, or matte.
Again, totally your preference!
Happy Creating!
^__^• ♡
This is a brilliant and informative Site. I’m in UK and have no idea what “modge podge” might be bit such a lovely pair of words.
Thank you again for your inspiration and guidance. You’re a star ????
You can find ModPodge in the Range here in the UK.
Thanku very much Tina great tutorial. Yep your right it’s intimidating! Have wanted to do one for so long but just havnt. I’ve watched so many videos and altho there is a process it’s the materials that frustrate me haha. I’ve got just regular tunes of paint not premixed…I can’t find floetrol in Australia unless I go online and I just havnt done that yet. Pretty wary about handing over card details to a unknown person altho I know it’s the way these days. Call me ol fashioned. What alternatives can i use? I’ve read about PGA as a alternative..paint thinners or extenders at the local hardware store..are they ok to use…amounts to use etc. Your in oz’s were in mls I know it’s not hard to convert haha but it gets a lil confusing when your intimidated to start with so it goes back in the ‘one day’ and ‘too hard basket’ ????
Your tutorial has explained alot and for that I thanku. Will I try it? Maybe ???? do i want to try it ? Definatley hahaha. Thanks again cheers Kaz from Down under ????
Where can I post my paintings
I have heard you can use house paint mixed with floetrol for the base coat on the canvas. As there are so many different house paints what sort should be used.
You’ll want to make sure you’re using a house paint that is latex/acrylic based. Many artists love Behr for the color quality.
I’m so glad I found this page! I, too, have watched dozens of videos, but have been terrified to dump my first cup. You’ve given me the courage to go ahead! I’m so grateful for the cup size hint; I don’t think it’s been mentioned in any of the videos I’ve watched. You nailed the abc’s; so many of the tutorials seem to assume that we’ve all mastered long division already. News flash – I just figured out 2+2! Bookmarked! Thank you so much.
This is the first time I have ever posted a comment on any venue. I think I need to give you guys some background so you know where I’m coming from and if you think this is too long to read, I promise you that you won’t regret the time. I’m 87 years old and I’ve been a professional artist/craftsperson since 1966. I did shows and galleries all over the USA and finally retired in 2005. I’ve done paintings in all mediums, printmaking, jewelry, Victorian crafting, large Santa dolls, florals, etc and the last business was making 55 different kinds of fudge. I did not do this all by myself, my husband of 57 yrs marriage, who was a wood worker, printmaker, fudge maker did all the shows with me. When I got too good at something I re-invented my self yet again, and I’m doing it now, with this medium. I taught myself how to do large paintings with acrylics after having done watercolors for 25 years. I want this method to work with my realistic acrylic paintings as I do not deal well with a total abstract. I do, however, love color and have taught color theory and done demos for art groups. I just started working on 2ft x 4ft canvases and went to 30″ x 40″ and am ready to try a 4ft x 6ft canvas. The reason for all this background is to show you that, any of you out there can do anything you want to do with art. It comes from within and your mind and brain and then your heart follows. If I can do it you can do it. If I can re-invent myself at this age and with health problems that I’ve had (lucky to be alive), I know that you all can do it. Don’t be afraid to try. Watch the videos, absorb what you see, take notes, get your supplies together and if you can’t afford the good stuff, play with the lesser grade paints, pour on canvas panels or wood, use the substitutes for floetrol (you Aussies use Owatrol) and just get started. If you don’t like what you have, gently scrape it off into another cup and save it (if it’s not mud) and use it for another pour, and yes, you can do this. You have a lot of supplies in your kitchen and workshops, there’s Walmart, Loews, Home Depot and in other places you have the equivalent of Walmart. Don’t be afraid to try it. Now here’s the kicker, I’ve not even done my first pour! We’re in the process of setting up the pouring studio in with my painting studio. But I’ve been learning and absorbing and taking notes and printing these tutorials. Have filled many 3″, 3 ring binders and folders on my computer. There are several “pour artists” that I follow and admire for their talent and knowledge. If I can learn, so can you. So just do it and good luck to those of you willing to try. Thanks for listening.
Bravo pour votre message si positif !
Do you put a base coat of plain acrylic paint on canvas, let it dry and then use your base coat mixed with medium to coat canvas right before pouring .
Hi Michelle, no need to put a base layer and let it dry, except if you need to cover an old painting first. This part would be done to cover old paint so it won’t show through. Always start with a solid colored canvas, usually white so all poured colors come out they way you want.
If this is a new white canvas, just coat your canvas with your base coat of white, leaving it wet and immediately do your favorite acrylic pour.
A tarp could be useful in this kind of project.