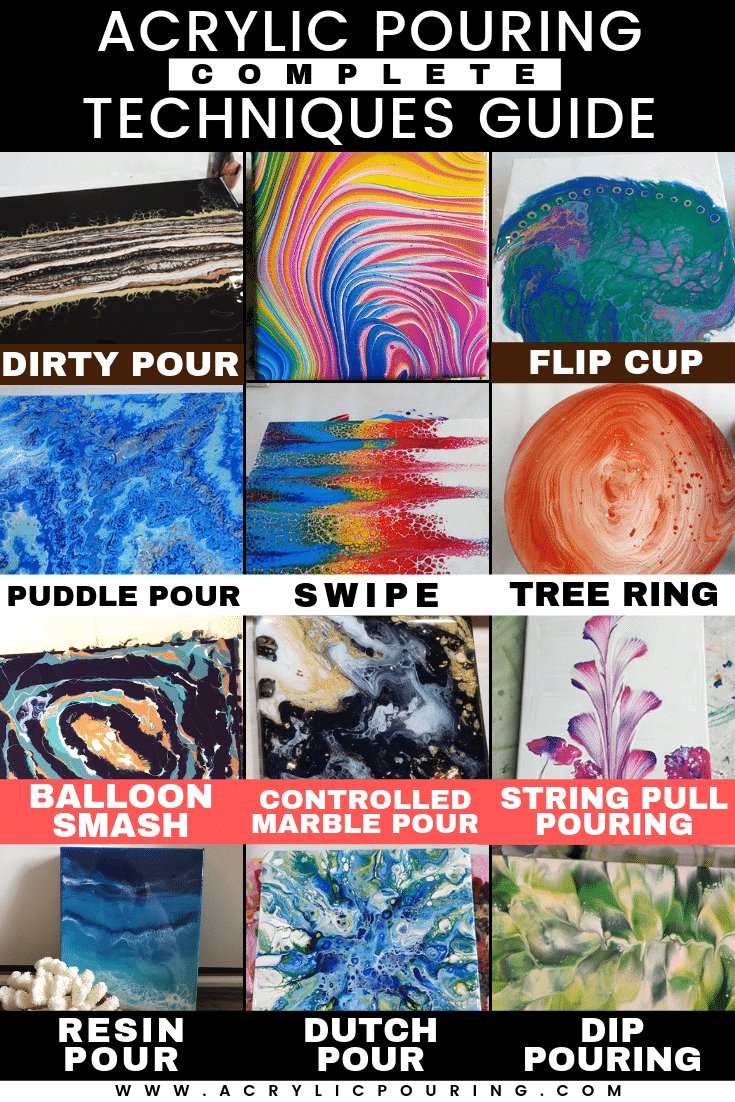
What are all the techniques you can try with acrylic pouring? There are so many different ways to approach any art form, but it helps to have some guidance, especially for beginners. We’ve created this step-by-step guide to help you with the most common techniques in paint pouring.
So go through them all, or find the technique you’re looking for in the table of contents below. We continually update this page with new techniques, but if you feel something is missing please let us know in the comments!
What is Acrylic Pouring?
Acrylic pouring is an abstract art technique where artists pour fluid acrylic paints on a surface creating art. Acrylic pouring is a “fluid art” along with alcohol ink, and resin art.
With acrylic pours, you can create backdrops for dreamscape scenery, coasters and other home decors, and magnificent faux marble counter tops (just to name a few things). With so many acrylic pouring techniques available, it can be difficult to know where to begin. We’ve rounded up all of the current acrylic paint-pouring techniques in this guide so you can learn about them all in one convenient place.
Acrylic Pouring Materials
The materials for each fluid painting technique will stay mostly the same; you’ll need
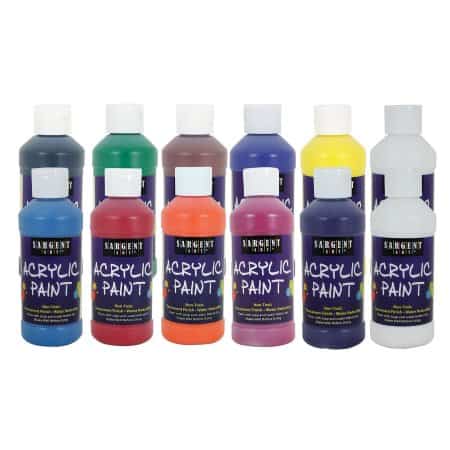
- Paint
- A medium of some sort
- A surface
- Silicone or a bit of water (optional)
We’ll discuss any additional ingredients or considerations used with each technique, but assume that if there are no additional ingredients mentioned, the technique requires only paint and medium to achieve. Here are some basic supplies to get started:
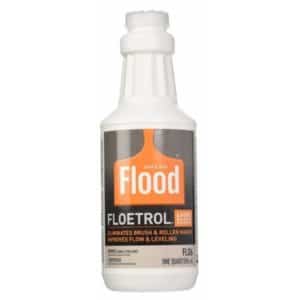
Pouring Medium: Floetrol, 1 Quart
Click for Price, 1 Quart
Silicone Oil: For Cells
Of course, the beauty of acrylic pouring is that it’s really customizable, so tweak the recipes to fit your needs! If you need more info on materials check out our acrylic pouring supplies including the Liquitex pouring medium post or get our acrylic pouring beginners guide to learn all the basics you need to get started with acrylic pouring.
For those of you who like to watch, rather than read, we have a great Acrylic Pouring Video Course which walks you through all the basics.
Basic Acrylic Pouring Techniques
When we say basic technique, we are referring to acrylic pouring techniques that are fit for beginner-level artists and veteran artists alike. These techniques require only a standard amount of preparation and can be completed using a pouring medium that most people have in their households already.
For beginners interested in more in depth and comprehensive video guides on basic pours including the clean pour, puddle pour, dirty pour, flip cup pouring technique, and swipe acrylic pouring techniques then check out our Acrylic Pouring Video Course.
Acrylic Pouring Paint Consistency and Recipe
For each technique in acrylic pouring you’ll need to have your paint mixed and ready to go. To start acrylic pour painting, first, decide on the colors you want to use. You can use our color theory pouring guide for some help there. Next, you need to properly mix your paint with the acrylic pouring medium and water.
While there are countless ways to mix the paint I’ve outlined a basic acrylic pouring recipe below.
- Floetrol (2 parts)
- Distilled water (1 part; hard water and tap water with mineral content will act differently and change the way paint floats, so stick with distilled!)
- Silicone (a few drops – but only in half the colors you’re using)
- Acrylic paint (1 part)
The end result you’re going for is the right consistency of the pouring mixture. This will also save you from the cons of using too much paint. As you gain experience you’ll adjust this consistency and mixture to work with the technique you’re using and your desired outcome. But for now just try to get a warm honey or syrup consistency. This should create a thin stream when poured, not droplets or it may still be too thick. But you also don’t want it to be watery either.
Once you have your colors chosen and paint mixed you’re ready to start with the painting surface of your choice with any of the techniques below
Basic or “Clean” Pour
A basic or clean pour refers to the process of pouring acrylic paint in the form of one color at a time onto the canvas. Sometimes, the goal is to get all the acrylic paint colors on the surface separately and keep them that way, or an artist may use one color at a time and then use a toothpick or other tool to swirl the colors together in intricate patterns.
Clean pours are great for creating color block pieces or abstract retro art.
Creating a Clean Pour:
- Mix your paint with your desired medium so that the consistency of the paint is like a warm, runny honey. The paint flow should be uninhibited, but should not be “drippy” or thick and sludge-like.
- Once your paint has been properly mixed, take one color at a time and pour as desired on a surface of your choice.
- Manipulate the surface to move the colors around if you’d like the edges of the color to blend, or leave the paint as-is to maintain clean lines.
In every pour, paint thickness is key: make sure that your paint is not too thick, or it won’t dry properly and you will have cracks in your finished painting.
Clean pours are most commonly used with the swipe method, which we will cover further down in this article.
On a side note, to complement your Acrylic Pours, I highly recommend using a Cricut Machine (my personal favourite is the Explore Air 2 machine) to design and print yourself beautiful crafts on all sort of supports. Check it out here! Back to Pour Techniques, now.
Dirty Pour Technique
A dirty pour refers to the process of layering individual colors in a cup, and then pouring them onto a surface all at once. Dirty pours are the most common pours, and a wide variety of results can be achieved using this acrylic pouring technique.
Creating With a Dirty Pour:
- Mix each color separately (paint and medium).
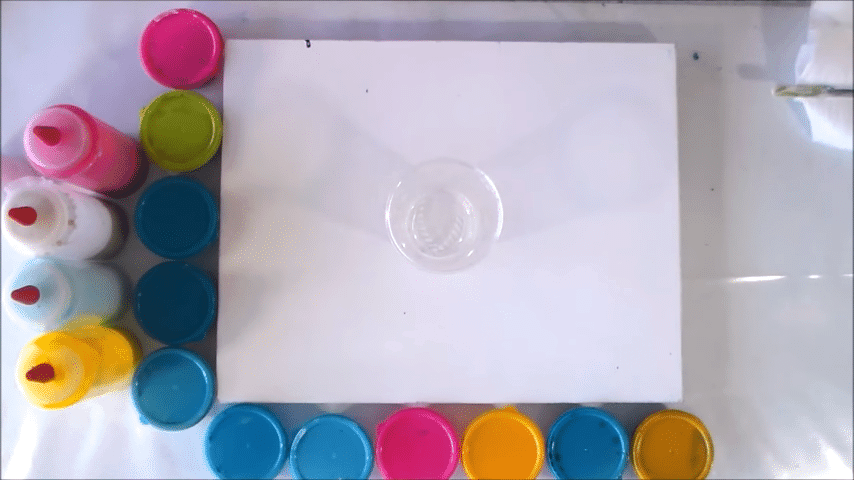
- Layer your colors together in one cup; you can do this gently by pouring the paint down the sides of the cup, or “plop” the paint colors into each other for a dramatic blend.
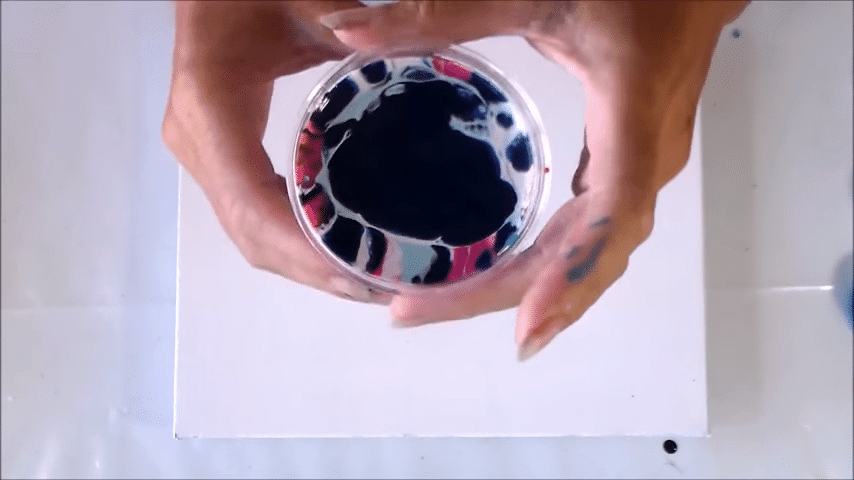
- Pour the paint onto your surface.
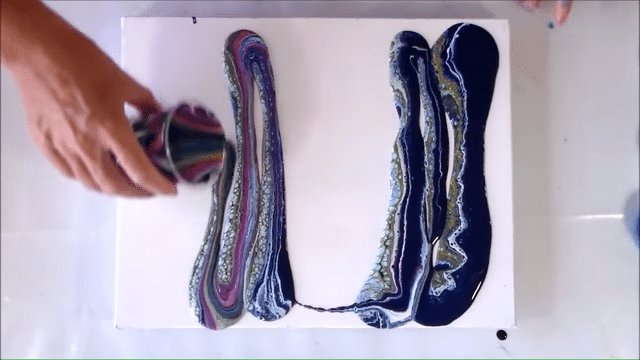
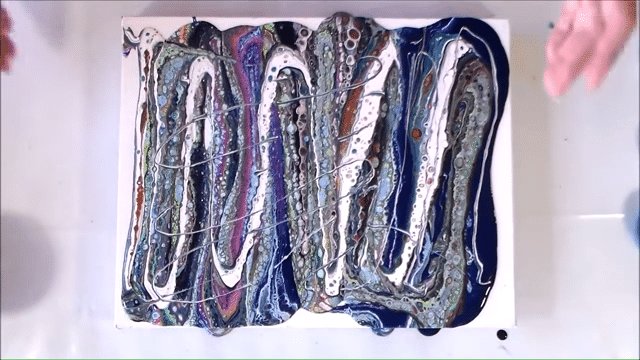
- Manipulate your surface to achieve the desired pattern and style. Make sure that you do not have a very thick layer of paint on the surface, or your painting will crack.
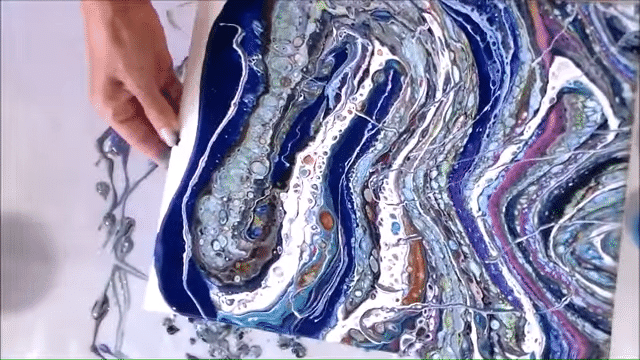
Dirty pour art is very popular when creating faux marble finishes!
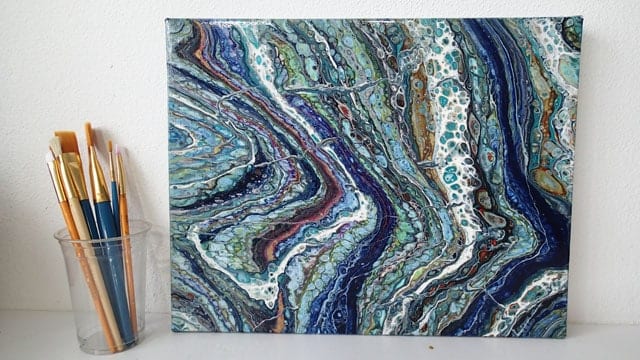
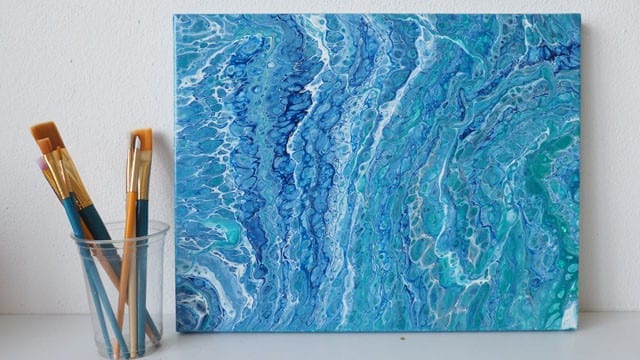
Dirty Pour Examples
Making a dirty pour from leftover paints
Flip Cup Technique
A flip cup pour refers to placing an upside-down a cup full of paint onto a surface, and then either pulling it off to allow the paint to flow out, or poking holes in the top to relieve pressure and allow the paint to come out from under the cup.
Flip cup pours create beautifully dynamic patterns and blends; cells are also attainable with this technique. If you’re looking to achieve cells, you’ll want to add a silicone or dimethicone to a few of your colors (I recommend only putting silicone or dimethicone in your colors, not in black, white or metallic paints).
Creating With the Flip Cup Technique:
- Mix your paints with mediums in individual cups. If you are using silicone or dimethicone, this is the time to add it.
- Layer your paint in a cup either by pouring it gently down the sides, or by plopping the colors together in the cup.
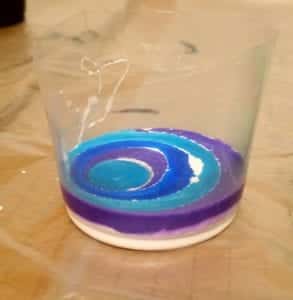
- Depending on the size of your surface, you can tackle the actual action of flipping the cup in a few ways:
- For small surfaces: Set your full paint cup right side up on your work table. If you’re using a surface that’s easy to manipulate with one hand, flip the surface over and place it over the top of the cup. Then, grasp the cup with one hand and the surface with the other, and simultaneously flip them over so that the cup is upside down on the top of your surface.
- For large surfaces: You can place a small piece of cardboard or plastic over the top of your pouring cup and then manipulate both the cup and the plastic the same as you would with a small surface; then, place the edge of the smaller surface onto the desired area of your larger surface, and slide the cup right off onto it!
- You can also do a very exciting flip cup pour and very quickly flip the cup over onto your surface; this is personally my favorite way to do a flip cup. The paint splatters can be very interesting!
- Now that you’ve got your cup on your surface, you can decide if you’d like to simply pull it off or poke a few holes in the cup to allow the paint to flow out on its own from the bottom once the pressure is relieved.
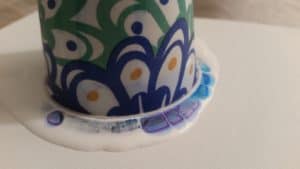
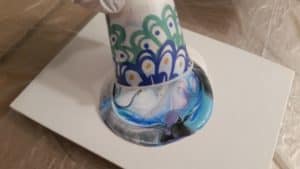
- Once your paint is on the canvas, you can manipulate it to get the desired effect and as always…make sure your paint isn’t too thick!
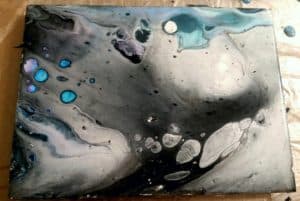
Flip cup painting is so much fun, because you never know what you’re going to get!
If you want more info on flip cups, check out our flip cup walkthrough for beginners.
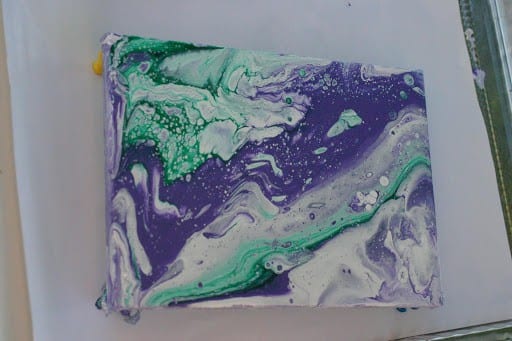
Flip Cup Pour Examples
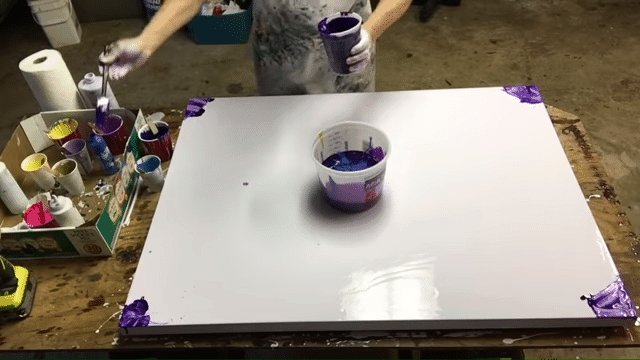
Puddle Pour Technique
A puddle pour uses a dirty cup to create a puddle of paint in the middle of a surface that can then be manipulated either by moving the canvas/surface or using air to manipulate it.
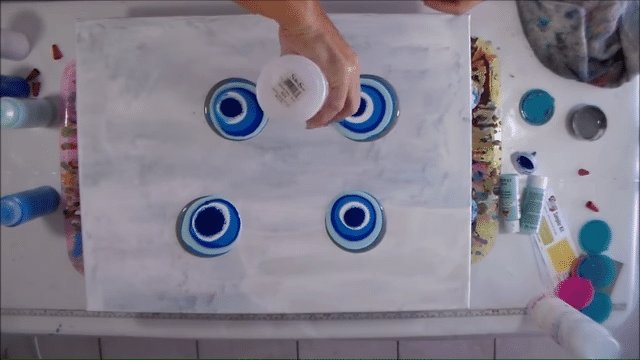
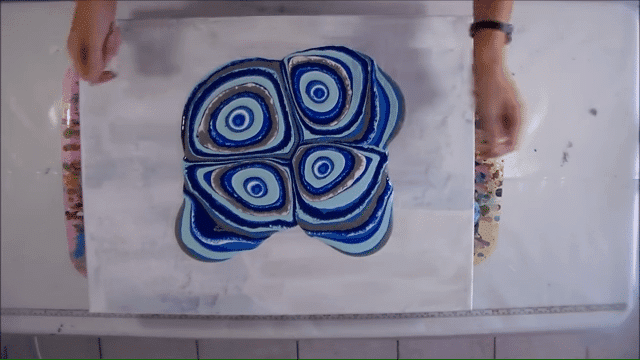
This technique naturally blends the colors, and works very well for tri-color rainbow pours (magenta, yellow, and cyan), since the blending can create new colors. Just be sure to familiarize yourself with the color wheel first so that you don’t end up with muddy colors.
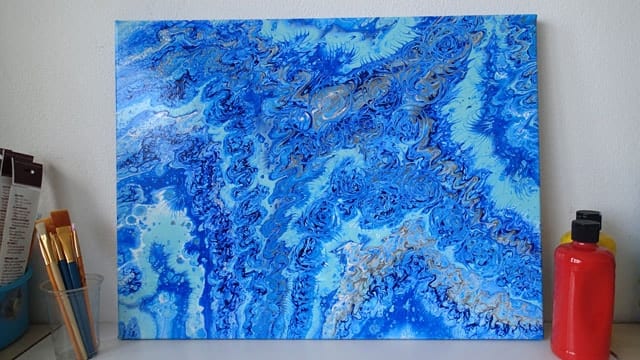
Creating With a Puddle Pour:
- Pour the paints on the canvas in a puddle.
- Layer the paints on canvas in a pre-determined order till satisfied with the amount of paint
- Use a skewer or popsicle sticks to swirl the paints. Else, simply move or tilt the canvas in specific directions. Control the flow by tilting in the opposite direction when required.
- Continue until you get the desired composition.
Intermediate Acrylic Pouring Techniques
Once you have the basics of paint mixing and poured paint behavior down, it’s time to move on to the next step of fluid acrylic pouring techniques. If you want some guidance for new techniques to try check out our acrylic pouring recipe book with 33 different recipes of all types of techniques including swipes, resin, marble, flip cups and many other pours.
Swipe Acrylic Pouring Technique
A swipe refers to the process of pouring individual colors and then using a tool like a slightly damp, flattened paper towel or a cake frosting spatula to swipe the paint. This is a great technique to achieve cells.
Creating Using a Swipe:
- Mix your paint and medium to the desired consistency.
- You can choose to keep your colors separate, or mix them together for a dirty pour; whichever you prefer.
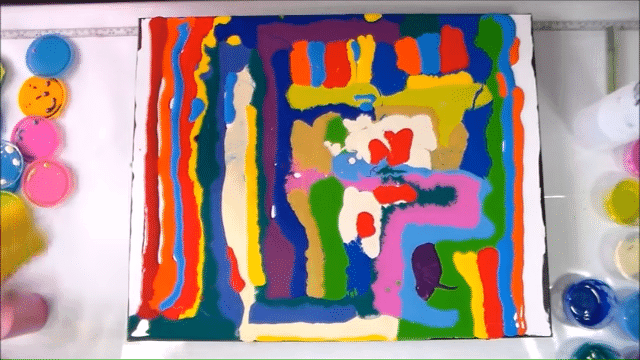
- Once your paint has been mixed and you’ve poured it on your canvas, take a flat, thin tool and gently swipe from one end of your canvas to the other. Don’t put too much pressure on the canvas, or you will scrape off the paint or mix the colors too much, which can produce mud.
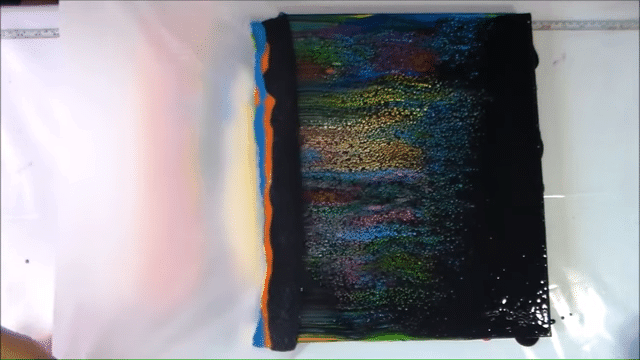

- Optional: If you have a torch, you can use it after a swipe to help cells pop out if you’ve added silicone or dimethicone.
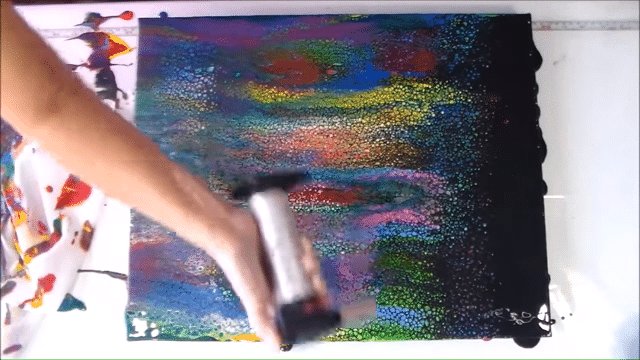
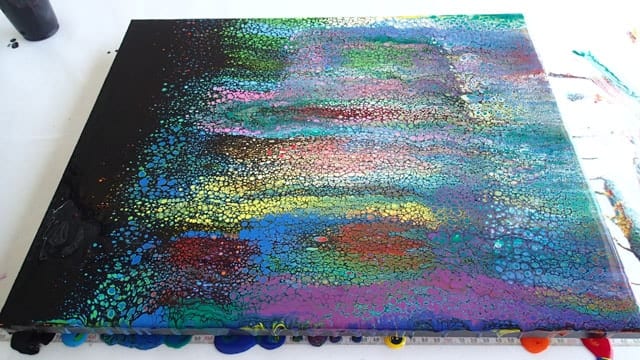
The swipe technique is one of my favorite acrylic pouring techniques, because it can be used to create more controlled designs; many artists use swipes to create the appearance of hair trailing behind the silhouette of a woman or even a horse.
Swipe Acrylic Pour Examples
Tree Ring Pouring Technique
A tree ring pour utilizes the dirty pour technique, but changes up the way you actually pour the paint onto the canvas to create a mesmerizing design.
Creating a Tree Ring Pour:
- Mix and layer your colors in a cup as you would with a dirty pour.
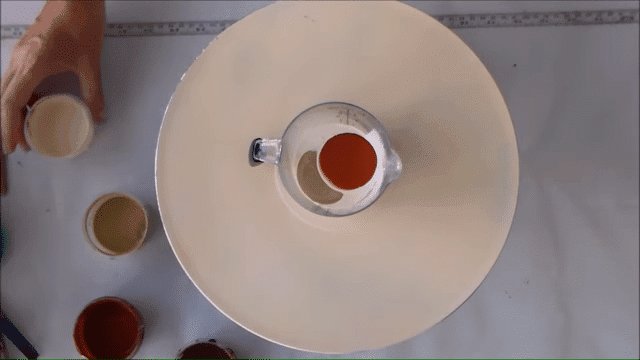
- Gently squeeze your dirty pour cup so that it creates a pointed “pour spout”. Then, begin pouring the paint on the canvas in a tight, circular motion until all of the paint is on the canvas.
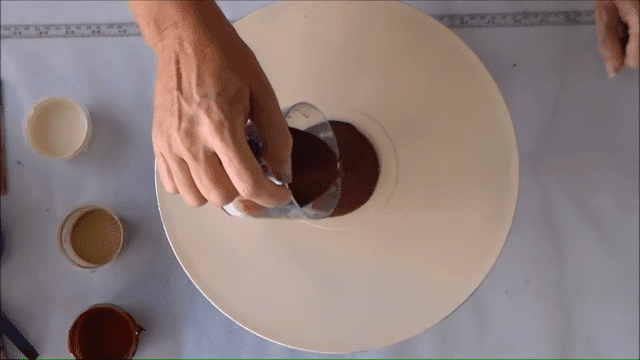
- Manipulate the canvas in a circular motion to retain the tree ring appearance of the pour.
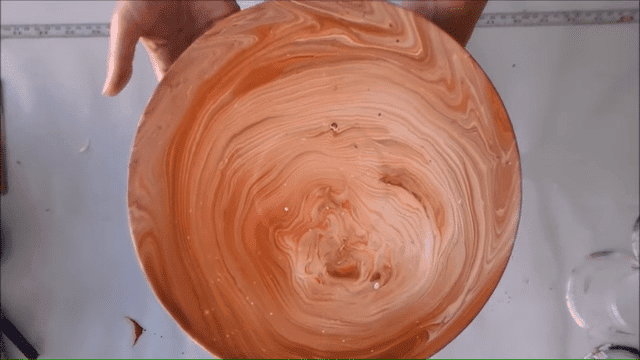
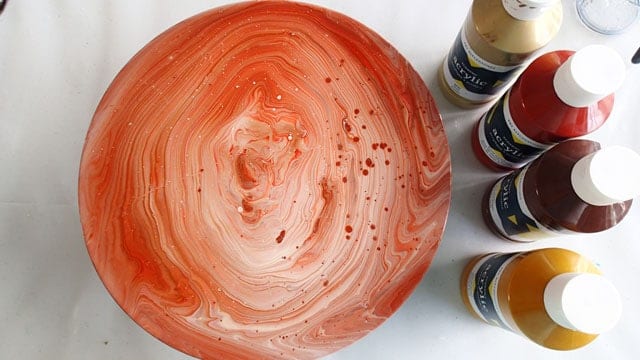
Tree ring pours can create a lot of depth! Be mindful of the colors you combine and how you combine them; play with light colors and dark colors layered on top of each other to create really stunning blends and lines!
Tree Ring Pour Examples
Swirl Tree Ring Aqua Colors
Travelling Tree Ring
Balloon Smash Acrylic Pouring Technique
This technique is every bit as fun as it sounds! A balloon smash is one of the acrylic pouring techniques that uses a bouncy, inflates surface to create unique shapes in mini puddle pours. A balloon smash can be done in conjunction with a clean or dirty pour, and creates flower-like designs.
Creating a Piece With the Balloon Smash Method:
- Mix a base color of your choice (white, black, etc) with the medium of your choosing and pour a thin layer over your canvas; spread it to all four corners (or all the edges, if you’re using a round canvas/surface).
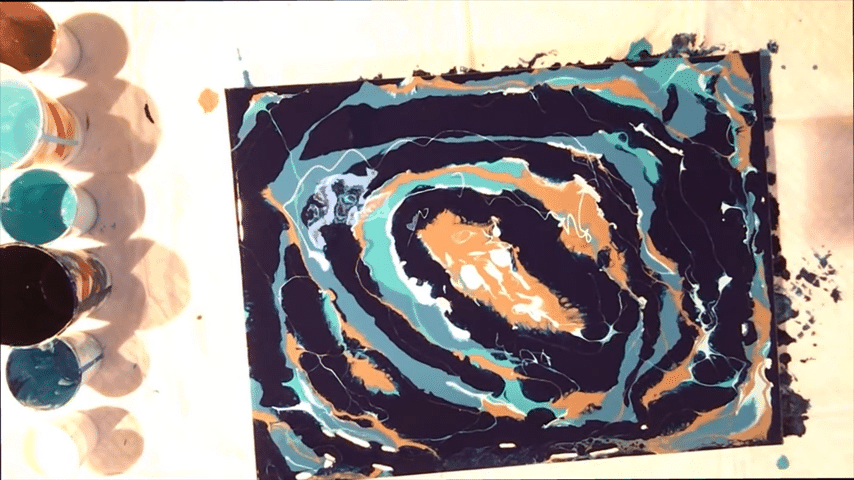
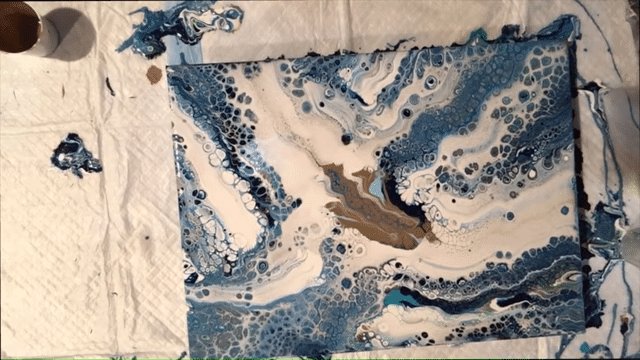
- Take your medium-mixed individual paint colors or your dirty cup and pour small puddles on the canvas. Start with one or two, just so you can see how the colors work together.
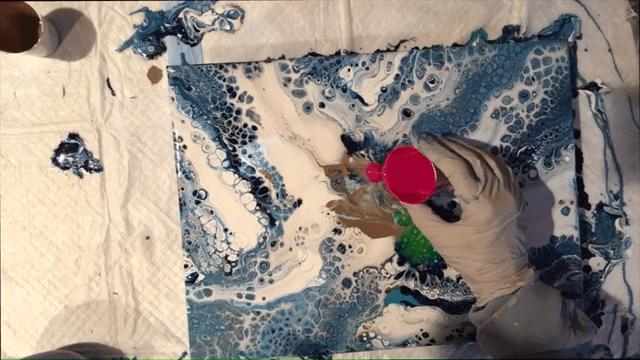
- Taking an inflated balloon, beach ball, or other blow up item that has a rounded side, and “smack” the middle of each poured puddle. You can do this hard, or use gentle pressure; try it a few different ways to see which method works best.
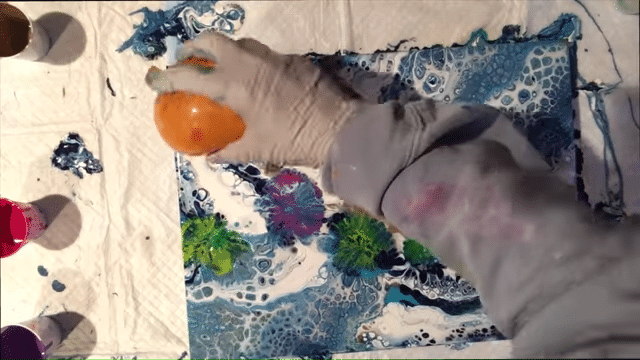
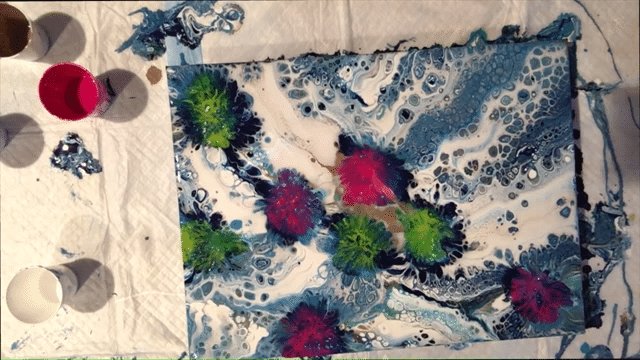
This technique creates beautiful abstract flowers and marine imagery, have fun with the unique shapes you can create with this method.
Tip: Try using a straw to blow out the edges of your smashed puddles for a silky, gauzy look.
Controlled Marble Pour Technique
A controlled marble pour is the technique of creating a faux marble finish with a carefully planned pour. In the Beginner section, we discussed that this is attainable with a flip cup pour, but you can also control the results with a more intricate method.
Creating a Faux Marble Finish With a Controlled Marble Pour:
- Choose your colors wisely. It’s recommended that you stay at three shades of the same color (for example, black, dark gray, and white). Keep in mind that marble has gradients, and these gradients are typically in the same color family.
- Choose a marble line color. In natural marble, you can see that there are either light or dark lines throughout the marble; you’ll need to choose which color will make up this line.
- Combine your desired colors and medium. Carefully layer your two main marble colors in a cup, retaining your third marble line color.
- Using the dirty pour method, pour your layered two marble colors onto your desired surface and gently manipulate to blend their edges.
- Gently squeezing your pour cup to make a pour spout, take your marble line color and drizzle it in lines across the surface. Keep in mind that marble lines often intersect because they run throughout a piece of marble, it’s a good idea to make lines that run off the side of your piece to give a 3D look.
- Once you’ve made your lines, manipulate your piece again so that the lines flow with the marbled background.
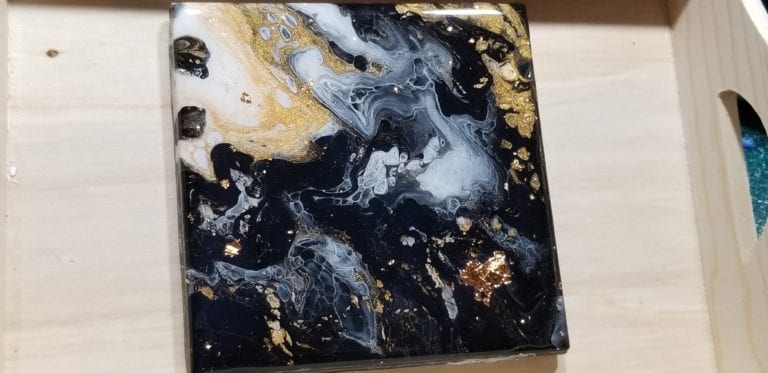
Marble lines in black, white or metallic colors are visually stunning—we recommend browsing through pictures of marble first so you can familiarize yourself with how marble lines work.
Advanced Acrylic Pouring Techniques
Once you’ve mastered the concepts and mechanics behind the beginner and intermediate pour techniques, it’s time to explore more advanced fluid art techniques!
String Pull Pouring Technique
A string pull uses a piece of string or a chain to create feather-like wisps of color on a poured background. These light and airy designs can then be outlined to create striking feathers, or left as-is for a natural look.
Creating a Piece Using the String Pull Method:
- Mix your colors with medium. You’ll want to mix your “background” color slightly thinner so that your string pull paint doesn’t get swallowed up by thick paint.
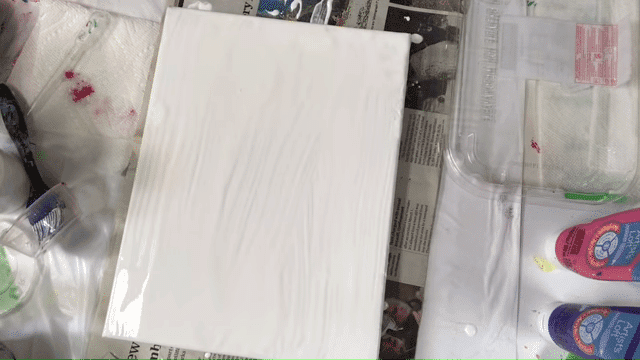
- Pour your background color over your canvas or surface. Spread it evenly.
- Loading your string:
If you want a random string pull (i.e, colors are not placed in any particular order), you can create a dirty cup and then pour a small amount on a piece of tin foil or other flat surface. Then, saturate your string in the paint.If you want specific color placement, keep your colors separate and create a line of paint on a flat surface like tin foil in alternating colors: for example, first you’d pour a line of blue, then pour the next segment of the line with red, then the next segment of the line in yellow. Stretch your string and lay it in the line of paint, turning it to coat it evenly.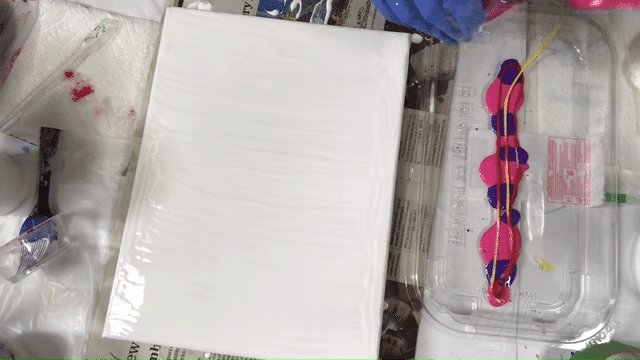
- Feather Pull:
- To create a feather, take your string and lay it stretched on your canvas. Then, take the top of your string and pull it towards you, dragging it flat against the canvas. Repeat, pulling in the opposite direction for the other side of the feather.
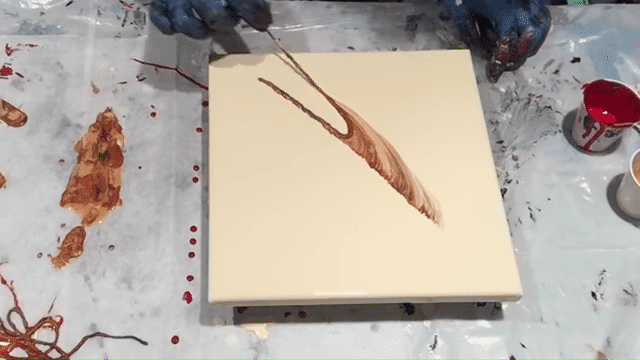
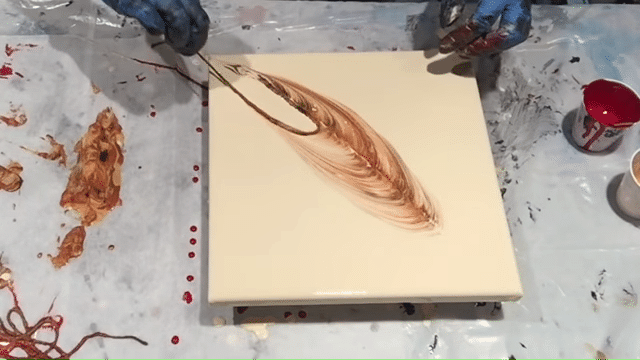
- Flower Pull:
To create a flower pull, take your string and coil it on the canvas, with the tail of one end pointed towards you. Gently pull the string or chain towards you without lifting it from the canvas, and allow it to uncoil itself as you pull.
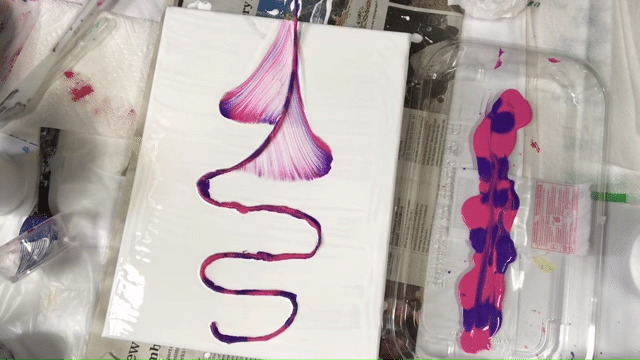
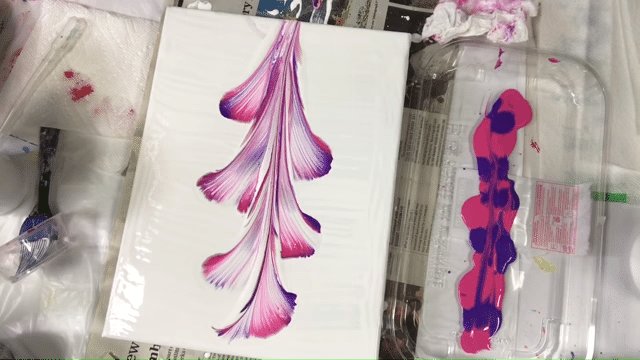
- Try not to over manipulate the design.
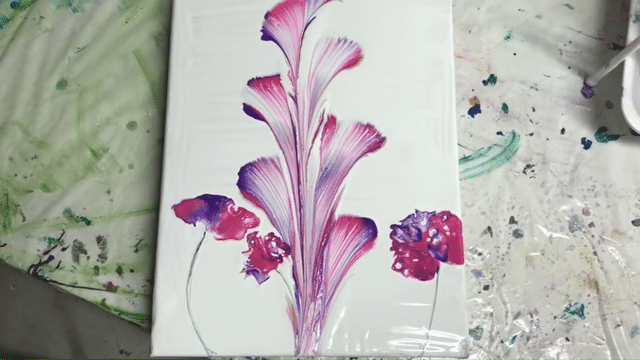
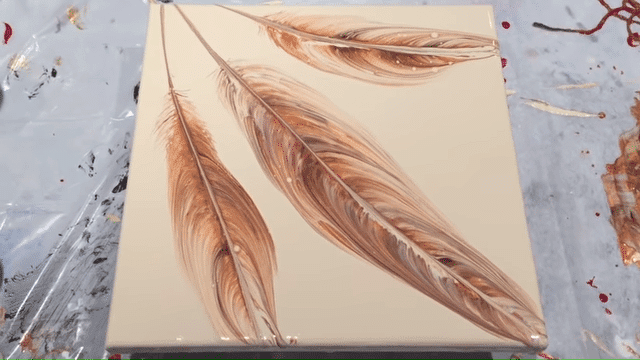
String or chain pulls can be difficult to master, and everyone has a preference for paint consistency. Experiment with background consistency and string paint consistency to get the effect you’re going for.
String Pull Acrylic Pour Examples
Flower String Pull
Feather String Pull
By Gina DeLuca
Resin Pouring Technique
A resin pour is created by mixing acrylic paint with typically a two-part resin to create depth and layers. Resin is transparent, and you can add just a touch of acrylic to simply tint it, or more if you want the color to be opaque. Resin pours work very well for creating ocean pours. In fact, the ocean pour used as an example below was created by Ann Upton, who offers a resin course that teaches how to make these types of paintings.
Creating a Resin Pour Piece:
- Follow the directions on your resin container for mixing and temperature.
- Once your resin is mixed and ready, add your paint. Do not add resin to your paint, add your paint to your resin. Mix the resin and acrylic paint thoroughly, making sure that it’s well incorporated. It’s important to check the working time for your resin so you can work quickly without sacrificing precious mixing time.
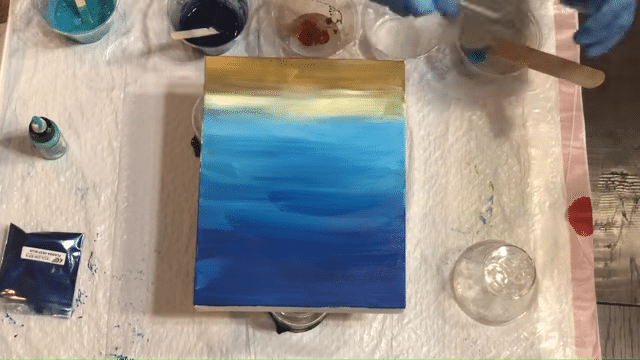
- Pour your resin onto your surface. You can use gloved hands to blend the colors, but be careful not to mix them or you may get mud.
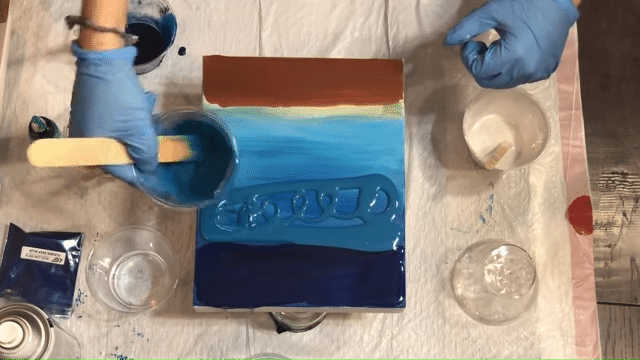
- Use a torch or your own breath and a straw to pop the surface bubbles. A torch works best, but make sure you hold the torch a few inches from the surface and pass over it quickly to avoid scorching the resin.
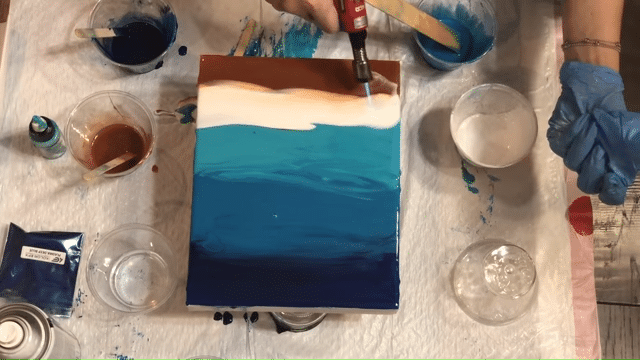
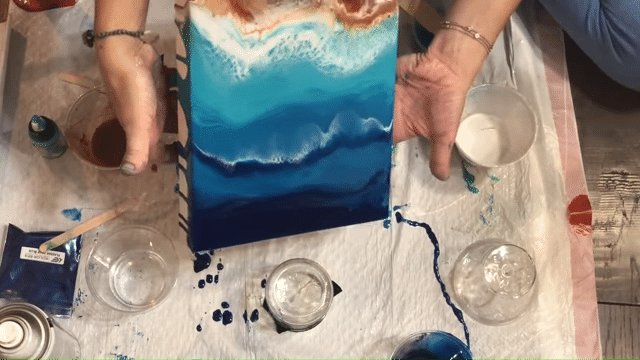
Typically, resin will cure in about 24 hours, and then you’ve got an amazing piece! Make sure that you protect your hands and your eyes when you’re working with resin; resin is difficult to remove from skin, and getting it in your eye is extremely painful, too!
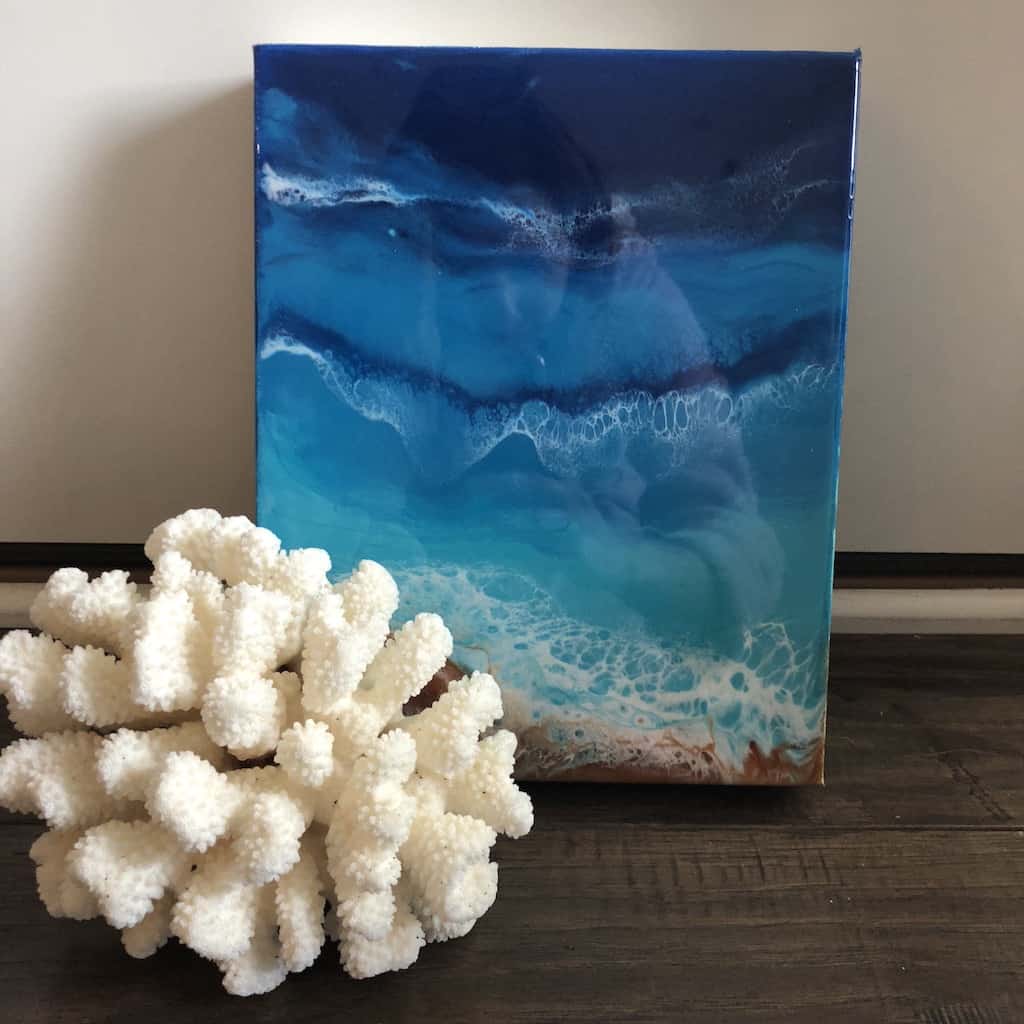
Resin Pour Examples
Dutch Pouring Technique
A Dutch Pour or Blow Pour is created by pouring paint (usually using the dirty cup technique) onto a canvas and using a blow dryer or other air manipulation to spread the color. This is a great technique if you’re looking to create abstract flowers or other unique and interesting shapes!
Creating a Piece Using a Dutch Pour:
- Mix your paints and medium, and choose a background color (mix that with medium, too).
- Pour your background color onto your canvas or surface and spread it around.
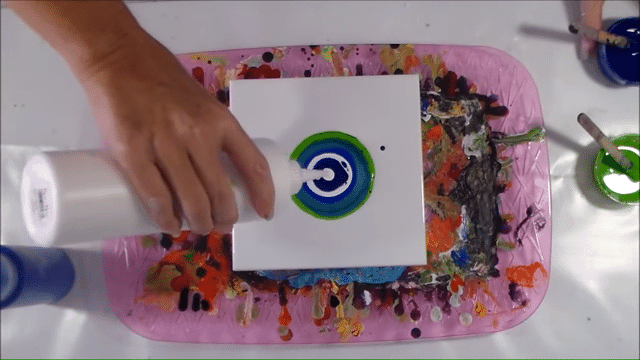
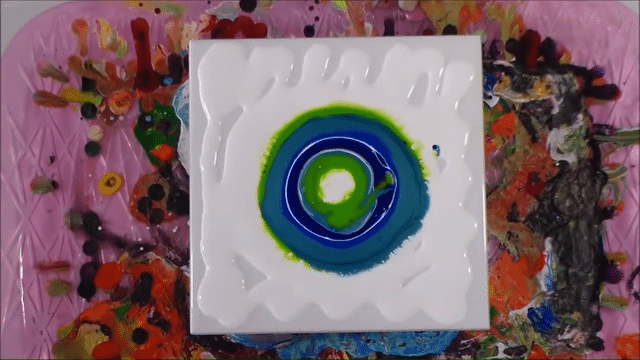
- Layer your colors, dirty cup-style, and then pour several puddles on the canvas.
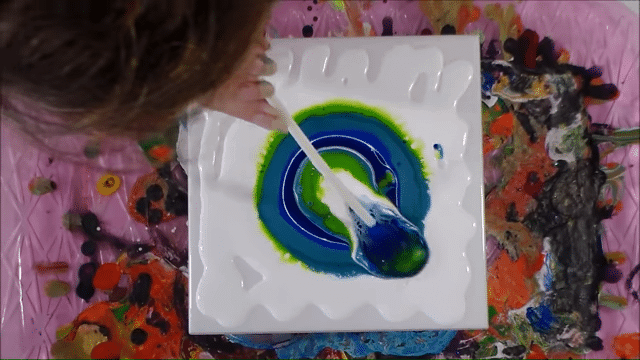
- Using a blowdryer (or a straw and your lungs) (start on low, high can be messy), blow the paint so that it spreads, connecting each puddle.
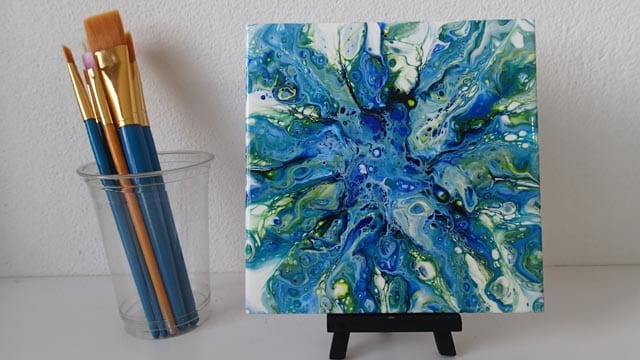
To add a bit more bling to the piece, you can also premix gold or another metallic and drizzle it on your Dutch pour after you’ve blown out the other colors. Then, use a straw or manual manipulation to gently blend the metallic so that it looks natural against the poured colors.
Dip Pouring Technique
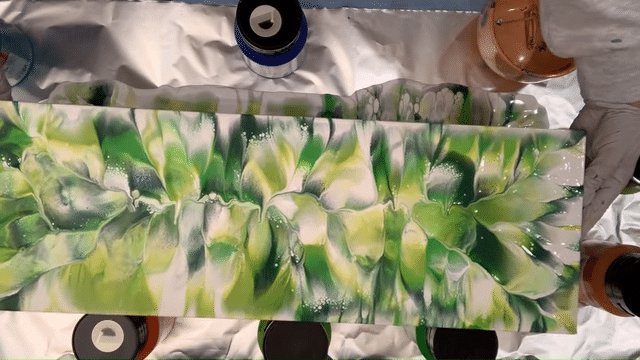
A dip is done by pouring on one canvas or surface, then taking another canvas/surface and pressing the two face to face, resulting in a unique paint mixture.
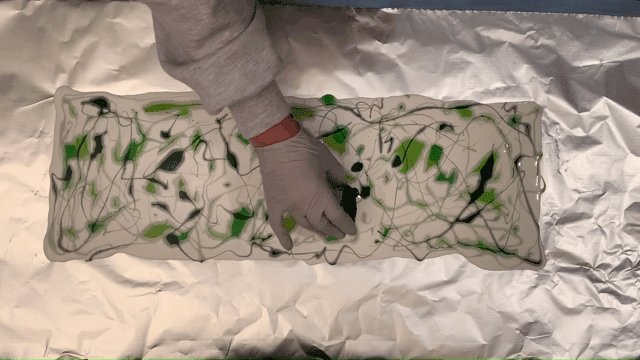
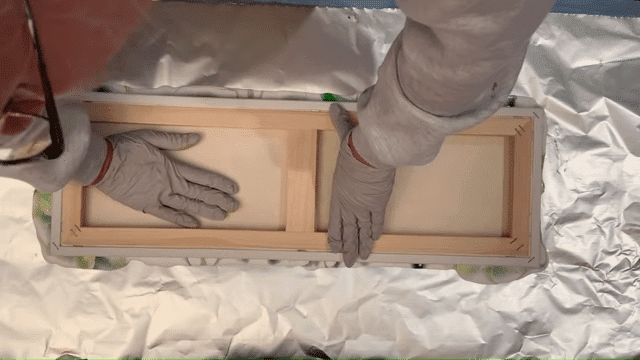
The dip technique is one of the trickiest acrylic pour techniques because it can produce rather muddy results if the artist isn’t familiar with color theory.
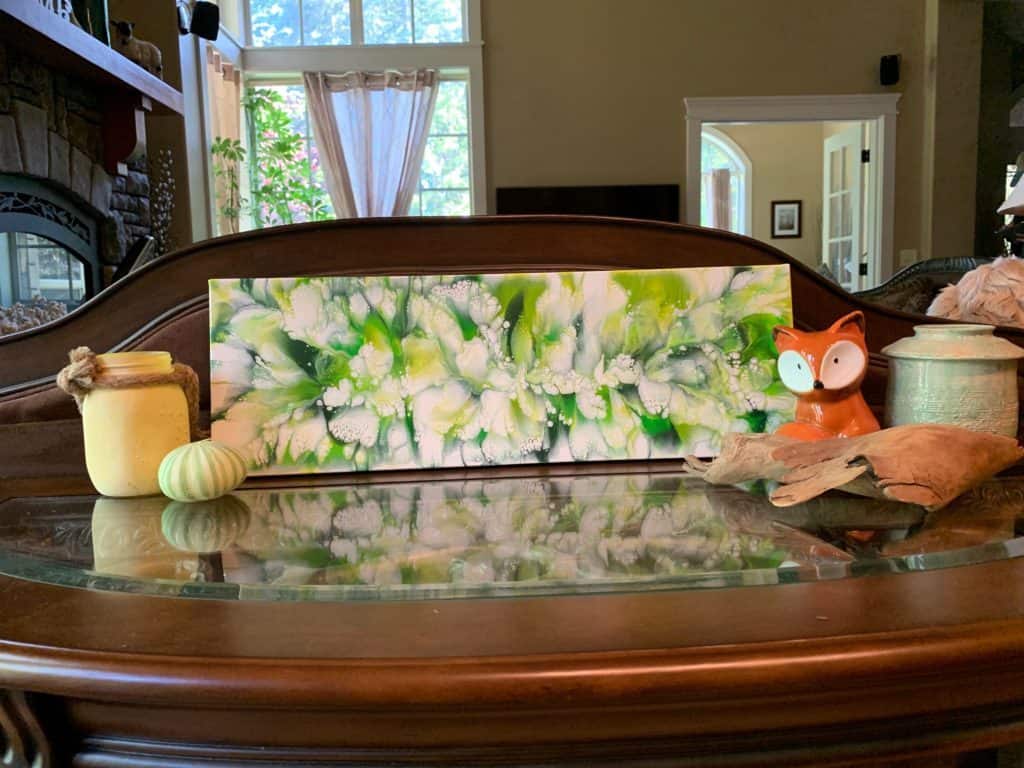
You can use either a clean pour or a dirty pour for this acrylic pouring technique. Once you’ve poured on one of the canvases, press the other firmly against it and then slowly pull them apart. You can then manipulate the pieces if you like, or leave them as-is if the paint isn’t too thick. This technique creates really amazing ripples and waves, as well as feathering and blending!
Final Thoughts
There are many ways to create a stunning piece of artwork using acrylic pouring paint. You don’t have to strictly stick to the directions of any one acrylic pouring technique either—mix and match and experiment! Moreover, you can feel free to choose the conventional stretched canvasses or the easier-to-use painting panels – if your technique is right, you will get the desired results either way!
FAQs
What is the best acrylic pour technique?
There are many different techniques for acrylic pouring, and the best technique will depend on your personal preference and the effect you want to achieve. Some popular techniques include the dirty pour, flip cup, and puddle pour. Experiment with different techniques to find the one that works best for you and the effect you want to create.
How to paint feathers in acrylic?
To paint feathers in acrylic, start by sketching the outline of the feather onto your canvas with a pencil. Then, mix your acrylic paint with a pouring medium to create a fluid consistency. Use a palette knife or other tool to apply the paint to the canvas, creating texture and dimension as you go. For added realism, use multiple shades of the same color to create a gradient effect, and add details like veins and shadows with a small brush.
More Acrylic Pouring Resources

Sara Wagner is an author and artist from Upstate New York. She is the owner of Studio Blackwater and can typically be found covered in paint, cats, or her two young daughters. You can find her on Facebook and Instagram as @studioblackwater.

What a fabulous guide! So many ideas in one place. I’ve been doing pour paintings for about a year and a half so not a beginner but not advanced. While I am familiar and have tried many of these techniques having them all in one place is a great help. Can’t thank you enough for creating this. It will be something that I refer to on an ongoing basis. Thanks again for sharing this!
Fantastic guide you have provided here!
Thank you ????
Sara…this is awesome!! You explained everything so well.. I learned some new things too!+
This is the best guide ever! Good job!!
AWESOME! Thank you so much! So helpful for me, as I’m a beginner (just started in March 2020). Having so much fun!
Thank you so much for providing this guide. The timing is perfect…I’ve been studying techniques and slowly stocking up on materials…now I’m ready to go.
Super thanks a ton
Oh wow! Mind totally blown! I’m presently researching the various techniques, equipment, etc., and I don’t know what to try first – there’s so much choice.
I have bookmarked this page as I will be returning again and again. Thank you so much for the inspiration and guide.
This is simply a fantastic guide all in one place. So helpful and informative . Thank you SO much for sharing this vital information . KSA
Of course, glad you enjoyed it!
Great article! Thank you for this and so many other helpful articles! I’m just wondering if you could add how to do a sandwich pour? I haven’t found any thorough instruction as of yet…you know, start to finish nor specific recipe related tips. The videos I’ve seen so far just say put white in first, then colors, then more white, then pour.
I’m curios if certain consistencies of the paints matter. Or, is it important to layer the colors? Some swipe and some do not, and I can’t tell what makes this technique different from those not sandwiched. So, if you can shine some light on this particular technique, I, and probably some others, would be greatly appreciated!
Sorry, I apparently cannot type today. Please pardon the typos in my comment. 🙂
A real help, enjoyed watching all techniques. Been pouring for 6 months & it is taking off in Australia, I live in Tasmania an island of the south east corner of Australia…
Great info! As a beginner I have watched SEVERAL tutorial videos…. hence my brain is on overload! I was influenced by a friend to use the Artist Loft Pre-mixed Pour Paints. A few colors that I purchased are rather “thick/dense” so they do not pour easy…. Is it okay to use Liquitex to thin them out?
Some artists use a regular white latex house paint to cover their canvas before pouring…. Do I need to add anything to the latex paint? Do I pour over it while it is still wet? Or do I let it dry? Do I still need to use White Pre-mixed Pour Paint over the Latex?
This is fabulous information! Thank you so much for putting this together…I certainly will expand my painting adventure with your guidance!
Can’t believe you gave us so much help and advice and show and tell for free. Since I’m under house arrest and have so much time on my hands, I’m going to try some of these. Thank you!
I am new to pour painting. Love it. I have been using pouring paint that is ready to pour. I don’t think I need to add anything to it.
I have tried mixing the small bottles of acrylic paint (1 pt) to floetral (2 pts) and a little distilled water. Not happy with that. I have not seen any comments about using the ready to use pour paint. This is so much fun to do. I have been using ceramic tiles also. I put Gesso on before painting them.
I do not know if it’s just me or if perhaps everyone else encountering problems with your website.
It appears as though some of the written text on your posts are running off the screen. Can someone else please
comment and let me know if this is happening to them too?
This may be a issue with my web browser because I’ve had this happen before.
Kudos
It sounds like this may be an issue with your browser, I’ve tested this on a few different browsers with no issues.
I want to do an acrylic pour over a tall glass cylinder candle holder. I have not been able to find whether or not if I thin out the paint, say with double the water, and do a dirty pour, will there be enough transparency to see the candlelight? Will the watered down paint have enough adhesion to not peel off the glass with normal decor use?
Thanks for your expert advise.
My paint was thick from not thinning it quite enough and now feels rubbery even after 6 weeks.
How important is drying and curing a paint pour before adding a varnish or resin?
How long should the paint cure?
Thanks for sharing this information.
I like your efforts.
Thanks for such an amazing post.
Thank you for such an amazing post
Great post thanks for the update.
A place where enjoyment permeates daily existence is Prestige Park Grove. Conveniently situated close to all of the city’s attractions is the huge apartment complex. One, two, and three-bedroom homes are offered.
I’ve ordered the E book (beginner guide) and have received NOTHING. I expected a link to download it but nothing came.
My order number is : 17116313
Please furnish a link so I can download it!
I’ve tried contacting through various email addresses and got NO reply.
Thank you for your valuable post it may helpful for all the visitors . For all kind of ragistration or login issues you can visit on my website by click here
The same source said the king wants his coronation to represent “the modern monarchy of the 21st century, so he won’t wear the old stockings and coats
Network marketing, also known as multi-level marketing (MLM), is a business model in which a company distributes products or services through a network of independent contractors, who are also referred to as distributors or members. These distributors earn money through the sales of products or services, as well as by recruiting and training other members to join the network.
Good
Good
Thank you so much for sharing. I have found it extremely helpful.
Hello,Aryan will discuss on this side. Any kind of money that exists
digitally or virtually and uses cryptography to safeguard transactions
is referred to as cryptocurrency, sometimes known as crypto-currency or
crypto. Without a central issuing or regulating body, cryptocurrencies
use a decentralised mechanism to track transactions and create new units.
From the Ministry of Education, the Disaster Risk Reduction Unit, created in 2017, has the task of advising, informing, coordinating and being CINAPRADE’s technical interlocutor, so that the education system can better deal with emergencies.
salivarius and uncommon probability to individual necessary proteins that have not been handled and deactivate the dangerous ingredients went ahead by rottenness are pushing track and keeps up revealed up for intestinal furthermost factor, gut and digestive tract.
Ready to experience the ultimate in luxury living? Explore the elegant and sophisticated properties at Prestige Park Grove. Our video takes you on a journey through this exclusive community, highlighting the stunning homes and top-notch facilities.
Google Bard AI explained … But, what is Bard? The new tool is a large language model built upon Google’s LaMDA (Language Model for Dialogue
Free Download Manager accelerates all types of downloads (files, video, torrents). It’s a smart and fast internet download manager for Windows and macOS
Best FRP byapss Apk Tools. Download FRP Bypass Android Free. FRP Bypass is an application to bypass the FRP protection of a mobile device.
nice post Thanks for Sha… Latest result for Shillong Teer Common Numbers
Buy Feliz Cumpleaños Mamá Spanish Happy Birthday Mother Card online on Etsy India. Shop for handmade, vintage and unique Greeting Cards items from
Uttar Pradesh is a state in northern India. With over 200 million inhabitants, it is the most populated state in India as well as the most populous country
Thanks this Post, is a free place where you can download thousands of MOD APK, MOD GAMES, and Premium APPS in 100% working condition.
Thank you so much for sharing, Its very helpful
Thanks for sharing this post it’s very helpful for me.
Prestige Park Ridge is an upcoming apartment complex developed by Prestige Group in Bannerghatta Road, Bangalore. The Project consists of 2 BHK, 3 BHK & 4 BHK apartments.Prestige Park Ridge is set to become one of the most prestigious addresses in Bangalore, providing its residents with luxury amenities and a great lifestyle. It’s built on acres and acres of land, with beautiful vegetation stretching as far as the eye can see.Located in the rapidly expanding neighborhood of Yadalam Nagar in Uttarahalli, Bengaluru.
Shriram Poem is the best residential project developed by Shriram Properties in Bangalore. This premium development is taking shape at the fastest-growing location Jalahalli Bengaluru. This project offers the best floor plan 2 BHK, and 3 BHK luxury residential accommodations. Reflecting the complete landmark and iconic structure in day-night time makes it a prime address to reside and believe that miracles do happen.
Provident Ecopoliten is an ideal project for those looking for a luxurious and comfortable living space in Bangalore. With its prime location, contemporary amenities, and excellent connectivity, Provident Ecopoliten is an excellent investment opportunity that is sure to provide a comfortable and modern lifestyle to its residents.
Purva Oakshire is a residential project located on Hennur Road in North Bangalore. It is a luxurious project developed by Puravankara Limited, one of the leading real estate developers in India.
Thanks for sharing this post it’s very helpful for me.
Really Thanks for sharing this post it’s very helpful for me.
Purva Oakshire is a residential project located on Hennur Road in North Bangalore. It is a luxurious project developed
“It really was a nightmare that we’re having tonight,” said Chris Rosman, acting deputy chief of the campus police department.
park grove is luxury residential project located at whitefield.
Sobha Neopolis launching soon at panathur road, bangalore.
Thanks for sharing this post. it’s very helpful for me.
This is one of the main upscale Land projects available to be purchased in North Bengaluru. Developed area of 3 room lofts are 1574 sq.ft and 1686 Sq.ft with cover region Sq.ft. The undertaking accompanies an appealing deal cost and adaptable development connected installment plan choice.
Prestige Park Ridge is an upcoming futuristic pre-launch apartment located in the good locations of Bannerghatta Road, South Bangalore.
Prestige Sunset Park is an upcoming residential project by Prestige Group, one of India’s leading real estate developers.
Education is a fundamental pillar of personal and societal development. It equips individuals with the tools they need to succeed academically and thrive in life. From early childhood education to higher education, the learning process helps individuals grow intellectually, emotionally, and socially.
I appreciate you sharing this content. It is quite beneficial to me.
Thanks for sharing, great article.
Este artículo es asombroso. Explica maravillosamente cómo todos deben escribir un artículo. Las ideas del autor son realmente geniales, y la forma en que explica es fácil de entender. Es una lectura obligada para cualquiera que esté interesado en este tema.
Thank you for consistently delivering high-quality content that not only meets our requirements but also exceeds our expectations. Your expertise as a writer shines through in every piece you create.
Thanks for sharing, great article. I have subscribed your news letter.
Nice article, thanks for sharing this.
Informative thank you for sharing.
informative blog article thank you for share.
At Mariano Latorre School, in the municipality of La Pintana, the Learn + platform was launched, a 100% free online tool that will be available to third and fourth year students to increase their level of knowledge.
A few days ago, in the digital medium El Libero, historian Alejandro San Francisco published an article entitled “The Destruction of Chilean Education”, in which he considered, based on the recent findings of Simce, the state of education in the country.
informative blog article with us.
Whisky prices vary widely depending on factors such as brand, age, rarity, and production techniques. Entry-level bottles can range from $20 to $50, while premium and limited-edition releases can command prices in the hundreds or even thousands of dollars. Collectible and aged whiskies often carry higher price tags due to their scarcity and desirability.
Godrej Ananda is an exceptional residential development created by the renowned builder Godrej. It is situated in a prestigious neighborhood in Bangalore, the capital city of Karnataka, India
thank you for share an article with us.
Krisumi Waterfall Residences is exclusive residential project in prime location of Gurgaon – Sector 36 A which is well connected with other areas of city & offers easy access to schools, hospitals, shopping centers, and entertainment hubs. The project offering uniquely designed spacious apartments with open spaces and premium social amenities that go beyond expectations, providing residents with a truly exceptional living experience. Developer prioritizes the safety and security of its residents. The project incorporates advanced security systems and 24/7 surveillance to ensure a safe living environment.
informative blog article thank you for share.
The 25-year-old, who vanished on July 13 soon after calling 911 and a family member to report seeing an unaccompanied toddler on an Alabama highway, returned home on July 15 where she was subsequently treated at a local hospital.
“However, she never saw the female, only hearing her voice,” he said. “She also told detectives she could hear a baby crying. She told detectives the male had orange hair with a big bald spot on the back. She said she was able to escape the 18-wheeler and fled on foot, only to be captured again and then was put in a car. She claimed she was then blindfolded but was not tied up because the captor said he did not want to leave impressions on her wrists.”
informative blog article thank you for share an best article with us.
Godrej Park Retreat is strategically designed by renowned builder Godrej Splendor. It consists of modern villas with all high end modern furniture accessories. Set in a beautiful and pleasant countryside setting is this lavish property in Bangalore, Karnataka, INDIA. have comfortable and spacious rooms.
informative blog article
Thanks for sharing such informative blogs
nice blog post, you can visit my website too…
Amazing post for regular follow up!
Thank you so much for sharing, Its very helpful
Thank you so much for sharing, Its very helpful
You shared good thing if any one find property for sale in Dubai so i will assists you in professionally
I just wanted to say thank you for such a comprehensive guide to acrylic pouring techniques. I’m a beginner and I’ve been really struggling to get started, but this guide has been really helpful. I especially like the way you explain the different techniques in detail and provide step-by-step instructions. I’m definitely going to try out the dirty pour technique next.
I also appreciate the tips you provide on choosing the right materials and preparing your workspace. I know that these things are important, but it’s easy to overlook them when you’re just starting out.
Overall, I think this is a great resource for anyone who wants to learn how to do acrylic pouring. I highly recommend it!
I eagerly look forward to each new post.
Olivia Rodrigo will drop her highly anticipated sophomore album. Kylie Minogue’s more than “Padam Padam,” with her new athletic-pop album “Tension.” Doja Cat’s “Scarlet” arrives
Thanks for the amazing content, post and information that you have shared here keep it up!
Thanks for the amazing content, post and information that you have shared here keep it up!
Apartments for sale in Calicut
Applause! what a blog here
The “Canon Printer Offline” error is a common issue faced by Canon printer users. This error occurs when the printer is unable to communicate with the device. It can be caused by connection problems, outdated drivers, or configuration errors. There are troubleshooting steps available to resolve this issue. If the problem persists, don’t hesitate to reach out to Canon’s customer support for further assistance.
Thanks for sharing tis amazing blog post
FDT stands as your guardian in this journey. Our IAM solutions act as personalized sentinels, permitting only trusted voices into your domain. With IAM cyber security services in Saudi Arabia, your sensitive data finds refuge, far from the reach of intruders. Let’s venture into a life where security isn’t just a notion – it’s a reality. Count on FDT to be your digital protector. Your tranquility starts here, where safeguarding meets possibility.
The Low-Code Platform empowers a wider audience, including professionals with diverse backgrounds, to actively participate in application development. With intuitive interfaces, pre-built modules, and drag-and-drop functionalities, Low-Code platforms have democratized the development landscape.
I found the post to be highly good. The shared information are greatly appreciated
. The shared information are greatly appreciated
Thanks for the amazing information shared!
i like your blog can you share more information about the topics!
Great Artcile
Good content thankyou for sharing.
Thanks for the amazing information shared!
thank you for share an informative blog for us.
Auf der Webseite der Airport Parking Community finden Sie ganz einfach alle Parkplatzbeschreibungen für Ihren Aufenthalt am Flughafen Kassel Calden (KSF) in Nordhessen. Wir möchten mit unserem Reiseblog Ihnen die Suche nach dem Idealen Parkplatz für Ihr Auto am Kasseler Airport vereinfachen, indem verschiedene Bereiche verglichen werden und Ihnen kostenfreie Außenparkplätze in der Nähe der Abflughalle gezeigt werden.
Gruß,
Mitglieder der Airport Parking Community
Für das Parken am nordhessischen Flughafen in Erfurt (ERF) stehen Ihnen offizielle Außenparkplätze und Parkhäuser, sowie private Parkplatzbetreiber zur Verfügung. Egal für welchen Parkplatz Sie sich entscheiden, die Suche nach einem günstigen Parkplatz wird Ihnen mit Hilfe der Airport Parking Community erleichtert. Wir, Mitglieder, wünschen Ihnen eine gute Reise und bequemes Parken am Flughafen Erfurt Weimar.
Neben der Übersicht aller Parkplätzer und Parkhäuser am Flughafen in Dortmund Wickede (DTM) haben wir auch Informationen über die verschiedenen privaten Parkplatzbetreiber, wie beispielsweise Airparks, Drive & Park, Easy Airport Parking u.a. Eine genaue Ortsangabe, Anfahrtsbeschreibungen, Gewerbliche Kontaktdate und Wegbeschreibungen haben wir gerne für Sie zusammengestellt. Wir wünschen Ihnen bequemes Parken am Dortmunder Flughafen. Gute Reise!
Als eines der führenden Vergleichsportal für Parkplätze und Parkhäuser in Deutschland, helfen wir Ihnen gerne schnell, bequem und kostengünstig von jedem Flughafen aus, auf einem im Voraus von Ihnen gewählten Parkplatz zu parken und somit entspannt Ihren verdienten Urlaub zu beginnen. Wenn Sie ab dem Flughafen in Memmingen verreisen und dort Ihr Fahrzeug abstellen möchten, besuchen Sie zuerst den Airport Parking Guide. Dort finden Sie Parkplatzbeschreibungen von allen Parkplätzen am Allgäu Airport.
Excellent work. A lot of appreciation.
Thanks for sharing such valuable info.
Fantastic blog! What advice would you give aspiring authors? I want to launch my own website soon, but I’m not sure where to begin. Would you advise using a paid alternative initially or start with a free platform like WordPress? I’m at a loss for options because there are so many available. Any advice? Bravo!
excellent result for the information contained here
Thats a very great article and helpful as always
Albawani Apk aims to simplify the daily routines of Muslims, allowing them to focus more on their spiritual journey.
Dr. Tony Fernadez Eye Hospital in Kochi is popular for the service of senior doctors with vast experience. Their popularity is deeply rooted in various aspects like compassionate care and affordable excellence. Visit us and experience exceptional eye care.
Elevate your brand with a premier social media agency in Dubai. Expert strategies for digital success. Contact us today
TikTok 18 Plus App is becoming very popular in Brazil, Turkey, Indonesia, and Mexico. If you are also looking for this app then congratulations you are in the right place because here we have shared all the information about the Tiktok 18 Plus app which can be downloaded for free from the official page.
CapCut Mod APK v11.2.0 Premium Unlocked for Android [March 2024]. No Ads, No Watermark. Fast Download available.
CapCut Mod APK v11.2.0 Premium Unlocked for Android [March 2024]. No Ads, No Watermark. Fast Download available.
CapCut Mod APK v11.2.0 Premium Unlocked for Android [March 2024]. No Ads, No Watermark. Fast Download available.
great blog. book marked this website.
nice post.
keep sharing it.
keep sharing. i liked it
Unlock the potential of your invention with a Patentability Search. Uncover prior art and assess the uniqueness of your idea before filing a patent. Expert searches provide a comprehensive analysis, guiding you to make informed decisions about patentability. Ensure your innovation stands out in the competitive landscape with this crucial step.
Embark on a journey into the exhilarating realm of where entertainment meets opportunity. Discover the top platforms, exclusive bonuses, and winning strategies that redefine the gaming experience.
Empowering Minds: At its core, education empowers individuals with knowledge, skills, and perspectives essential for navigating life’s complexities.
thanks for information
visit here
thanks a lot
Explore our meticulously designed 2 and 3-BHK residences at Godrej Woodscapes conveniently located near ITPL and Bearys Global Research Triangle at Budigere-Whitefield, for those who appreciate contemporary luxury infused with historical charm. Situated at the prestigious Bengal Lamps Factory site, our enclave offers seamless connectivity to Old Madras Road and Whitefield Hoskote Road, ensuring unmatched convenience for residents
Explore our meticulously designed 2 and 3-BHK residences at Godrej Woodscapes conveniently located near ITPL and Bearys Global Research Triangle at Budigere-Whitefield, for those who appreciate contemporary luxury infused with historical charm. Situated at the prestigious Bengal Lamps Factory site, our enclave offers seamless connectivity to Old Madras Road and Whitefield Hoskote Road, ensuring unmatched convenience for residents
Nice article its too helpful.
This comprehensive guide to acrylic pouring techniques offers valuable insights for artists of all levels. From basic methods to advanced approaches, it provides clear instructions and encourages creativity. The inclusion of a table of contents facilitates easy navigation, while the invitation for feedback ensures ongoing improvement. A must-read for anyone interested in exploring the art of paint pouring.
Eon Sector 105 Noida offers a prime location for retail shops and offices. With a strategic position in one of Noida bustling sectors, Eon provides a lucrative opportunity for businesses to thrive. Whether you’re looking for retail space to showcase your products or office space to establish your business, Eon offers modern and versatile options to meet your needs.