Creating art doesn’t have to be expensive. I receive dozens of messages each month from people who really want to start pouring, but they can’t afford the cost of Liquitex, Golden, or other professional quality paints. My answer to each beginner is the same. Pouring doesn’t have to be expensive!
My First pour
My first pour wasn’t glamourous or even that great. I couldn’t really afford to spend more than about five dollars in that very lean time, but I was sick of watching from the sidelines. I wanted to pour!
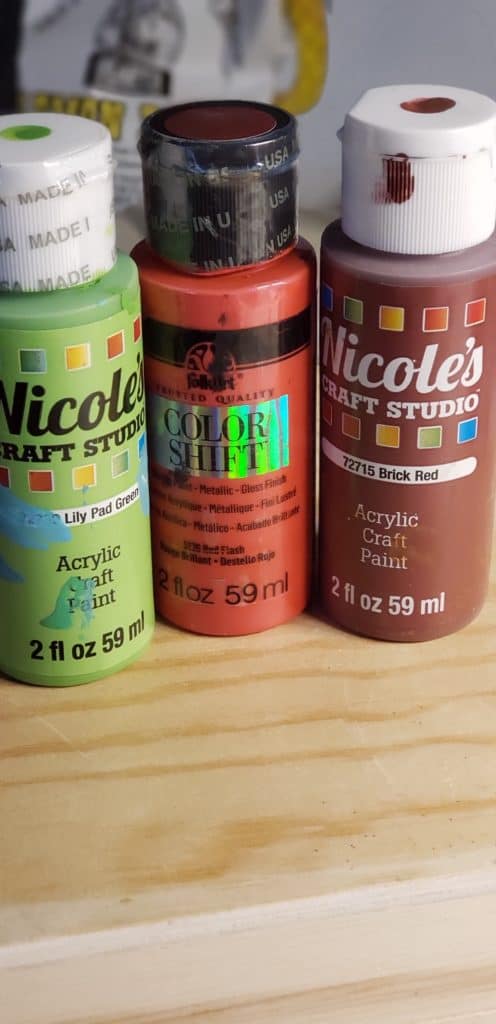
I went to my local AC Moore and bought four store brand craft acrylics; they were 59 cents apiece, and on sale buy one get one free. Then I went to Home Depot and bought four ceramic tiles at 16 cents apiece. I couldn’t afford Floetrol at that point, so I decided to create my first pour with water as the medium. The rest is history.
The Benefit of Cheap Experimentation
There are benefits to using expensive/professional grade products: the staying power, vibrance, and overall quality to name a few. But, there is one major drawback to using more expensive supplies, and that is that if you spend a lot of money on supplies, you will likely be more afraid to waste the product in the name of experimentation.
This was a major hurdle for me when I first considered pouring. I had seen so many posts on Facebook discouraging the use of craft acrylics and water, that I almost gave up on the idea of ever pouring for good.
Almost.
Then I realized that while there were some valid points, it wasn’t up to another artist to tell me that I had to jump right into expensive paints and mediums. This was an experiment. No one would see the pieces, and I wouldn’t be selling them. These were just for me, for my creative purposes.
So, if you’re feeling perplexed because professional-grade paints are expensive, please know that you can start with craft paint and water; don’t let the cost hold you back.
Affordable Pour Recipe
- 3 small bottles of acrylic paint
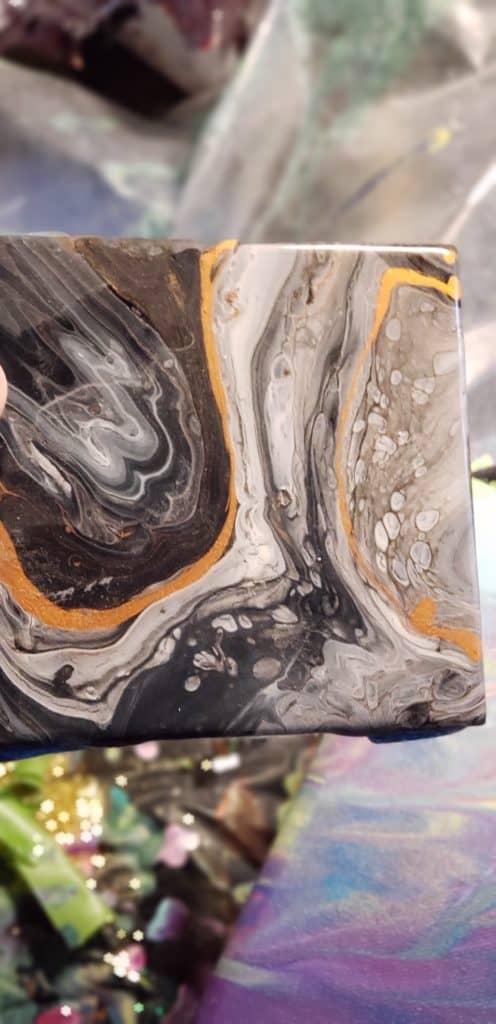
- Try to grab a simple color scheme to start, like black, white, and gold or white, dark blue, and teal.
- (4) 4×4” ceramic tiles
- Water
- (1) small plastic cup for each color you’re using, plus one for layering your paint
- Something to stir your paint with (popsicle sticks work best)
- Aluminum foil, and old pan, or plastic wrap
- (4) larger cups to elevate your tiles

Step 1: Set Up
Before you begin pouring, you’ll want to protect your work surface. Using aluminum foil, an old pan or some plastic wrap, cover your surface completely. If you’re using aluminum foil, I suggest curling up the edges a bit so that you have a lip to catch excess paint.
I do not recommend using paper products to protect your surface, because the paint will soak through and you’ll have a pretty big mess on your hands!
After covering your surface, overturn four cups (they can be solo cup sized or a little smaller if you like) and place one tile on each cup so that its elevated over your protected work surface.
Step 2: Mixing Your Paint
Pour about one ounce of craft acrylic into a cup, one color per cup. You will want (3) three ounces of paint and water total per tile.
Add water very slowly to each color. Start with a few drops and stir your paint. The key is to add water until your paint is the consistency of smooth, melted ice cream.
To test the consistency of your paint mixture, stir your paint well. Pull your stirring utensil out of the paint at an angle and watch the paint run off.
- If the paint “glops” or “plops”, your mixture is too thick and needs more water.
- If your paint runs quickly off the stirring utensil and rips, your mixture is too thin and needs more paint.
- If your mixture is clumpy, you have not stirred your paint enough and will need to continue slowly and steadily stirring until the clumps have broken up.
Step 3: Layering Your Paint
Once you’re comfortable with the consistency, take an empty cup and begin layering your colors.
For more definition between colors: Tilt your empty cup slightly and gently pour each color down the inner side of the cup. This keeps colors mostly in the order in which you’ve poured them, and stops excessive mixing.
For more blending of colors: Layer in a color or two by tilting your pouring cup, but alternate gentle layering with “plops” of color in the middle of the cup. This will help your colors incorporate and create a broader range of colors. If you are going to use this method, make sure you have the basics of color theory down so you don’t end up with a muddy pour.
Step 4: The Pour
Your paint is layered, now it’s time to pour! I’d recommend one of two beginner-friendly techniques.
Flip Cup: Take your ceramic tile and flip it shiny side down onto the top of your pour cup. Holding the cup and tile, flip both over so that the cup is resting upside down on the tile. Wait a moment, then remove the cup and tilt the tile to spread the paint.
Dirty Pour: Simply pour your paint onto the tile, and then tilt and turn the tile to manipulate the paint.
No matter which technique you decide to use, it is imperative that you do not allow too much paint to stay on the tile! A thin coating of paint, just enough to cover the tile, is ideal. This way, when your paint is drying, it can dry evenly without cracks.
Step 5: The Waiting Game
Now it’s time to let your paint dry! Paint does dry quicker on tiles, and your tiles will be safe to move within about 48 hours assuming that you haven’t used too much paint. Dry does not mean cured. Wait at least 1-2 weeks before displaying, and remember that if you want to use the tiles as coasters, you’ll want to seal them with a coat of
resin (Pro Marine Supplies makes a great resin for coasters. I recommend at least sealing with a spray sealant like Rustoleum Clear to ensure your paint doesn’t peel off; a can of this usually costs about $8.00 and can do an abundance of tiles.
Final Thoughts

There’s simply no sense in investing in expensive products when you’re not sure you’ll even like the process… Although, trust me. You will.
Save your money and experiment with lower cost products before you take the giant leap into professional grade paints and mediums; and make sure to join our Facebook group, where you can find thousands of amazing artists that generously share their tips and tricks!
When you feel ready to take your pouring to the next level, then check out the acrylic pouring ebook and video course to learn more of the basic techniques!

Sara Wagner is an author and artist from Upstate New York. She is the owner of Studio Blackwater and can typically be found covered in paint, cats, or her two young daughters. You can find her on Facebook and Instagram as @studioblackwater.

Hi There, Just read your article and found it very interesting and really helpful. Just wondering…. In step 2 – Mixing your Paint – the second dot about paint viscosity, should it not perhaps read – if your mixture is to THIN, add more paint? Sorry not meant as criticizing, just wondering. A newbie, so analysing everything I about pouring and am a bit confused. Thanks so much for all the information and this great article for us who are just starting out, really appreciate it.
You’re right, we just edited it. Thank you!
I can’t tell you how much I appreciate every instruction recieved.
Many Thanks.
That is such a good “share” for beginners, thx.
Great article for all of us. It really does not have to cost a lot to create beautiful art from the get go. So stop procrastinating and start pouring! I could not afford canvas when I started almost 2 years ago and used tiles and freezer paper with non stick cookie sheets for tilting. Now I make and sell jewelry from my art. If this soon to be 74 yr old non-artsy guy can do this, so can you!
Hi Ms Wagner, thank you very much for a very instructive article. But I have few questions……
You have used only water as the pouring medium and also not added any additives for creating cells ?
Could you please clarify.
Thank you
I would also like an answer to the above question please
The article was written for beginners and therefore only paint and water was used to keep things simple.
Water is not a medium but used to thin paints. A medium is used to condition paints. There are lots of articles discussing the different mediums that can be used and the reasons why.
Google “mediums used in acrylic pouring” and things will become clearer.
Hi loved the article – made me consider trying again. Have had some success but also more failures i would like. So having spent on expensive products found your article encouraging, since I have already experimented with water and glue. However even with the more expensive products and the addition of silicon I do not get the cells I imagined I would, in fact in truth I seldom get cells at all.
I can honestly say I have had a hard time with the cells and will be g;ad when i get there But have had two strokes and so my mind doesn’t always work like it use too but I want to thank every one for all the advice you give and some day I will be able to do it just like you all have.
Hi everyone. I have not had luck in getting cells and it’s refreshing to know that others have problems where they have to do the cheaper thing like I need to as well. I have a question: Can acrylic paint in tubes be used as well? I have tubes of paint but if they can be used…how do I dilute them, and the quantity of water – or – medium to use? My husband is a nice guy but he’s losing patience with my waste of paint ($). Thanks