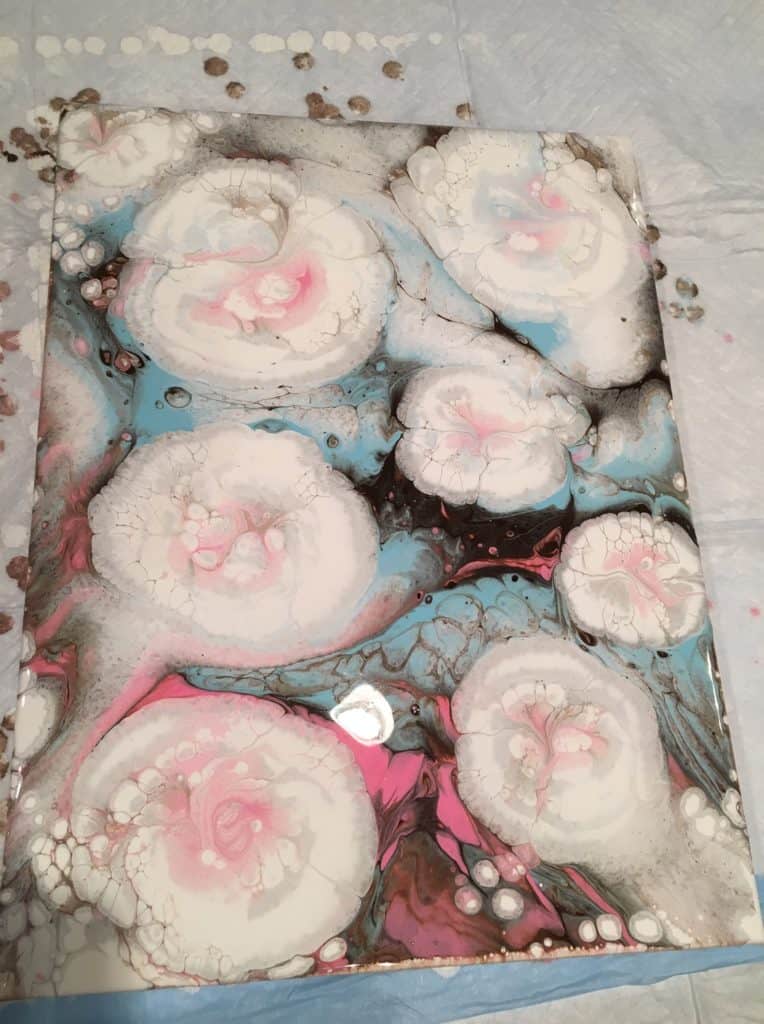
It was really by accident that I created my first vintage looking peony painting. Most of you know what I’m talking about when I say it started out as a less than stellar pour, pretty boring actually, so I started playing around with it hoping to give it some flare. A couple random swipes through it didn’t excite me so after looking at it for awhile I decided to do something I’d been wanting to try for a while – using plastic for a flower dip. I figured a painting I was pretty much convinced to scrap would be a good place to practice.Instead of scrapping it, I was rewarded with a very happy surprise! So I’ve made another painting to share with you how I did it.
I’m always so grateful to the amazing fluid artists whose willingness to share their discoveries and new techniques keep inspiring me to try new things myself. I want to credit Fiona Art and her gorgeous flower dips for inspiring this peony design.
My video will cover everything I did to create this pretty painting.
Supplies I Used:
- Basics Titanium White
- Amsterdam brand Quinacridone Rose, Sky Blue Lt, Van Dyke Brown
- Plastic Sheets
- Canvas
Basic instructions
- Pour the background.
- To make the flowers, make a spiral with your white the size you want your flower then spiral some extra pink right in the center.
- Lay your plastic on the spiral, making sure all the paint for the flower has contact with the plastic but don’t squish it down too hard. (I like to make sure my plastic square is wide enough so I can hold two sides, which makes it easier to lift when I’m ready rather than dropping the whole square into the paint and trying to fish it out.)
- Pull two sides together then (tricky!) lift and pull the other two sides together and quickly pull the plastic straight up and off the canvas.
 Tips
Tips
I keep the base white very thin just to help the background colors move on the canvas, but I mix the background colors and the white and pink for the flowers slightly thicker than my normal pours. Hint: When you lift the popsicle stick and let paint run back off into the rest of the paint in the cup, it should form a slight mound as it drops back into the rest of the paint but disappears almost immediately.
Make sure you clean the paint off your gloves between doing each dip because slippery gloves make it hard to pick up the plastic!
Make your plastic squares large enough to completely cover your flower spirals and not too large for smaller ones.
The key to the flower shape is how successfully you can evenly pull all sides of the plastic together and then straight up from the canvas.
Have fun!! Even if it turns out differently than what I’ve shown you, it will be your unique piece, which is one of the many things I love about this art form!

love this. will try it. but there is no ‘like’ button to push.
You’re right about the “like” button! I’m glad you enjoyed the video.
It’s pronounced QUIN-nack-ri-done ( like phone with a D). Nice video . Thanks
Thank you! I think I mess that word up every single time I say it! LOL
Your creativity is amazing, the flowers are realistic and have a vintage look. Beautiful work and an inspiration. Wilfriede
Thank you Wilfriede! I’m glad you enjoyed it! 🙂
El aspecto es muy bonito, pero no veo cómo se hace. por lo tanto, no lo entiendo. Gracias.
Gracias Maria!
Me encantaría ver cómo lo hace porque así explicado no entiendo nada.
Pure pour talent! I am not sure I understand why you put so much work into the base
pour since it is barely visible with the flowers. Thank you for so generously sharing
your talent!
Thank you barbara! I really just do a background for the variation in colors and a little bit of background texture. I think it helps make it look more interesting, rather than just a plain back ground, which is why I just did a quick layered pour and tilt, but you certainly wouldn’t have to do that. 🙂
Me ha encantado. Es fantástico el resultado. Muchas gracias.
Gracias Maria!
I am going to try this. Looks like fun and the flowers are very pretty.
Thanks Maggie, I hope you’ll share your results! 🙂
Beautiful. I have found using “store brand”, aka, cheap gallon size zipper bags easier to work with rather than the more stiff, crinkle type of wrap. I cut it to size depending on the look I’m going for. It’s more ply-able, therefore easier to grab all sides without disturbing the paint until you are ready to pull up. Thanks for showing us this technique and yes, Fiona is fabulous!
Kathy Wesolek, using the storage bags is a great idea!! Thank you for sharing this with us!
Oh thank you Kathy! Great tip on the zipper bags! Thanks for watching the video!
OHHHHMMMMGEEEEEEEE!! I’m getting my gloves on right now! THANK YOU for this video!! I can’t wait to see my masterpiece!
I can’t wait to give this technique a try, Thank you for sharing Linda
Just plain paint? No additives or mediums? Then what do you do after its dry?
So kind of you to post this……Now I can have a go…