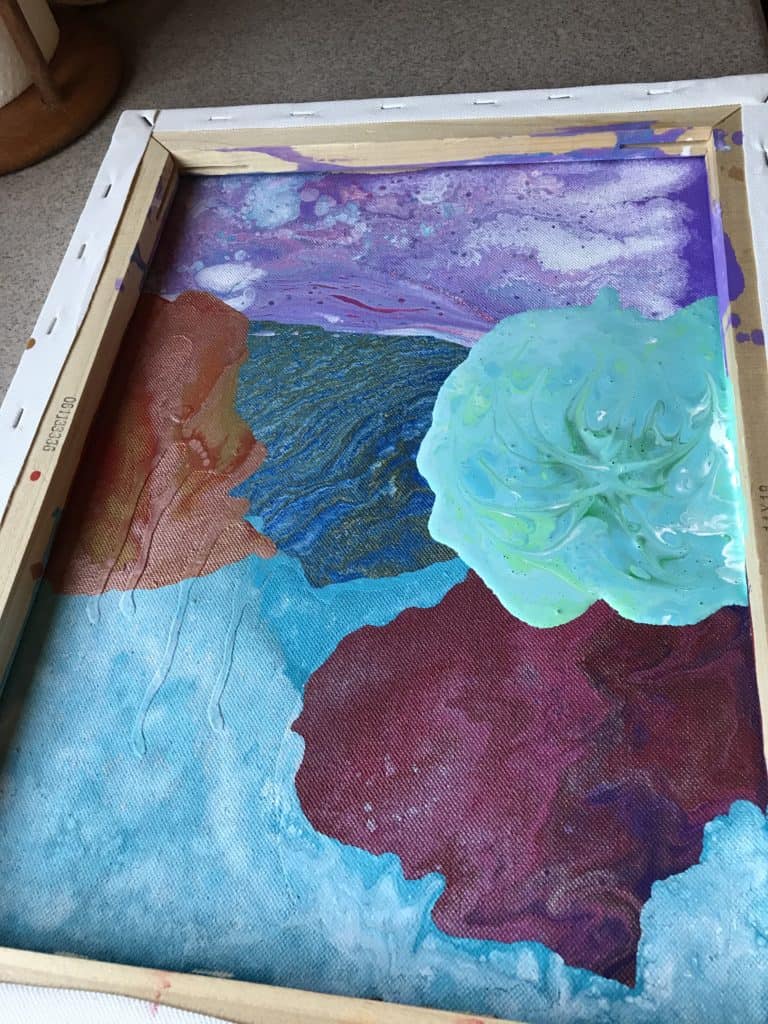
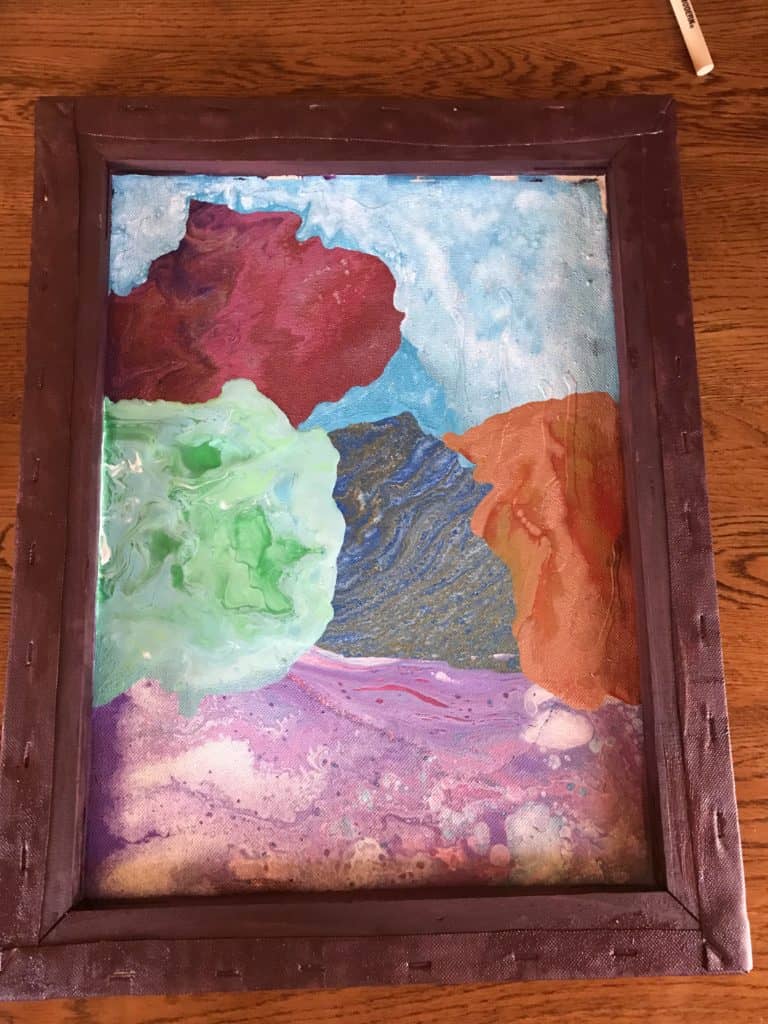
I received a lot of comments and questions about my canvas choice during the process of creating my acrylic collage. I was pouring on the back of wooden framed canvas that I’d used for a project I wasn’t ready to give up on yet. I saw it one day, propped up against my living room wall and I couldn’t help but think what a waste of pouring real estate that blank back was, so I decided to experiment. It wound up being a double experiment, both for the collage itself and this new pouring surface.

Supplies I Used:
- Artist’s Loft in mars black
- Americana alizarin crimson
- Folk Art acrylic paint in rose gold
- Painters tape
- Artist’s Loft canvas
Waste not, Want not
My first reason for pouring on the back of this canvas, as I’ve mentioned, is that I couldn’t bear to waste that blank space. The front of the canvas is a painting I began years ago and couldn’t figure out initially so I put it down. When I got the idea of a collage in my head it was such a risk I didn’t want to risk an all new canvas, even with the promise of repouring. The back of this canvas was somewhere I could hide this experiment if it failed that wouldn’t take up room or resources. I try to be very economic about my art supplies and want to utilize everything as best I can.
My Pour Style
When I pour, it’s not usually a ton of paint. If I were to fill an entire kitchen cup of paint every time this project obviously wouldn’t have worked because the overflow would have nowhere to go. But because I use much smaller paint amounts and have such a desire to experiment and combine techniques I thought this would be the perfect way. The framed formed its own little basin so clean up was almost nonexistent and I could tilt and manipulate the paint as much as I felt the piece needed.
Built in Frame
In the back of my mind I had this idea about how I would finish the whole thing if the collage turned out. Pouring on the back of this canvas gave me a built in blank frame that I could turn into anything I wanted. I wouldn’t have to find the perfect frame to display this piece because I would be able to create my own. I wound up mixing up some red and black and one of my metallics to create this deep merlot color paint for the finish. I used painters tape on the surface of my pour so I wouldn’t have to worry about my brush strokes while creating this frame. After I was happy with the layers of paint I sponged on some of that metallic to create a gilded effected. Now all I need is a command strip and I’m in action!

If I come up with another risky experiment that can be done in installments, this is definitely a method I would give another try. Not only does it help me use up everything I have but it gives me a two in one piece that I can display as my mood changes.

PS Koz is new to the acrylic pouring game but she’s diving right in and has no intentions of looking back! A student of the universe, there is nothing this artist loves more than learning and trying new things. Her other hobbies include reading, foreign language, and salsa dancing.

What are wonderful Idea for experimenting & using the canvas, plus left over paint. Thanks for sharing.
If this were mine, I’d embellish the frame with some mosaic chips and have a fancy border as well. Probably in a single color so as not to detract too much from the central image. Just a thought.
Loved your idea of making use of the back of a stretched canvas. To make the stretcher bars will look more like a frame, cover the stapled edge with heavy acrylic gel. Let dry. Paint with your frame color. Or you can also tape that edge. And paint over it.
OR…glue a strip of Burlap and paint it. It’ll cover the texture of the stapled edge. Or glue rope around it. Hhmmm. Think I’ll do this!
How do you hang the pic without damaging the full canvas side? Thank you!
I think those are all great ideas to finish the back side of the frame. I hate to waste the back of pictures as well, so this is a great idea. Thanks
I think it looks great the way it is. It looks very rustic!
Use a wooden canvas ( dollar store) the backside looks really cool and it is easy to put a pour on, maybe gesso it first. It has a nice frame as well.