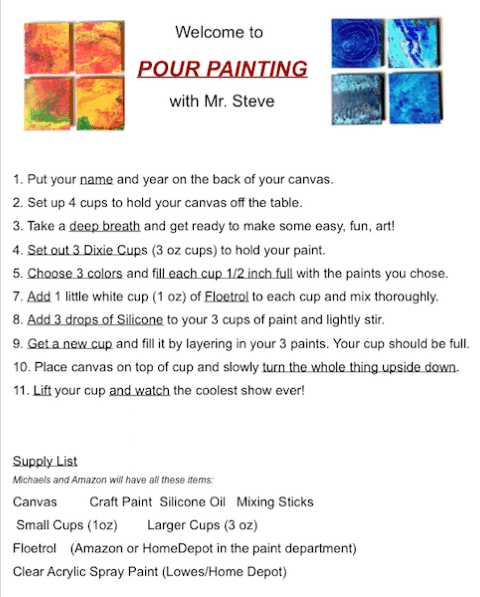
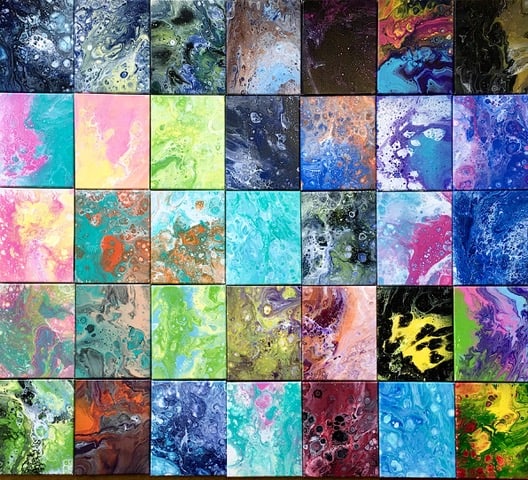
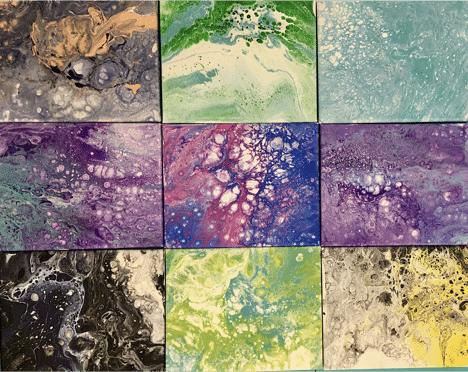
One of my fellow teachers gave me a nickname this week and I think I like it. He called me “The Pied Piper of Pour Painting.” In the last three weeks I have taught the teachers at my school how to make pour paintings as well as 250 students and several parents. The grand total is over 300 people and close to 400 paintings. Needless to say I needed to develop a fail-proof system to teach so many people how to pour and more importantly, how to make a beautiful pour painting. This video is the summary of the system I came up with.
Supplies I Used:
- 8”x10”canvas (you can use other sized canvas but this ‘recipe’ makes enough paint to cover an 8”x10”
- Large Box Top (this will be your Pour Box and will hold your canvas and dripped paint)
- Craft paints in 2 oz bottles (This link is for the amazon version of the same brand I use)
- Silicone (I prefer the Silicone by 3-In-One in this link)
- Mixing Sticks
- 3 Oz cups(we call them ‘Dixie Cups’)
- Small 1 oz cups
- Floetrol (I buy it by the gallon)
- Clear Acrylic Spray to seal the painting once it has dried
- Pushpins are optional (you can use cups to hold up your canvas instead)
- Marker to put your name and date on the back
- Torch to help bring out cells
The set up shown in the video really works and it has worked each and every time I have used it. Out of over 300 pour paintings, only two did not turn out well.
Side note: don’t use orange, gray and white for your three colors. Otherwise this video shows you all the items you need to put together a great start up kit that you can use for yourself or for a larger group. The kit is extremely functional and economical.
As I taught the pouring lesson (over and over again) I made a few improvements/adjustments to the lesson. The main change being the amount of paint to put in the bottom of your three cups. In the video I say to fill the cup 1/3 full with your color. I changed that amount to “Add 1/2 inch of paint to each cup.” Once you add the floetrol to the cup then the cup will be 1/3 full. Another detail is to top off your last cup with paint before you do the flip. Three ounces of paint is the perfect amount for an 8”x10” canvas and if the cup is not quite full, add some white (or the color of your choice) to fill it up to the top. Finally, in the video I show how to use push pins to elevate your canvas but if you are working with children it is much easier to have them set up four cups to hold the canvas up off of the board. That’s it!
If you have been hesitant to try pour painting or if you have been wanting to share your passion for pour painting with friends—this video should give you the know-how and confidence to go for it!

Steve Shaw is an artist and teacher living in Atlanta, Georgia. His days are spent in the classroom teaching his students the basics of art and self-expression. In the evenings and weekends, he paints. Steve has shown his work in several galleries in the Southeast and has illustrated three children’s books. Recently Steve has discovered acrylic pour painting and is putting all his other projects on hold while he journeys down this artistic road.
To see more, follow him on Instagram, visit his website, watch his videos on his YouTube Channel and purchase his paintings at Etsy.com.


Great video. You did a terrific job. Thanks so much for sharing.
I get nice cells, but I destroy them when trying to cover the entire canvas
Thank you Steve for this video. I was painting rocks last year but put everything away for Christmas and just haven’t found the desire to go back to it yet. Pour painting is what I want to do!! You provide all the supplies needed and step by step instructions. Even I can do this!! I am going to put my craft table back up next week and do some pour painting. I can’t wait to see how it turns out.
Sharon Bacon
Jefferson, Ga.
Where would I find a torch like the one you used? I looked online at Hobby Lobby and Michaels with no luck.
I’m not Steve but I found mine at Bed Bath and Beyond. They have a smaller one that is around $12 but go ahead and invest in the $20 one. It’s just better for this purpose.
Hi Steve,
Thanks a million for this wonderful article. I am an art teacher from South Africa (oil painting, photo realistic!), but when I saw the first pour painting, I dropped the oils and started experimenting with acrylic pours. Since we do not have the same products here, its been a battle to find equivalent products that work, but I have been trying many products and think I am (almost) ready to present my first class. Finding your article is a God send – when the student is ready, the teacher is sure to appear! Very well put together, and absolutely what I needed. Thanks my friend, you are doing awesome work.
Hello Adele. From Howick and been pouring for about a month and can’t stop. Would love to make contact with you as to where and what sa products you are using. Also interested in learning more about aucustic burning??? Thanks Barbara
hello,
the great thing about pouring is it can be done with just water as the pouring medium to thin the paint.
to get the same type of cells without silicone can also be accomplished without buying anything; however, this takes practice & the knowledge of which color is heavier and when tilting the canvas slowly and very little to stretch the colors you can create similar cells.
there are so many new & ingenious techniques (swiping across the whole painting with a palate knife, using a straw to blow or move the paint, dipping the wet painting with another new canvas, spinning the canvas,
scooping or drawing designs in the wet paint to create designs with a stick or other tool, using acrylic nail polish, spray paint on water to dip items and it marbles onto the surface, regular wall paint watered down and using India ink of 2 colors mixed with 90% rubbing alcohol, )
those are some of the recipes & alternatives to accommodate for limited supplies, different selections of brands specific to countries.
also this art form can utilize almost all of the paint that would’ve gome to waste, even the paint that goes off of the canvas.
if you work over a plasic drop cloth, garbage bag, metal, or tray the paint drippings when dry are called “skins” and are beautiful. they can be used in other artworks or on jewlery.
good luck & search for some of the types of pours I mentioned like swipe or acrylic swiping. those are my favorite and very quick to do, easy to explain, with beautiful results. I also us Moroccan aragon oil, or treadmill oil, even personal KY lubricant sold for adult use can be used to create the little circles or cells showing the other colors.
Watching your videos of pour paintings is always a pleasure. Just loved your setup information for teaching students or anyone else. Will keep these instructions. Your work is beautiful and I really enjoy following your channel. Thank you so much for your guidance and instructions! ????????????
Great video.
How much do you charge for your classes?
Thanks
Thanks Steve, you made teaching pour painting look so easy. I noticed that you didn’t add any water to thin your paints. I’ve always added a little water to thin my paints. Did you not have them add water to keep it simpler?
Thanks for the video and information Steve. Do you know how many ounces or grams the 1/2″ of paint would work out to that you pour into the 3 oz cups?
How many paintings can be made from one bottle of the silicone?
Hi Steve… I have been teaching and playing with Pours for many years now… I taught it in my own studio before I moved to a retirement home. I first used the pouring techniques as backgrounds for my acrylic paintings, – Still life, etc… But in the past 7 years have used just the various pour techniques that either by accident or by trial and error, I enjoyed working with. Had no idea there was such a large group now teaching it on the internet… Accidently found your emails as well as another persons and love the videos you both have created. I use the paper towel, palette knife, or frosting spatula and scoop to “swipe” with either of those across my paintings to create landscapes, then after allowing that base to dry, I go in and “embellish” those with more detail of trees, etc. either with a fresh pour or a paint brush or palette knife. Too date have been selling them as I get any painted, so at least get some money to restock my acrylic supplies. .
With limited space I have introduced pouring to my now retired fellow residents, and have two younger retirees who have gone off running with the basic tools creating their own ideas of pouring. One has gotten into doing beautiful glass pieces, pouring over plain glass vases.. I know there are more, here who really wish to try it, and I hope to offer more chances in the next year. I have done several Demonstrations of the basic pour, the swipe techniques, and the use of the straw in blowing, as well as balloon prints.. All without the use of a torch, as we are not allowed to use it here. I do use Floetrol, water and a drop or two of silicone in the colors, but rarely use the oil in the white.
I only wish I could travel, I would love to meet you and see your studio. I plan to click on and see more of your work and love it that you are working with young folks. I taught for 40 years and loved every minute of it. I also worked with young art teachers as they did their student teaching. That was the most exciting time to work with these young people who had such exciting ideas. You remind me of those young teachers, and I love your Enthusiasm and your obvious JOY in teaching.. That is what is so exciting, regardless of what media you work in. Keep it UP.!!!!!. Even with the older retired person, I am working with, I see their response to Enthusiasm and Joy as I am working with them.
Good Luck in what you are doing..
p.s. I feel I have met a friend online,
as ever, Donna ( a 93 year old retired Art Educator)
Hi there! Thank you for the wonderful directions. I am doing this for a GLOW party (black light/Neon party) I will have 24-30 kids at the most in one group. I will end up seeing 6 total groups throughout the day. One question…. how far ahead can I pour the paint with the floetrol, as well as the layered paint colors. I know kids will want to choose their own paint, but thought if I could start the layering in the cup, it might save time. I only have each group for 30 minutes. I will see Kindergarten, Grade 1, 2 , 3 , 4 and 5. Thanks