Once you become a fluid artist, anything with a flat enough surface eventually becomes an opportunity for you to turn it into a beautiful piece of art.
In today’s episode, Tracy Nelson discusses what motivated her to turn her mailbox into pour, which materials she used, and some tips learned along the way for other inspired artists to try.
If you’re not satisfied with the color of your mailbox or tired of your traditional square surface and can imagine yourself turning your mailbox into a piece of art then this episode is for you!
This episode is sponsored by Acrylicpouring.com – the leading fluid arts website which provides fluid artists around the world the inspiration and tips they need.
If you are new to fluid arts and want to get started now then go to https://acrylicpouring.com/ to learn the 5 fundamentals of making beautiful acrylic pours for FREE. Also, join their Facebook community where every day artists just like YOU are sharing their newest creations that just might end up on another one of these episodes.
Introduction:
Welcome to another episode of The Fluid Arts Podcast with your host Kévin White. Here, we dive into the wonderful world of fluid arts, including acrylic pouring, alcohol ink, resin art, and more.
Each episode contains a one-on-one session with talented artists who share their techniques, inspirations, and tips for creating amazing fluid art. Whether you want to earn a living making art or improve your work, this podcast is for you. So, please sit back and relax as we take you on a journey to learn more about this exciting and engaging art form.
Today’s featured artist Tracy Nelson, has a full-time career with a digital agency, lives in Richmond Virginia, and spends the rest of her time pouring, cooking, and spending time with my friends/family.
How did you discover Acrylic Pouring?
A girlfriend of mine introduced me to this method and it was funny too because when she first showed it to me, I immediately became addicted! The next night, I’d gone out and purchased all the supplies needed and began pouring in my dining room for maybe a week until I realized that wasn’t sustainable. Soon after that, I kicked my son out of a spare room that he really wasn’t using and made it my very own studio. I love it a lot and I’ve been at it ever since!
Is this your mailbox?…what was your inspiration?

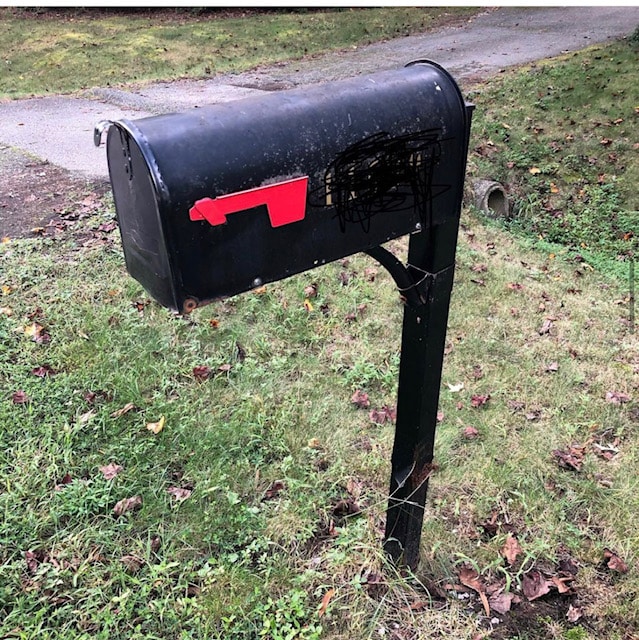
Yes, it is. Originally I had an old, decrepit, all black metal mailbox that people kept hitting when backing out of my driveway.
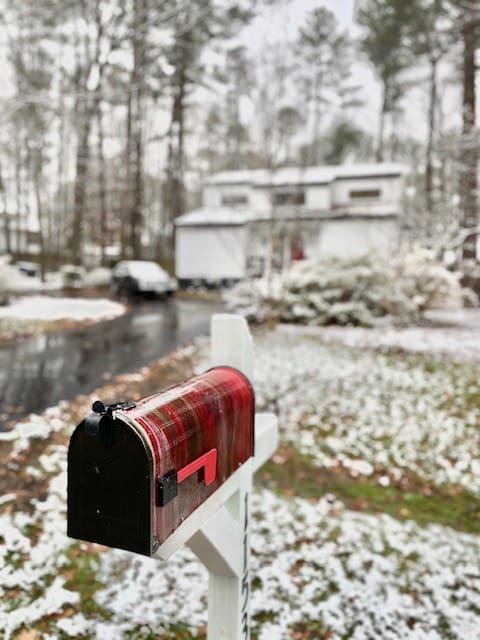
I was just going to repaint my mailbox to match my house but then one of my friends who was helping me put the post in said “Why aren’t you pouring on this? You should pour this.” My response was simply “Well, I don’t really want to put it on the post but that’s a great idea, maybe I’ll put it on the mailbox.” So I decided to get a brand new wooden post, assemble the necessary supplies, and spray painted my old one simply because I knew it was going to take some time.
I really wasn’t sure how this was really going to turn out.
What supplies did you use?
I went to Lowe’s and bought a cheap $15 grayish colored mailbox with a KILZ spray primer. I have a dry rack (similar to a dish dry rack) that I bought from Walmart, trash bags that to use for coverage, and a small container of Helmsmen Minwax that you can get from Lowe’s. The Minwax is typically in the same container that a primer would be in and you can buy it in a spray can.
I always used Floetrol. I love that solution to mix with the paints. Using a variety of paints can be the challenge, even in the same brands and the same type of paint, you can find that the consistency can be way different. The Minwax really made the colors pop out!
How did you do it? (step by step):
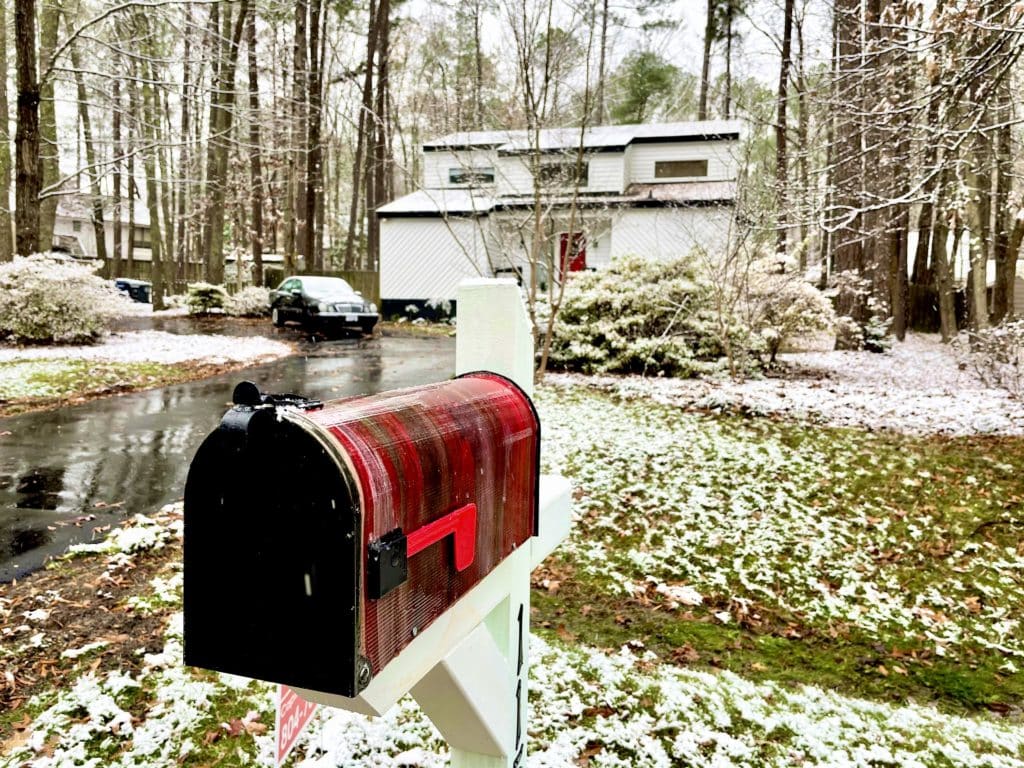
I painted the post white so it would really stand out and I wasn’t worried about the color of the mailbox because I knew I was going to put primer on it anyways before I poured on it. I then taped the areas that I didn’t want covered and poured on it about four times.
I had them all in separate cups and then just poured individually. So I didn’t even mix them ahead of time, which is probably good because they were mixing so quickly as I poured them, as they ran over. I only poured on the rounded arch (the top of it) and then I just went back and painted the backs and the front.
My house is white with black trim and a red door. So I was like, “Okay, well let me do white, black, red and gold.” But for some reason, in certain spots, it mixed and made a lavender color, and I was trying to get rid of that because it was just standing out too much.
Is it weatherproof?

Well, time will tell and this is where I applied the Helmsmen Minwax. I’m just not a big fan of resin or anything related to the finishing part of the process. Since it was going to be directly in the sun, there wasn’t a resin I could find that protects from the UV, but the Minwax does. I just poured the liquid from it onto a brush and started wiping it on. I have a little wiper that came with my resin.
How long did it take to dry?
For this one, I only gave it two or three weeks. For most of my projects, I try to give it 30 days at least, because I’ve had some situations where I apply the finish and it cracks just because the paint hadn’t been cured. I do believe that my paints were thinner than I normal and is the reason why it dried a lot faster.

Any tips?…things you would do differently?
I did this one on a rack but I think it would be better to do on some sort of turntable Lazy Susan type platform so that you can move around and watch both sides.
Spray painting or painting the sides that you want first solid and then tapping those up and going back and doing your pouring.
Start working with surfaces that are oddly shaped because it can be frustrating when you’re so used to only a flat surface. It’s really easy but when you start working with surfaces that are oddly shaped, it will be a little challenging.
Watch both sides because that was a challenge too. I was just looking at one side and then I’d get that one straight and I’d look at the other side and I was like, “Oh that doesn’t look right. It doesn’t look the same.”
Try to avoid being wasteful as much as possible and find creative ways to reuse supplies. For example: After my mom eats her daily dose of yogurt every day, she then cleans these small cups out and saves them for me to use for pouring on some of the smaller projects.
Mix all your paints the night before because I feel like that can be the hardest part of the project.
Next time, I will think through a little more of how I pour the colors on together.
This post is a fraction of the fluid arts podcast, don’t forget to view it and share it with your artist friends. Also, if you haven’t already, don’t forget to join our Facebook community. Thanks, and see you in the next episode.
Tracy’s Media Platforms:
I’ve lived most of my life in Richmond, VA and I have always had some sort of creative outlet (photography, pottery, jewelry design,etc.) and most recently acrylic pouring!
As a mother of a teen and 2 pooches I find it therapeutic, addicting, and I am humbled that so many others have found my creative obsession valuable and inspirational.

Hi, I loved your painted mailbox idea. I am relatively new to pouring and thought this a great idea for our plain black mailbox. The problem is, it is one that hangs on the wall of the house next to the door. It is rectangular shaped with a lid which lifts up. I am not certain if I will be able to achieve my goal without getting paint inside of it. Any suggestions?
Hello Beverly. Thank for the compliments. I think that’s a great idea and easier surfaces. I suggest using ClingWrap and painters tape to block off any spots, including inside that you would not want to cover. I used newspaper on my but with my latest projects found Cling wrap easier to manipulate and to better protect/seal. I would cut a piece that is bigger than the inside area, cover the majority but leave a bit of space at the top to seal it off completely with painters tape. Hope this makes sense without a visual! Love to see it when you’re done!
I think your mailbox looks beautiful! The one thing I would do differently is to create a margin of unpoured paint so the door can close securely. I would assume with repeated opening and closing, the paint will become unstable.
Thank you so much Delynn!
Yeah excellent point, good news is only me and my mailman can see that! :). We’ll see how it holds up and I figured I’d have to go back and touch up over time.
Cheers!
Love your mailbox! I am thinking about pour painting my mailbox. Never have poured before. Are there any brands of paint that you recommend for this? I plan on getting the mineax and the floetrol, just wasn’t sure if there were better brands or types of paint to use. Thank you!