Have you ever poured a painting that’s pretty, but not mind-blowing? Many of us have a stash of pours that we can’t seem to part with…pours that are good, but not “great”.
Luckily, this is art we’re talking about! Just because you don’t love a pour doesn’t mean you can’t still use it for other projects. In this article, we’ll talk about five ways you can embellish a boring pour.
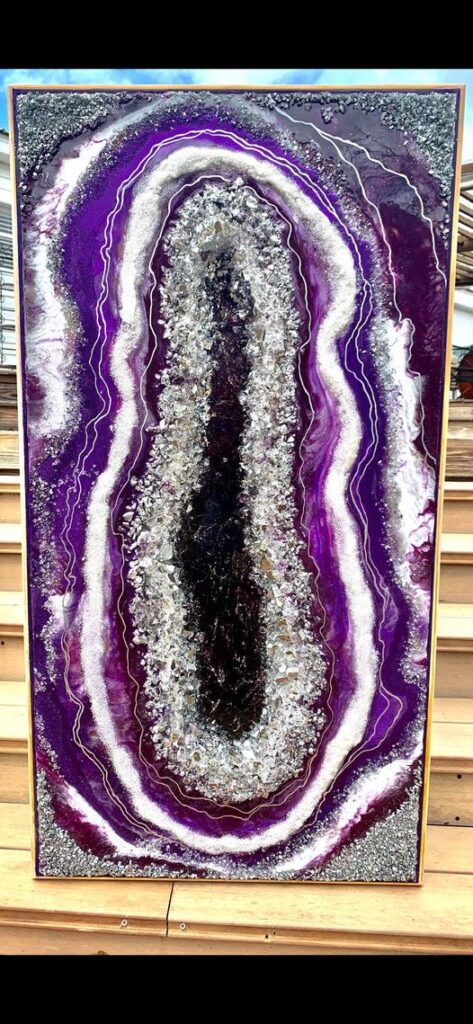
Geode Pour
There are a few different ways you can create a geode pour; you can either pour with the intent to create a geode, or use an already cured piece as the base for a finished geode. We’ll be talking about finishing a cured piece to look like a geode.
If you’re not familiar with geode pours, they’re one of the most popular kinds of embellished pours out there! Geode pours have unique lines of crushed glass, glitter, and even crushed crystals. Typically, geode pours are finished with resin to give them the high shine finish of a polished mineral.
Here are some supplies you’ll need in order to create a stunning geode embellished pour:
- Crushed crystal or crystal pieces. These can run on the expensive side, so look for good deals on bulk packages from Etsy or Amazon to get the best deal. Pay special attention to the sizing of the crystal pieces in relation to your piece.
- Crushed glass or sea glass pieces. If you’re not ready to drop money on real crystal or mineral pieces, crushed glass is a great alternative! Crushed glass comes in a lot of different colors, shapes and sizes.
- Fine tip paint pen. Geode pours have winding lines that trace patterns throughout the piece to resemble the natural formation of an actual geode or agate. Using a fine tip paint pen in gold, silver or white is an easy way to add lines after your piece has cured.
- Chunky glitter. Fine glitter will work for geode pours, but if you want your piece to really pop, we suggest experimenting with chunky glitter to give your piece dimension!
- Epoxy resin. To get your geode pour to really shine, resin is a must. You can use the resin to coat your geode pour in several stages to give it depth and dimension.
- Strong, clear glue. Any glue will suffice, although using something like Gorilla Glue will ensure that your crystals and glitter are permanently affixed to your painting. If you’re going to be creating fine lines using glitter or crushed crystal, putting down lines of glue first will help keep everything where you want it to be.
Stenciling on a Pour
You can be an incredible fluid artist and really bad at painting freehand! If you still want to paint something over your pour but aren’t great at painting, stenciling on a cured acrylic pour is an easy way to get the finished product you’d like.
There are two ways you can stencil on an acrylic pour painting:
- Allow the piece to cure completely and then stencil on the dried acrylic paint. Using this method, you would not seal the painting first. If you’re using a stencil adhesive, you need to be really sure that your painting is cured, or you might get a nasty, peeling surprise when you take the stencil off!
- Allow the piece to cure completely, seal it, and then stencil on top of the sealant. Creating a piece this way solves two issues; first, you don’t need to worry about your paint peeling up with your stencil. Second, you create depth that might be absent if you just painted the stencil right on the surface of the pour.
Either of these methods will result in a beautiful piece. For beautiful depth and a glass-like finish, follow these steps:
- Wait until the pour you want to work with has completely dried, or use an already cured pour.
- Seal the pour with a flood coat of resin and allow the resin to cure completely.
- Position your stencil on the resin and paint. To get an opaque look, you may need to allow the paint to dry and then apply another coat while the stencil is still on your piece.
- Allow the paint to fully dry and remove the stencil. If you used stencil adhesive, make sure to remove it from the surface of the resin completely.
- Apply another flood coat of resin.
Stenciling on an acrylic pour in layers will create depth by creating some shadowing underneath the raised stenciled design!
Using Seashells and Sand to Embellish a Pour
Do you have a blue pour laying around? Let’s turn it into an abstract beach!
You can buy crafting sand or reptile/terrarium sand at any local Walmart, craft store, or pet store, and usually in a variety of colors. Seashells are also pretty easy to find, even if you don’t live anywhere near an ocean! Amazon, Etsy, Michael’s and other stores that carry crafting supplies all have bulk seashells in various sizes you can buy.
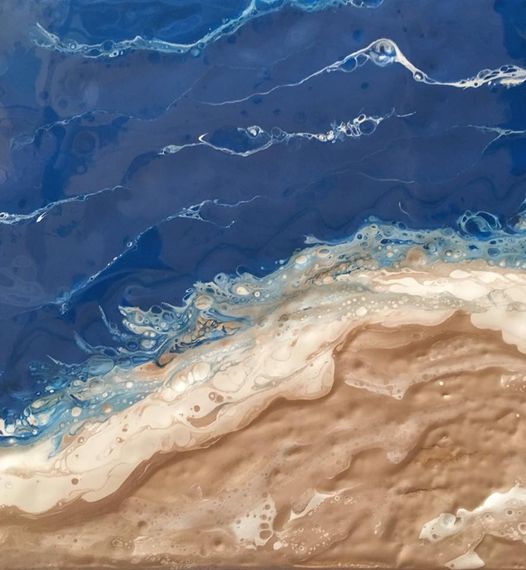
You can embellish you piece two different ways with seashells and sand to create a unique beach acrylic pour.
Using Resin to Make Waves on an Acrylic Pour
You can create an abstract, yet semi-realistic ocean scene by building a beach out of sand mixed with resin in the corner of your painting, decorating it with seashells that you an affix either with super glue or resin, and then adding a flood coat of resin with white “waves”.
Here are the supplies you’ll need for this technique:
- A completely cured pour
- Epoxy resin
- Crafting or reptile/terrarium sand
- Seashells in varying sizes
- White alcohol ink, spray paint, acrylic paint or resin dye
- Cups for mixing resin
- Stirring utensils
- Gloves
- Well-ventilated area
- Super glue
Here are the steps to follow to create a unique resin beach acrylic pour:
- Make sure the surface of your cured acrylic painting is clean; there should be no dust, leftover silicone, or anything on the surface that could stop the resin from adhering.
- Create a border around the entire canvas using a strong painter’s tape, masking tape, or acetate strips. This will stop your sand and resin from dripping over the side.
- Mix some of your chosen sand with resin. You can mix this at whatever ratio you like, but keep in mind that the more resin you add, the thinner the mixture will be, which can make it difficult to keep your beach in the exact position you’d like it in.
- Put the sand mixture on the canvas in the desired position. For some added texture, sprinkle some dry sand on top of the resin/sand mixture once you’re happy with the placement to add some extra depth and texture.
- At this time, you can choose to add your seashell embellishments or wait until the resin has dried. Be aware that if you have especially heavy rocks or seashells, they may simple sink through the sand.
- If you plan on adding your seashells after the resin has cured, you’ll want to use super glue to affix them in the appropriate position.
- After the glue has dried completely, pour a flood coat of resin onto the piece, careful not to cover your sand or seashells completely. Retain a small amount of resin and mix it with the white dye of your choosing.
- Drizzle thin lines of white resin across the piece and envision them moving towards the beach. Using a heat gun or blow dryer, blow the white in the direction you’d like the waves to go.
- Allow this to cure completely. Then, add another flood coat of resin on top of the water for added depth. At this step, you can add more waves if you’d like.
- After your piece has cured, remove the barrier around the piece. You may need to lightly sand the edges to remove any leftover tape.
Creating a beautiful resin beach piece out of an already cured pour requires a bit of preparation and patience, but the results are absolutely worth it!
Using Standard Sealant to Create a Beach Acrylic Pour
You don’t necessarily have to invest in resin in order to make a beautiful beach piece. You can use the same supplies from above minus the resin to create the same type of beach, just without the same depth of the resin.
If you use a sealant like Polycrylic in order to seal the piece, you won’t be able to make waves; you can use a fine tip white paint pen to make subtle lines after the piece has cured however, or skip the waves altogether and let the pour be an abstract ocean.
Embellishing an Acrylic Pour with Lettering
Pours that aren’t as busy work really well as backgrounds for quotes! It’s extremely easy to embellish a pour in this way.
Using Vinyl Letters to Embellish an Acrylic Pour
You can order custom vinyl cutouts from Etsy, and even some local automotive supply stores (usually small businesses) will do custom vinyl.
One thing you’ll want to consider when using vinyl is how you’ll adhere the vinyl to the painting. You will need to use transfer tape in order to affix the vinyl. If you have a lot of small letters with punctuation, that can be extremely frustrating since those little pieces don’t always want to come off of the vinyl!
Transfer tape can also be pretty strong; make sure your piece is completely and totally cured before trying to adhere vinyl, or seal it with a coat of Polycrylic or resin before applying the lettering.
And of course…make sure you double-check the spelling before you put the vinyl on! Once it’s on, it’s not coming off.
Hand Lettering on Acrylic Pours
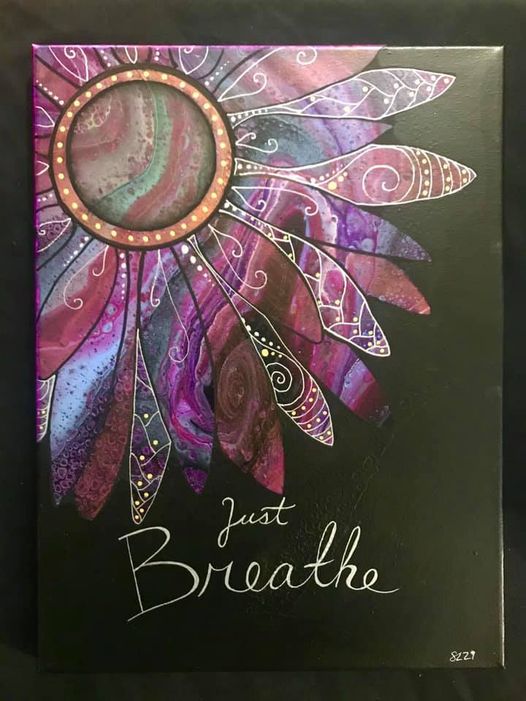
If you’ve got a steady hand, a paint pen and good handwriting, you don’t need vinyl to embellish your acrylic pour with lettering!
If you choose to go the hand-lettering route, place reference lines on your piece using a light, but still visible, watercolor pencil. Watercolor pencil can be washed off after the lettering has completely dried, and won’t show up on your final piece.
Drawing reference lines will help you keep those letters nice and straight, and exactly where you want them to be!
Using Mod Podge on Acrylic Pours
Finally, we come to one of the most interesting embellishments on this list; using a product like Mod Podge to embellish a pour with pictures!
Mod Podge is a magical, versatile crafting tool that works as a sealant and a glue. It comes in a lot of different types, but the standard Mod Podge works best for this kind of project.
First, you’ll need to figure out what image you want to place on the pour. Then, cut around the image as close as you can to avoid any white or blank areas that will show up when it’s affixed to the pour.
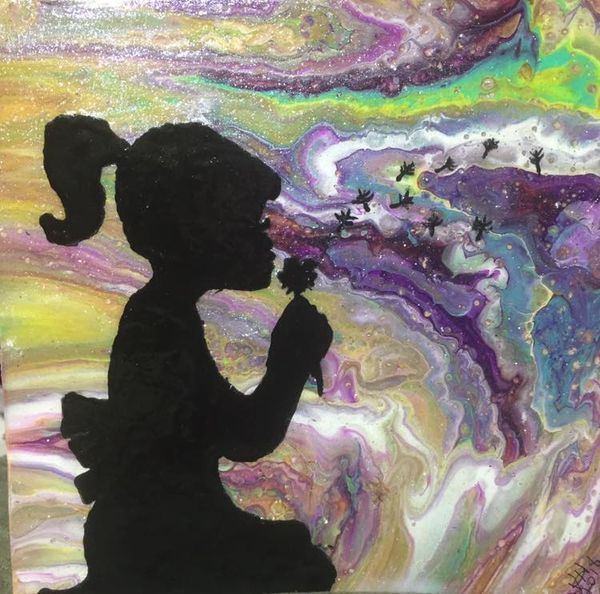
After you’ve trimmed the image, seal both the front and back with Mod Podge, and allow it to cure completely. If your image curls, you can place it between two sheets of parchment paper in a heavy book to flatten it back out, but make sure you wait until after the Mod Podge has completely cured.
Once your image is cured, you can attach it to your pour either by sealing with a sealant like Kamar or Polycrylic and placing the image on the wet surface, or super gluing it; just make sure that the edges are completely sealed to the painting.
Then, finish your painting with another coat of sealant over the top of the image and the pour, or a flood coat of resin for extra depth.
It’s that simple! You can use this for many different image types. You can also laminate pictures before sealing them onto the pour to give them extra protection.
Final Thoughts
Look at your stash of boring pours; after all of these ideas, they don’t look so boring anymore, do they? Pick up one of those pieces, grab some glitter and make something beautiful! Make sure you show us what you’ve created in our Facebook Group so we can admire your work.
More Resources
Master the Basis of Color Theory for Harmonious Pours
Embellishing an Acrylic Pour with Lanterns
Best Heat Resistant Sealing Finishes for Tiles and Coasters

Sara Wagner is an author and artist from Upstate New York. She is the owner of Studio Blackwater and can typically be found covered in paint, cats, or her two young daughters. You can find her on Facebook and Instagram as @studioblackwater.

Ms. Sara, I was wondering about those quotes on vinyl from hobby lobby. You peel them off the main piece and stick it on your wall. Smooth out with a credit card. I’ve got several in my home. That might work also. Some quotes are from the Bible and some just random sayings like “don’t touch my coffee cup”. They are better then that. Lol. I look forward to these emails as I learn a lot. Thank you.
Hi Sara, I am wondering why a mini blowtorch is recommended to bring out cells and not a heat gun?
Very smooth and simple explanation, great website for learning. Penkraft is a great place to learn everything about art and craft. you can become a penkraft certified teacher. Penkraft provides you Handwriting Improvement, Calligraphy, ethnic art, modern art, phonic abacus, and vedic art.
When using resin, a respirator should *always* be used. You can do incredible damage to your lungs, even with Art Resin/non toxic resins. You should always have gloves and preferably long sleeves. You do not have these on your list of equipment.