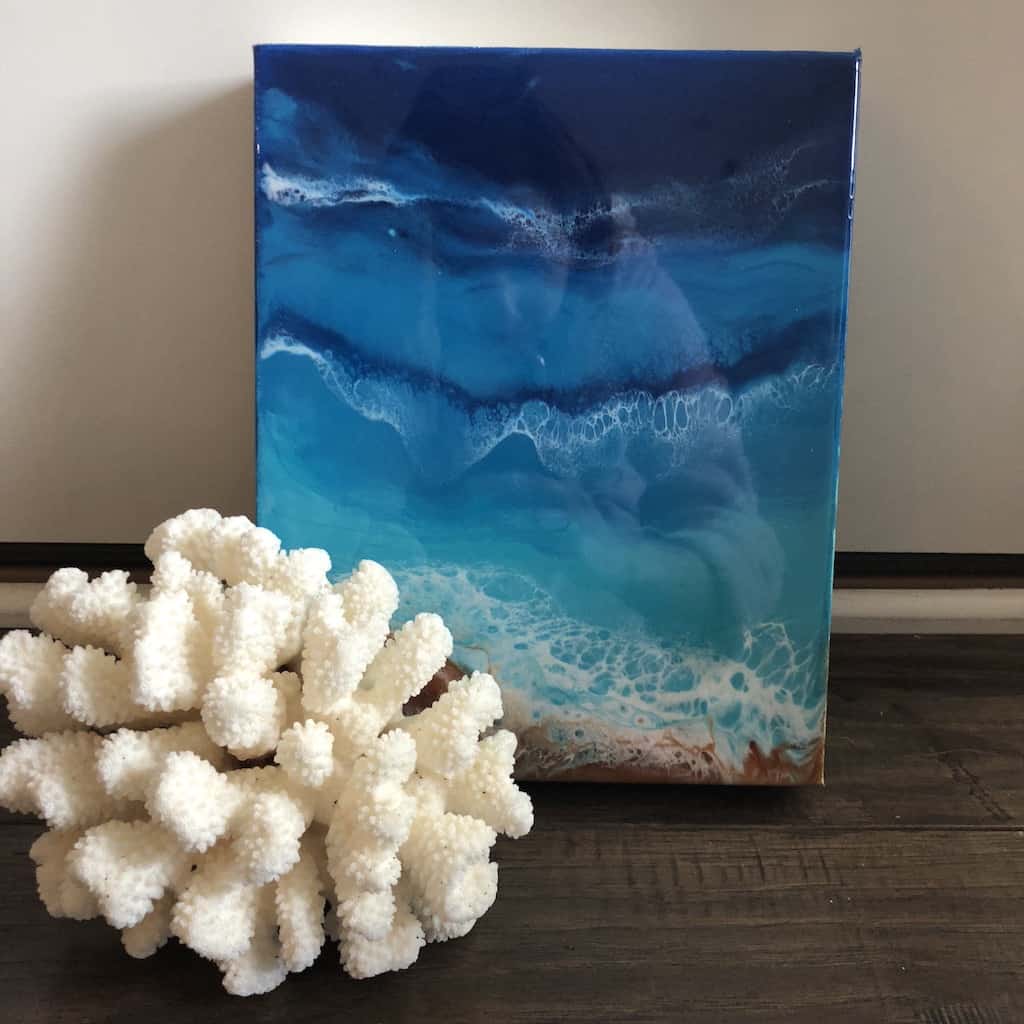
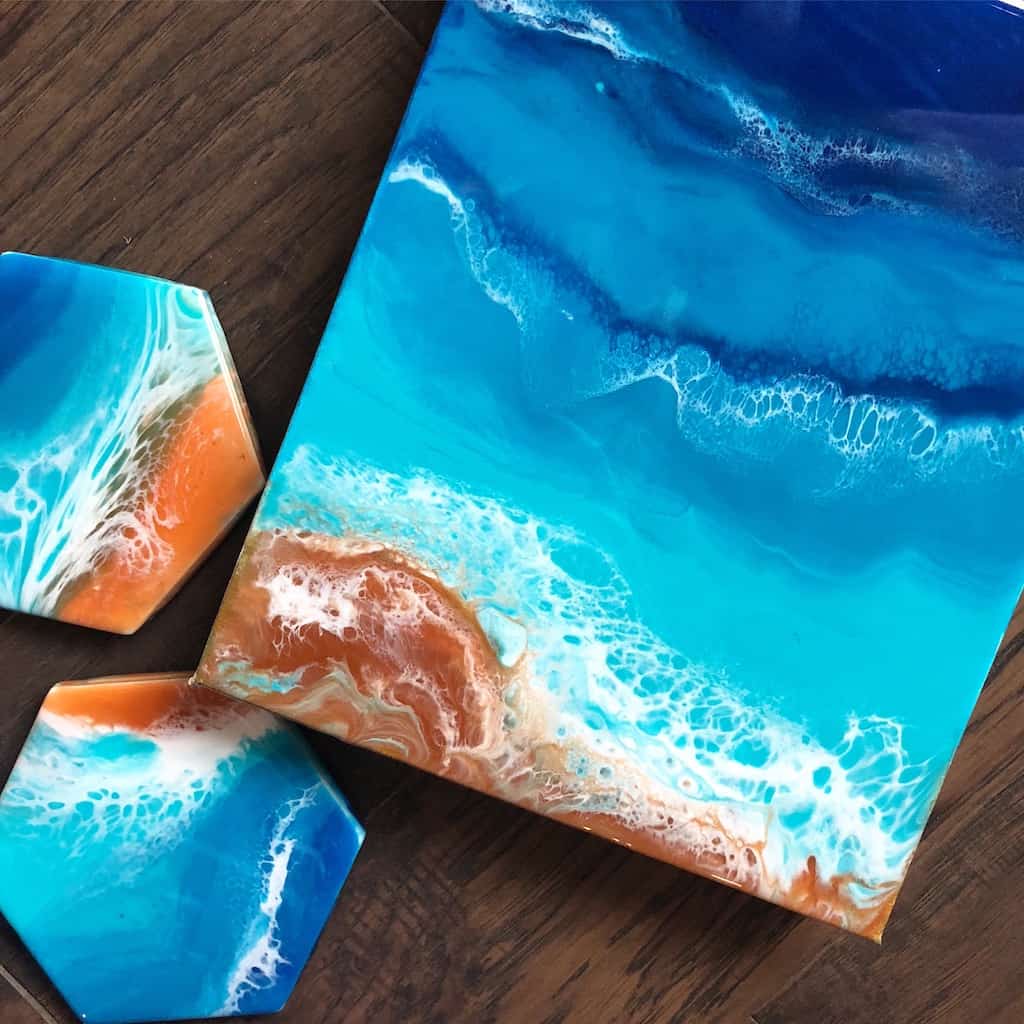
Today we’re going to learn how to incorporate resin into our fluid pouring. This technique is very useful for creating beautiful beach scenes, complete with realistic-looking waves. I lived in Hawaii for 7 years, and the heart of all of my paintings is based on the love and connection I feel to the island. Almost all of my pieces are blue and oceanic and reflect the spirit of the island.
While I go over a specific type of resin work in this article, I’ve also created a downloadable course on how to do resin artwork for those interested in taking their resin art to the next level. This course gives you a broader base of knowledge in resin and the specific techniques I use. There’s also an option to include a supply kit that will give you all the supplies you need to get started. You can find my course and kits here.
The wonderful thing about fluid art is there are so many different mediums you can use for it. My favorite is resin. Now, I know a lot of you are new to resin work, but I promise that if you follow a few basic steps you’ll get results you simply won’t see with acrylic alone.

Supplies You’ll Need
For this project you will need these items. I will link my favorites below:
- Resin of your choice. I like to use Naked Fusion Resin for artists
- Acrylic paints. I use High Flow, but any acrylic will work
- Denatured alcohol
- Glitter or mica (optional)
- Safety equipment (gloves, respirator, tarp for work area)
- Wood panel
- Small butane torch
- Mixing cups and sticks
The most important thing I can tell you about working with resin is to thoroughly read the instructions on the back of your resin container.
I would say 99 percent of all resin “fails” could be prevented by just reading the directions. Each resin has a different mix time, cure time, ratio, and set of instructions. So as long as you follow yours, you should be fine.
Now, let’s get started on our beach pour….
Mix the Resins and Colors
Begin by mixing your resin according to the instructions. Mine is a 1:1 ratio and needs to be mixed for 3 minutes. After mixing, I divide the resin into small plastic cups.
Next, I choose the colors for my beach pour, usually shades of blues, greens, sand, and always white for waves.
When adding acrylic color to your resin, start with a VERY small amount, and never add more than 10 percent by volume. If you are using high flow paint, start out with just a few drops. Keep in mind that anything more than 10 percent by volume will change how the resin cures.
Also, NEVER add silicone to your resin like you do with your acrylic pours.
Once you have added your acrylic, high flow acrylic, or pigment, mix it up until the color is even throughout. If you think your resin is too thick you can add a little denatured alcohol to thin it; just not too much! Remember the rule of 10 percent here also.
Pro tip: Use the same denatured alcohol to get resin off your hands, floor, clothes, or anywhere else you don’t want it.
The Pour
Subscribe to Acrylic Pouring on Youtube
Follow Ann Upton on Instagram
The next step is where your creativity comes in. Pour your colors where you want on the panel, but hold off on your white for now.
Feel free to get funky and creative with placement. The ocean is ever-changing and always in motion, so your design doesn’t have to fit a traditional mold.
Use your gloved hand to blend the colors together. Blends the blues, blend the greens, blend the sand – blend, blend, blend! With beach pours, I find the resin looks more natural when colors seamlessly transition into one another.
This is also the point where you can torch your resin to remove any bubbles on the surface. When you add heat to resin, the resin becomes viscous and moves more easily.
After you torch, pick up your panel and move it around a little, just like you would an acrylic pour. This is where your safety equipment comes in handy, so make sure you keep those gloves on!
Add Waves
Once you are happy with the general structure of your ocean scene, you can add the waves. You want to make sure this comes last, because the lacing of the white is what will really pull the ocean together.
Use a popsicle stick, or pour from your cup, and add thin lines of white to the areas where you want to create waves. It’s easier if you go ahead and pour all your waves at once.
Once you have them down, position your torch about 1 inch above the resin, at a 45 degree angle, and apply the torch. As you move the torch all over the white part of the waves, you’ll see the resin really start to lace and move around. Be careful not to linger in one place for too long or you risk burning the resin.
Do this to all your waves and then tilt your canvas to exaggerate the wave effect. Lacing becomes more apparent as the resin dries, so don’t be discouraged if you don’t see a lot at first.
Now Stop. Don’t Overwork Your Piece
Once you have a scene you like, STOP! Don’t overwork your piece.
I can’t tell you how important it is to leave your work alone once you’re happy with it. And remember that resin only allows about 30 minutes of work time, so if you go back to work on a painting later you will ruin it.
Let your painting sit for at least 24 hours, until it’s hard to the touch. But remember it hasn’t fully cured for at least 72 hours, sometimes longer. If you want to do another layer you can do so after it is hard to the touch; you don’t have to wait until it has cured.
Try It Yourself and Share
Hopefully this inspires you to recreate some of your favorite beaches. I can’t wait to see them!
I’ve also created a course on using resin that I recommend for artists looking to really understand the basics of resin work and improving their skill. There’s also an option to buy the course and a resin supplies kit so you can use the same supplies I do. Sign up for the course here.
Please share your beach scenes and other resin pieces in the Facebook group and on Instagram, especially if you created them with the help of this article. We’d love for you to link back to this article and tag us on Instagram: @annupton.art and @acrylicpouring.
Guidelines to Keep In Mind When Working with Resin
- Read the instructions specific to your resin brand!!
- Protect the area where you are working, and yourself
- Denatured alcohol cleans up resin, so keep it handy
- You can paint your canvas underneath your resin to use as a guideline of where to place your colors
- Work quickly, and once you’ve finished don’t touch your painting for a full day


Ann is a wife, mom to 5 kids, and pastry chef turned full time artist. In 2017 she was diagnosed with Lyme disease and discovered painting as a new creative outlet. She went from having never painted to becoming a full time artist in less than a year.
Her art is inspired by the beauty and mystery of Hawaii, and she specializes in resin, acrylic, watercolor, and heavy texture. Discover more of her work, including timelapses and art to purchase, on her instagram @annupton.art. You can also check out Ann’s resin course that teaches the basics of resin and techniques she uses to make her beautiful art.


I love the colours in these – what paints have you used?
Here’s a list of supplies used in this pour:
• Resin of your choice. I like to use Counter Culture Resin for artists: http://counterculturediy.com/products…
• Acrylic paints. I use high flow, but any acrylic will work: https://www.amazon.com/Golden-High-Acrylic-Assorted-Color/dp/B00DETAF7M/ref=as_li_ss_tl?ie=UTF8&linkCode=sl1&tag=ap-youtube-20&linkId=94c5807b046abd002cc9c7176d030d89
• Denatured Alcohol: https://www.amazon.com/Klean-Strip-QKGA75003-Denatured-Alcohol-1-Quart/dp/B001FOSX9U/ref=as_li_ss_tl?ie=UTF8&qid=1518760716&sr=8-4&keywords=denatured+alcohol&linkCode=sl1&tag=ap-youtube-20&linkId=31f7d4837ec2d7e9e2510937eadb4835
• Glitter or Mica (optional)
• Safety equipment (gloves, respirator, tarp for work area)
• Wood Panel
• Small butane torch: https://www.amazon.com/Kitchen-Culinary-Cooking-Brulee-Adjustable/dp/B01FAAXUBU/ref=as_li_ss_tl?ie=UTF8&qid=1518760932&sr=8-4&keywords=butane+torch&linkCode=sl1&tag=ap-youtube-20&linkId=9c01201991d98b83b330db7b107f4267
• Mixing cups and sticks
Your art is amazing! I love how you created the waves. My jaw has hit the ground. I love your work!
Thanks for this clear explanation !
Kiss from France
You covered all the bases and I’m anxious to get resin next week. I’ve been having fun with acrylic pouring, swiping, etc. and now am anxious to create with resin!
Hi there,
I am having a hard time getting my white waves to have those cell like spaces. I have tried different consistencies and a different heat gun but I can’t seem to get it to spread out and form those cells like I have seen in your work and others. I having been using acrylic paint and MarinePro resin (it is cheaper). Can you help me please?
Try changing the brand of white. Try artist loft titanium white as it is known to cell and or lace. You can also try adding just a drop or two of alcohol to thin it.
Use about a dime size of craft n cast and 4 drops of piñata Bianca white alcohol ink in about an ounce of resin. Mix well. If your resin bubbles sort of like carbonated soda, you have enough white. If it doesn’t add a bit more.Wait half the time of your resins curing time before you start. If you start too soon the resin will be too runny and won’t hold the cells. Next I don’t find using a torch to get cells is the best way. It warms up the resin too much, causes your cells to “melt”. . Right after I put down the white I swipe over it VERY briefly with the torch and then use a heat gun on the white (after letting it sit along with the resin on the surface for 1/2 curing time of your resin.(for example if your resin has 45 minute working time wait about 20~25 min before you add your white), than I follow it with a quick wave of the torch in the areas where there is still too much white for my taste. Than leave it alone and your resin will develop cells over the next 45 minutes or so.just wanted to add a very important note to this tutorial ~ it isn’t easy. It takes lots and lots of practice ( I mean like lots and lots of fails). This doesn’t mean you’ve failed, it means you’re slowly learning. I’ve been trying for months and I’m just finally getting the hang of it. I must have trued at least 50 ~ 60 paintings to get to where I am today. Be patient and keep practicing. I use “Mas “tabletop
resin or “total boat tabletop “resin, which are both available on Amazon. These work the best for cells that I have found. I tried at least 10 different resins looking for the best ones for cells. You can also look up creating cells on ocean resin paintings and find a ton of clearer and more helpful tutorials. I personally think tutorials such as these cause people to waste a ton of money on materials trying to imitate it, which is impossible since there is just not enough info available. Good luck. Don’t give up! You’ll get there.
Simple beautiful! The beach is my happy place!! Thanks for sharing! May God Bless You!
Can you please tell me :
When we add white :
does it mean : white mixed with epoxy ? ot just the acriliic white alone ?
Thank you in advance, and thank you for this wonderful work and sharing it !
You mix white with resin
Wonderful tutorial!
Dear Ann, I have an old faux marble vanity I would love to use this technique! I obviously cannot lift or move the top surface. Have you ever tried this technique on a single sink fanity top or piece of furniture where you only have your fingers or brushes to use? I would love to try this…I am really scared because even practicing on a board will not simulate what you do on canvas… Would you please advise me how to paint the vanity top in a beach scenes with resin. Or, better yet, do a demonstration on top of a dresser or something you cannot lift or move…I would love to use blues, turquoises, greens, and whites…I only have one shot at this…I would appreciate any advice you may share! Thank you in advance, Tracy
I have done pours before and I definitely love your process. I would like to do a large
(40 or 50 “) square. Do you have any advise for this size?
Maybe a silly question, but does including the resin within the pour mean there’s no extra step to finishing. Compared to a normal pour then sealed with resin.
The counter culture link is no longer valid. Opens to a 404 page.
Hi, thank you for the detailed instructions. I have a similar question about the white. Why does the white lace and not the other colors? Would silicon work with resin? Is it thinner than the other colors?
Thanks again!
Laura
Ann, you do such beautiful work and I enjoyed watching your video. I am, however, shocked that you took your gloves off and left them off, then put your hands in the resin. I work with resin too and know how bad this can be! Even if you do not experience any problems now, those chemicals get absorbed into your skin and can cause long term effects including cancer. Please protect yourself, but remember you are teaching new people who are following your example. We want them to use gloves and respirators and protect their skin.
I do love your work and want to see you be able to continue.
Yes, lovely work but I am also worried about no glove use. Also, denatured alcohol is bad stuff. “Denatured alcohol is ethanol that has additives to make it poisonous, bad-tasting, foul-smelling, or nauseating to discourage its recreational consumption.” Not that it is being drunk but I would never use it.
I’m having the same problem please help me too tried 3 times and had to chuck it in the trash what a waste of money but I want to make one so bad. please please help
[email protected] Thank You.
Having trouble getting the white bubble effect, I have Armor Art White, and I’ve tried it with epoxy and without cause wasn’t for sure if your suppose to mix epoxy with it or not but I Tried both ways and nothing and it seem to dry fast when I use the heat gun to the other paints with epoxy, am I not using enough epoxy with the paint or too much, I’m lost please help
Absolutely gorgeous! Love how you added the depth and additional waves.
You didn’t wear gloves while handling the resin. I would think the resin might be hard on hands after a while. Have you experienced any skin issues doing this?
Are there products that are not resin that can be used to get these results? …possibly TriArt Acrylic Glass, or CrystaLac ?
Finally someone who explained all details properly to where I feel I could male this before of your helpful tips. Thanks Ann
I love this tutorial! It’s so easy to follow and the results are beautiful.
I love this tutorial! It’s so easy to follow and the results are beautiful.