You want to start painting, fluid pour-painting to be specific, but don’t know where to begin, right? Yes, there are lots of videos with lists of products to buy and even more videos with different people’s recipes for how they mix their paints. But has anyone seen instruction on helping the ‘disorganized’ or the ‘logistically challenged’ crafters? If that’s you, I’m here to help!
I’m going to assume you’ve already purchased all the necessary supplies, have already established a pour area and are almost ready to begin mixing everything up and start your first pour.
Before you start, let me ask you a few questions that may not have crossed your mind:
- What are you going to paint on?
- What are you going to do if the phone rings or someone knocks on your door while you’re pouring and your hands are covered in paint?
- What’s going on in the rest of your home? Where is your cat or dog? Does your child have an activity to occupy themselves with for an hour or so? Is your spouse going to need you for anything? Do they know that you are planning to pour?
- What are you going to do with your painting after you are done pouring and it’s still dripping off the edges?
- How are you going to keep your finished piece safe while it dries? How can you protect your painting from dust, active air vents and flying insects that might be attracted to your lovely colors?
I ask these questions because I’ve experienced almost every one of these challenges and have learned (by my lack of preparation) to tackle the challenges before I begin each project!
So, let’s address them each in turn. But before we begin, here’s the supplies you’ll need to keep everything organized like I do….
Supplies You’ll Need
- Bathroom Cups
- SOLO Cups
- Artist Loft Canvases
- Plastic Storage Tubs (for their lids)
- Wax Paper
- Craft Sticks
What Are You Going To Paint On?
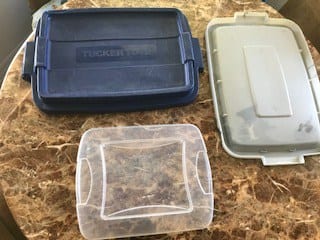
My personal favorite work surface is the top of a Rubbermaid (doesn’t have to be this name brand) bin lid– for many reasons.
-
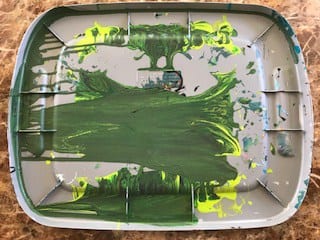
- You can use it as a receptacle to catch your run-off paint in a nice clean contained area. You don’t have to not worry about messing up your table or whatever surface you’re using to support your project.
-
- After you are done pouring, the run-off can remain in the lid when you move the painting to your drying location.
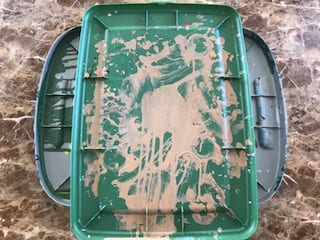
- The paint can remain in this lid for however long you like until the paint completely dries, turning into what we call ‘skins’.
-
- The skins can easily be removed with a fingernail, edge of a butter knife or similar tool and placed in wax paper for safekeeping.
- The lid is basically ready to be used again after removing skins.
- If you run out of container lids, simply flip this lid upside down and use the other side. You can even do this when the skin is dried on the other side and you’ve not removed it yet.
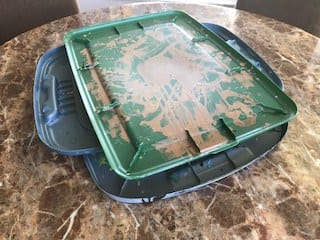
- If you have lots of lids and make lots of skins, you can stack the lids criss-cross on top of one another as a way to save space while they’re drying.
- After you’ve poured quite a bit and need to clean the lids, they can go right in the shower or tub and are easily wiped clean with soap and water to remove any remaining paint. Put a strainer over your drain and all paint scraps will be collected. That way, you can dispose of them in the trash and keep them out of your plumbing.
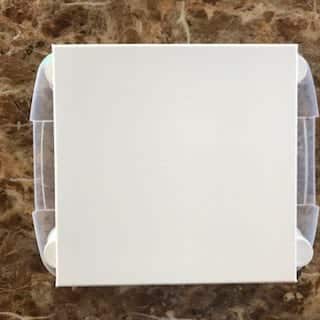
I place four plastic cups on top of my lid and this is where my painting sits when I pour. Be sure that your substrate (canvas, wood, tile, glass, etc.) does not extend beyond your lid or your run off will run OFF the container lid and onto your table or whatever you’re pouring on. Always use a lid larger than your workpiece!
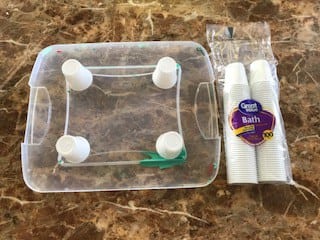
Make sure your surface is level and place your substrate onto your cups. You are almost ready to paint!

What Are You Going To Do If You’re Interrupted?
What’ll happen if the phone rings or someone knocks on your door while you’re pouring and your hands are covered in paint?
Be prepared for any of life’s little emergencies by being able to wipe your hands off quickly. Have a wet washcloth and a dry dish towel right next to your container lid at all times. Even if you don’t have any unexpected visitors, it’s nice to be able to wash quickly. You may want to have a sign to place on your door, letting family members or guests know that a painting is in progress!
What’s Going On In The Rest Of Your Home?
You don’t want your cat jumping up onto your table and knocking down all your paint cups, do you? As for Fido, well, you know best if he’ll be a bother or not.
Does your child have an activity to occupy them for an hour or so?
Is your spouse going to need you for anything? Do they know that you are planning to pour?
This should be self-explanatory. Make sure you’ve taken care of everything you need to in the house, and arranged to have some private creative time.
If you thrive in distraction and don’t mind having everyone calling for your attention and wanting to see what you’re doing then no instruction needed. Otherwise, privacy and/or quiet time is a very soothing environment in which to summon your muse.
What Are You Going To Do With Your Painting After You Are Done Pouring?
This is the tricky bit: moving the paint while it’s still dripping off the edges. Whether you have your own studio or art room or are forced to pour on the top of your stove due to lack of space, you still need to move the painting.
This procedure is one of the trickiest to master, and the main reason I wrote this guide!
-
- Clean off a dresser top and put down a towel. Place four bathroom cups on top in the approximate size the substrate you are working on. This is similar to what you’ve done with your bin lid to set up for painting.
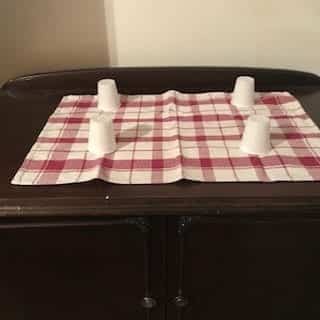
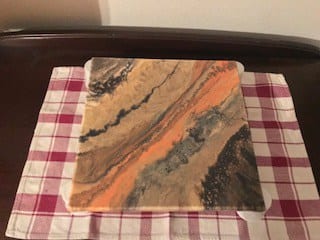
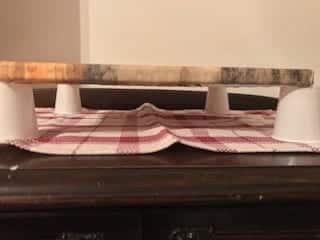
- If you have a second bathtub, put a couple of boards across the top and do the same thing with towel and bathroom cups.
- If you have a spare bed, same procedure.
- If you have a true drying rack, perfect! Just be sure that you aren’t placing the canvas directly onto the wire rack. The paint will stick to it and so will your canvas. Plastic cups are your friends!
The reason for tackling this tricky procedure is because your painting will be dripping and you don’t want to leave it on the current cups as the substrate and paint will stick to the cups. Then you will have a mess when you try to move the substrate once it is dry.
Also, if you don’t pick a point at which to finish and start the drying process, you may be tempted to keep tilting and/or just messing with your painting in general. The more you mess with it the more likely you’ll screw it up. Find a place to stop, move it carefully to your drying location, WALK AWAY, and leave it alone!
If you drip any paint while you’re moving the piece, be sure to clean it up before it dries.
How Will You Keep Your Finished Piece Safe While It Dries?
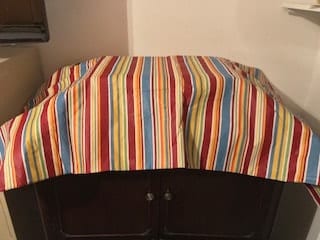
Next, you’ll need to cover the painting. Let’s assume you’ve decided to use the dresser as your drying area. You’ll need to drape a cloth over the painting so it will not be affected by ceiling fans, AC/heat vents turning on, pets and insects, etc.
-
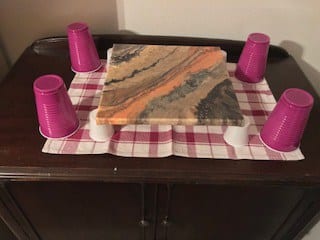
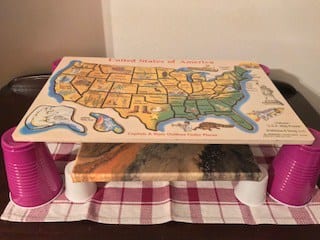
- I usually keep four tall glasses near the drying area and place a large piece of cardboard or even a large canvas board on top of the glasses. This will cover the painting. Now cover that with a sheet or cloth of some kind so that the painting has a safe, dry, protected area to dry for about 22 – 28 days (minimum).
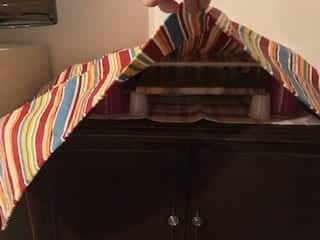
- If you have the luxury of a real wire drying rack, ensure that you have something (cardboard, for example) between each shelf to prevent top painting from dripping onto the shelf below.
- If you only have space to dry a single painting, then you can really only do one pour at a time. If you don’t want to be restricted to pouring once a month, get creative and find another spot! If you can construct several different areas as drying areas then you can pour that much more. The same principle applies to varnishing. If you don’t have a place to put the painting after it has been varnished then you are stalled once again. Once varnished, the painting really needs to sit, undisturbed for about a month.
Wrapping Up
Whether you follow all of my steps or only implement one into your own process, it doesn’t matter. What does matter is that you have given some thought to the “what next”s and “what if”s before you are faced with them!
I hope this was useful and I look forward to seeing your beautiful pours! What do you do to prepare for a pour? Please let me know in the comments below…

Born in France, Patricia now calls Palm Coast, Florida, home, where she runs Oceans Apart Studios. She’s had the pleasure of raising two daughters and nineteen medical foster children. Now she specializes in watercolor, acrylic pouring, and custom jewelry taken from the run off of her paintings. Her pieces aim to capture the differences that make each woman uniquely beautiful. Check them out on Etsy.

Thank you for your helpful tips xx
When my pieces are no longer “drippy” I have a great rack! Free wooden baby crib, took the two sides, cut them off to be even, put hinges on to make a V, holds about 10 pieces at a time, folds flat for moving, and I just love it!
So glad you found them helpful Sharon.
That sounds like a very smart way to repurpose a crib. Have you given any thought to pouring your crib? 🙂
That’s brilliant!
Patricia, thank you for the great ideas and your well-written, well-illustrated article. I’ve been pouring for a while but never took the time to make a dedicated drying area. Now I’m inspired!
Oh you’ve made my day Pam! I have a huge metal rack in my garage and I’ve put smaller shelves on the main shelves to give me more opportunities for additional canvases. This main shelf is completely covered with three king size sheets and I keep it covered at all times. This is my final drying area. When a painting comes out of the house (to make room for more) I transfer it to the garage for more drying time. After a full 28 days of drying, I varnish and it goes back on the covered shelf in the garage. Completely protected from dust and bugs. These stay a full month. Let me know what you come up with.
Do you have a picture of what you did? I can’t picture it. Thanks.
A picture of what I did? Do you mean a photo of the actual pour?
You are so welcome. Glad you enjoyed it.
Many thanks for your tips – am just reading up and just about ready to do my first pour – and yes I hadn’t given a thought to the drying bit????. Will have to make a space in the garage me thinks……..
Acrylic pours do take some time to dry, Jane. Make sure you leave them to dry in a spot where they won’t get disturbed/damaged. Good luck with your first pour and have fun!
I’m a total beginner (ie I haven’t started yet) – I’m at the stage of reading articles and watching videos.
I live on a tiny island called Mauritius situated in the Indian Ocean.
It’s very dusty and windy here, and I’ve been perplexed as to how I’ll be able to dry my pours without a layer of cement dust, gecko poop and dead moths/weird insects (when I finally get around to doing them!), so this article made me very happy!
Veronique, sounds like you have a challenging situation. I’m so glad my video helped.
God bless you. I am set up and ready to pour, but scared. How silly. Wish we could do our first pour together, LOL
It takes a month to dry ??? !!! Why? Is there any way to speed this process up? This will stop me being able to do this at all because I have active toddler and very full house and there is no way I can set aside space for a month.
Thank you so much for the very helpful tips. I have been pouring for about a year and the only “problem” I have it not enough space for paintings to dry. I’ve told my husband I need a space of my own-instead of the kitchen counter-to paint on. Maybe when we move in a year or so??? Very frustrating!