In this video, I share a few of my recent experiments with glitter and pouring medium only. My goal, and one day I WILL achieve it: a tree-ring pour that keeps distinct rings made only of glitter and pouring medium!
Supplies I used:
- Glitter
- DecoArt Clear Pouring Topcoat
- Liquitex Iridescent Medium (Experiment 3)
- Cups
- Stir Sticks
- Canvas
I recently broke in to my glitter collection and had a weekend of intensive glitter therapy. I decided to try using glitter and Liquitex pouring medium only. Since the pouring medium dries clear, I figured it might have a resin-like effect that allows the glitter to keep its maximum sparkle.
I mixed 15 colors of glitter and did a tree ring pour hoping that it would keep distinct rings when it dried. It didn’t keep its rings, but it dried with a beautiful color gradient and a gorgeous, glossy finish. Still, I wanted the rings!
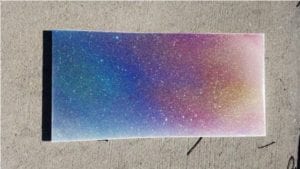
Since that weekend, I have completed several more experiments on this quest for pure, glitter tree rings. None of the experiments have been successful, including the three experiments in this video.
But that’s okay! I had fun experimenting with the sparkle, and that is truly all I need!
Experiment 1: Glitter + DecoArt Clear Pouring Topcoat
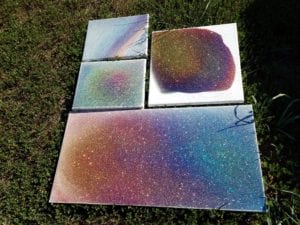
DecoArt Clear Pouring TopCoat is thick stuff. I decided to try it out as a pouring medium with glitter because of its thickness and its glossy finish. It seems quite a bit thicker than Liquitex Pouring Medium, so I thought that would help the glitter tree rings stay distinct. I added about an ounce of the topcoat and a generous amount of glitter to each cup, about two to four grams.
In this experiment I used seven colors; gold, orange, red, blue, purple, teal, and green. I first poured the colors I wanted in the center of the tree ring because they will pour out last. After I prepped all of the colors, I poured them onto the canvas using tree ring style—small, circular hand motions. I was extremely optimistic about this one!
The rings looked beautiful at first! I decided not to tilt it to see if the rings would stay that way. It dried with a beautiful, glossy finish… but no rings. Granted, the rings might have disappeared on their own, but the canvas was slightly off level so the paint slid off to the side and the rings were no more.
Experiment 2: Chunky Glitter + DecoArt Clear Pouring Topcoat
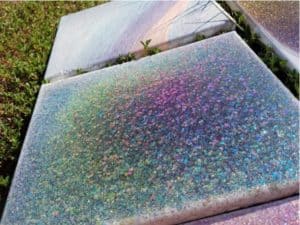
For the second experiment, I tried chunky glitter. It definitely adds bulk to the pouring medium, so I thought it would help the glitter tree rings stay distinct. I used DecoArt Clear Pouring Topcoat and glitter in the same ratios as experiment one, but this time with six colors: pink, brown+pink hearts, blue, teal+teal stars, green, and yellow+yellow stars.
It was pretty clear that the colors were going to blend on this one, so I went ahead and tilted the paint to cover the full canvas. I love the results of this one! The chunky glitter adds depth and gives the end result a beautiful 3D effect. The pouring top coat dried crystal clear, so the glitter is at maximum sparkle!
Experiment 3: Liquitex Iridescent Medium + DecoArt Clear Pouring Topcoat + Glitter (with a touch of water)
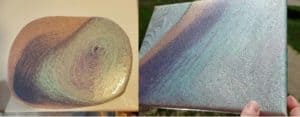
My supplies for experiment number three were Liquitex Iridescent Medium mixed with glitter. I love this iridescent medium, but it is semi-opaque so I figured there was a good chance the opacity of the medium would blot out some (or all) of the sparkle, just like paint does. I added a squirt of the DecoArt Pouring Topcoat and a splash of water to each cup in addition to the medium, to balance out the thickness of the iridescent medium.
I also hoped that these additions might counteract the opacity and allow more sparkle to shine through. I used gold, orange, purple, silver, and teal glitter in this pour. I loved the look of it right after the pour and had my fingers crossed for rings! It kept its rings better than the other experiments, but the medium did blot out the sparkle of the glitter after it dried.
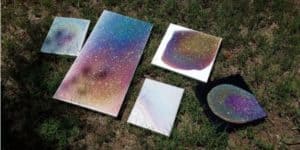
Even though I have not achieved distinct glitter rings, I love the effect this creates! I will definitely be making some snap jewelry from these glitter canvases. My husband thinks they could be used to create cool wallets, so I might try that, too.
I can’t wait to hear other ideas for what to do with these from the AP community! Please share your thoughts in the comments below or on the video! Happy Pouring!

Jenny Post discovered acrylic pouring in April 2017 and uses the therapeutic process to help manage the highs and lows of bipolar disorder and work-related stress. She enjoys sharing with and learning from the acrylic pouring community. You can check out her work on YouTube, Instagram, Facebook, and Etsy.

I think you should try the decoart pouring medium or Sargent Art pouring medium. Both pouring mediums don’t blend well with other colors and they don’t create cells very easily so I think that it would hold the ring shape . The Sargent Art pouring medium takes about two weeks before it’s not sticky anymore but it will stop being sticky as soon as you put a coat of sealer on top . I am inspired now to try a glitter pour. All of your attempts are still beautiful, none are failures .
Great effort here!
The closest I an get to tree rings with anything shiny is by using a medium called “Liquid Glass” clear version & glitter already in a glue – like medium, Found at any craft store. Ie then added Liqitex Flow Improved to get the glittery glue & Liquid Glass to move a bit better.
I need to purchase the materials first such as the paints etc.
just wondering instead of pour 1 glitter, 2 glitter, 3 glitter, 4 glitter etc.
how bout 1 paint, 1 glitter, 1 paint, 2 glitter, 1 paint, 3 glitter, 1 paint etc.
I’ve thought of using glitter, too, but have been convinced the paint pigments will swallow the glitter. Without paint, I end up with glitter on a white canvas or whatever I’m painting on. I haven’t tried this on canvas yet, but on a plastic planter, I put paint down first, let it dry and put glitter over it. It worked!
What about resin? Use resin instead of pouring medium?
Dear Jenny,
I am not sure how old this video is or if you have already found your magic formula yet for glitter tree rings but I had a thought while watching your video. What if you use graduated tubes with just one color in each and between colors use the liquid glass medium to stretch the rings, then instead of tilting the canvas, spin it gently to extend the rings to the sides.
I really liked your black canvas one or a dark color background, it makes it more dramatic with the sparkles.
Good luck with your pouring adventure. Remember there are no failures only lessons to be learned and expand from. ❤️