As artists, we have the unique opportunity to make beautiful gifts for friends and family during the holidays! As fluid artists, we have the added bonus of being able to take just about any household object and give it a colorful “upgrade”—which translates well into selling items during the gift-giving season, too.
With so many potential objects to pour on, it can be hard to narrow down items to make for family or to offer for sale. That’s why I’ve put together this helpful guide to keep you on track during the holidays and get the most out of your supplies, money, and time!
When to Start
First things first: if you are looking to give gifts this season, you really need to start making them now. Depending on the thickness of your paint and what you’re pouring on, dry times can range from five days to a month—and then you’ve got to account for sealing. Give yourself enough time to make a properly cured and sealed gift so that it lasts for a long time.
What to Give
Unless you’ve got a special project to work on for friends or family, there are a few common household items and personal gifts that are an easy hit every time.
Coasters
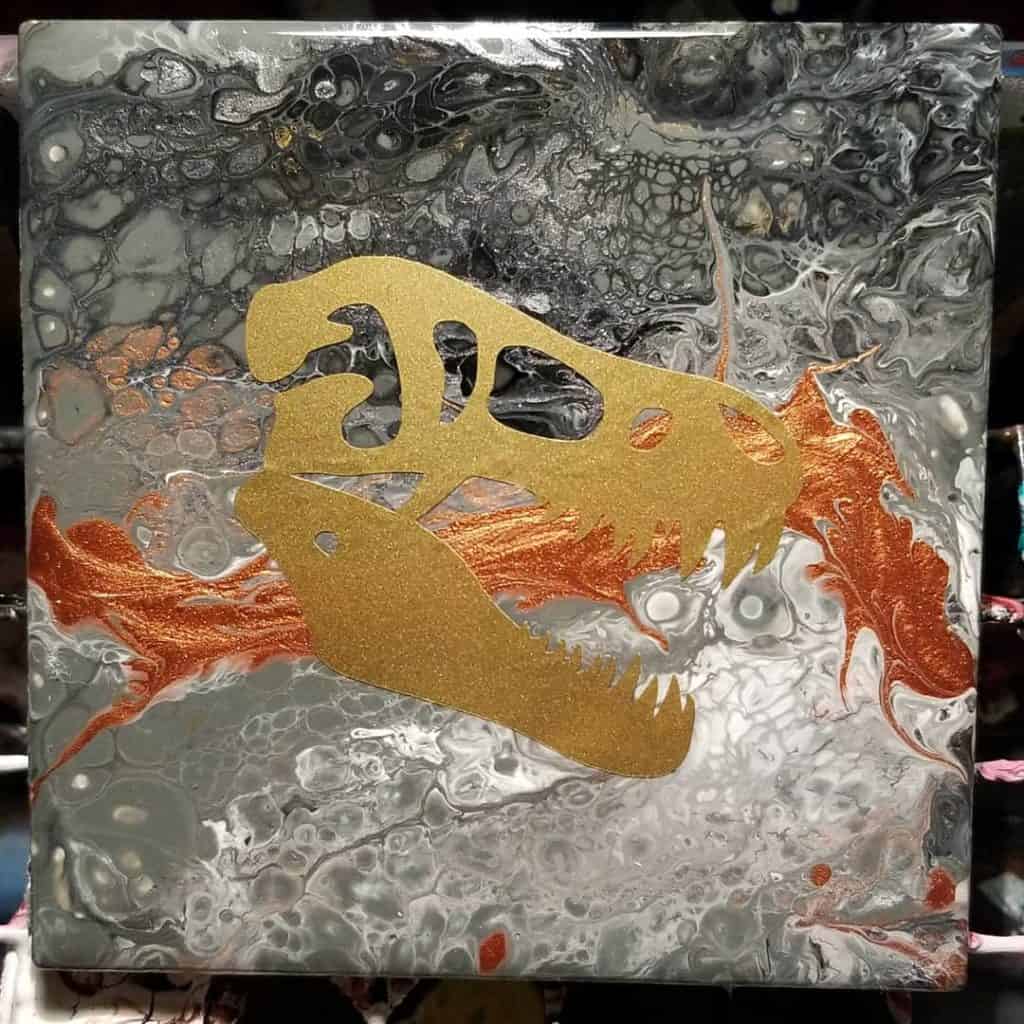
What’s more versatile than a coaster? Poured coasters are beautiful, unique, functional, and can be split up and displayed as little pieces of individual art instead.
[Insert Gift Guide_Image2]
To make a set of coasters, you’ll need:
- Ceramic tiles—I buy mine at Home Depot, it’s about $16 for a box of 104.
- Some sort of backing—I buy pre-cut cork squares through Amazon, which makes it much easier to quickly seal the backs. You can also use sheets of cork and cut them yourself, or use felt instead.
- Acrylic paint
- Sealant—I use Polycrylic for an initial seal, and Pro Marine Supplies resin for the finishing seal.
- Twine or ribbon
- Your business card or a tag with your company info
Step 1: First, clean your tiles with a bit of rubbing alcohol to remove any impurities from the surface. Then, place them on an elevated surface (I like to use overturned plastic cups to elevate them).
Step 2: Mix your paints. You’ll need about an ounce of paint per tile; I find that using a small medicine cup as a dirty pour cup works perfectly for the size of the tile. Keep in mind that you want just enough paint to cover the surface of the tile; using a thin layer as opposed to a thick layer will keep your paint from cracking, and will allow the paint to dry quicker and more evenly.
Step 3: Once you’ve mixed and poured your paints, allow your tiles to dry. From my personal experience, if I stick to the one ounce rule per tile, the tiles are dry within five days. Tile is different from canvas, in that when pouring on a canvas, you need to consider that the wet canvas must also dry. This is not the case for tiles and this is why they dry slightly faster. There are many schools of thought on drying times, but having poured and sealed over 300 tiles using this method over the course of about two years, I feel confident in my method.
Step 4: Seal your tile with Polycrylic or a sealant of your choosing. At this stage, you can also add metal flakes or glitter for a little extra shine! Allow your sealant to cure according to the manufacturer’s directions.
Step 5: This step is optional, but if you are marketing your item as a coaster, I would recommend sealing it with resin. I use Pro Marine Supplies resin personally, and I’ve had very good luck in testing and everyday use when it comes to setting hot cups on them. There are other great resins out there too, like Art Resin, that will really give dimension to your coasters and keep them bright and shiny for years to come!
Step 6: After your last coat of sealant has cured, use cork or felt to cover the back of your tiles. Doing this will help protect the recipients furniture from scratching if they choose to use them as coasters.
That’s it! From start to finish, a set of coasters typically takes me about 10 days to make.
Serving Platters
Serving platters are a big deal right now; embellished wooden boards, painted marble slabs, all of these, when sealed, are great for displaying food or decorations.

To make a serving platter, you’ll need:
- A surface—I purchased a thin slab of marble from Home Depot for about $6.00. Many large stores like Home Depot and Lowes sell marble, granite and slate, along with assorted pieces of wood. You can also go to a local lumber yard or quarry to find truly one of a kind surfaces.
- Paint
- Resin
- Handles (optional)
- Frog Tape or other painter’s tape (optional)
Step 1: Prepare your surface by cleaning it with rubbing alcohol; this will rid the surface of anything that could stop the paint from adhering.
Step 2: If you only want to pour on a portion of the slab, use Frog Tape or another painter’s tape to section off the desired area. I prefer Frog Tape because it seems to offer very clean lines as opposed to the blue tape I’ve used in the past. Make sure to firmly secure the tape so that your lines stay clean.
Step 3: Time to pour! After you’ve poured on your slab, let it dry for about four to six hours before pulling off the tape; that way, your paint has plenty of time to solidify slightly so that you can maintain a nice, crisp line.
Step 4: After your paint is cured, decide how you intend for your piece to be used. Will it be used to display food? If so, I’d recommend using a food-safe resin like Pro Marine Supplies or Art Resin. If it will just be a display piece and you’d rather not use resin, sealing with two or three coats of Polycrylic will do the trick.
Step 5 (Optional): If you plan on adding handles to your tray, you can either do this before or after you seal. If you do it before, you’ll want to make sure you tape off your handles to avoid a messy look. If you choose to add handles after, make absolutely sure that your sealant is cured completely or you will risk blemishing your piece when you drill the holes for the handles.
Handles can be found in many shapes and sizes, but I like bar cabinet handles the best. There are many different designs and colors to choose from, and if you have the right bit, you can drill through just about any surface. Just make sure to follow safety instructions before doing this, and don’t be afraid to ask your local hardware store for a hand!
Jewelry
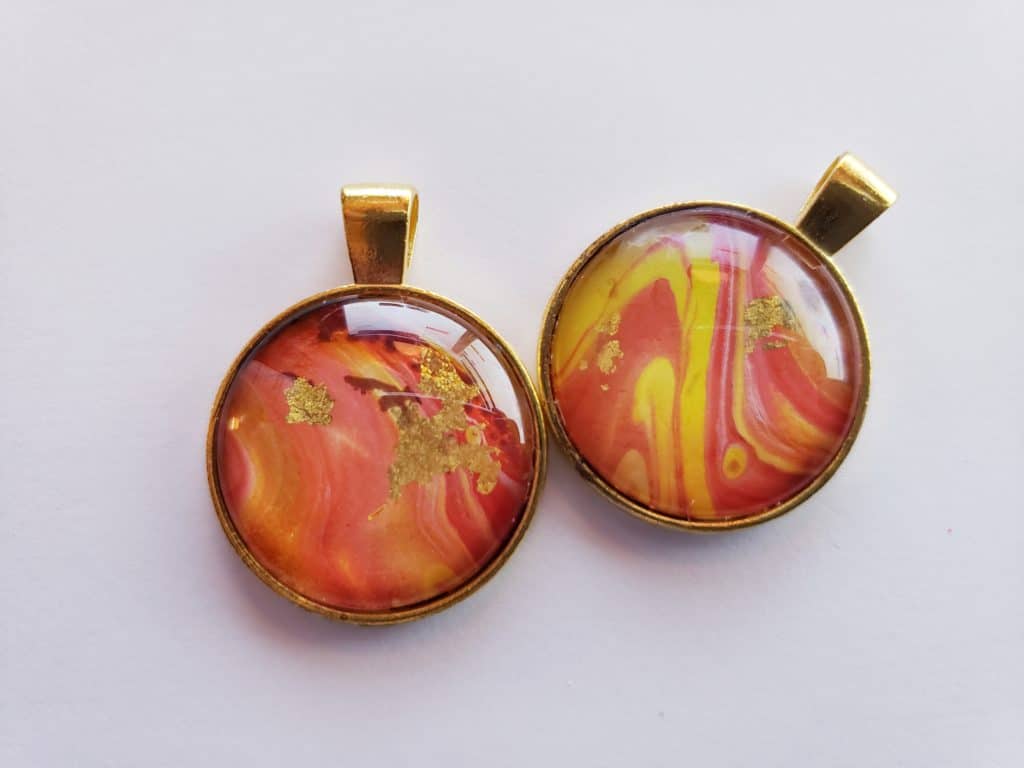
Fluid artists are very familiar with making jewelry out of skins—a method that uses your runoff paint and makes beautiful, functional pieces that your family, friends or customers can carry with them everywhere!

There are many different types of jewelry you can make, and many settings to choose from. If you aren’t familiar with jewelry making, I would suggest taking a peek at Amazon or Etsy for pendant trays, which are trays with a lip that hold skins or freshly poured paint perfectly. You’ll also want to grab cabochons to place on top of your skin/paint inside of the tray once you’re done. Cabochons are a great finishing touch to your tray—they give the piece a lot of dimension and make it look three dimensional!
Things you’ll need:
- Pendant tray of some sort—There are a ton of options! Earrings, pendants, bracelets, rings…you’ll be able to find many styles and options through Amazon or Etsy.
- Glue—Popular glue choices are E6000 and Diamond Glaze. These glues dry clear and are very, very strong, so be careful!
- Paint or skins—You can either make a teeny tiny pour inside of a pendant try, or pour paint onto wax paper or aluminum foil and allow it to dry into a skin. Just make sure that no matter what method you choose, you pour in a very thin layer, or you may not be able to fit the paint into the tray comfortably.
- A round punch—Typically found in scrapbook sections, these hole punches come in a variety of sizes and make paint skin cutting much easier!
Although the steps for making jewelry are going to depend slightly on what you decide to make, the basics are the same.
Step 1: Clean the inside of your pendant tray with alcohol to get rid of impurities. This will help your glue stick and keep things firmly in place!
Step 2: Place a small drop of glue inside of your pendant tray; the size will depend on the size of the tray you have. If you are using a 25mm tray, for example, use a bead roughly the size of a lady bug. Then, use a toothpick to spread the glue around.
Step 3: Attach your skin to your tray and press firmly down. Use a cotton swab with nail polish remover to clean the sides of your tray if any glue spills over; let set for 15-20 minutes, depending on the glue manufacturer’s instructions for drying.
Step 4: Spread a thin layer of glue over the back of your cabochon, careful not to touch the underside of it with your fingers (you don’t want permanent fingerprints!). Then, place your cabochon into the pendant tray, on top of the skin. If you are wearing gloves, hold your pendant and cabochon firmly between your pointer and thumb and press down. If you aren’t wearing gloves or don’t have the dexterity to pinch hard, use a clamp with rubber ends to squeeze the cabochon to the pendant. I typically let each pendant sit in a clamp for about 10 minutes, and then allow them to dry overnight before using.
Other Gifts
Small bowls with a paint pour sealed with resin in the bottom also make a great gift as ring bowls, trivets are all the rage, and of course, classic wall-hanging art is always a great gift! When it comes to acrylic pouring, you’re only limited by your imagination when it comes to what you can pour on; but hopefully, this guide will help you find some direction this holiday season.

Sara Wagner is an author and artist from Upstate New York. She is the owner of Studio Blackwater and can typically be found covered in paint, cats, or her two young daughters. You can find her on Facebook and Instagram as @studioblackwater.

Love the serving tray.
Serving trays and platters seem to be very in right now.
Great explanations. Thank you! Resin is very expensive. Is there an alternative?
Resin can be pricey, but if you are looking for something heat safe and especially something durable for coasters, there isn’t an alternative I’m afraid.