I love acrylic pouring, but I can only do so many dirty pours, flip and drag, and swipes on canvas. I need variety! At a certain point in any pouring session, I have to start playing. I can’t draw to save my life, but I can get creative and think of new things to pour over, under, through, and of course to delightedly pour on.
So I decided to go on a scavenger hunt of sorts and try to find five new and exciting objects to pour on. If you’re like me, pretty much everything you see prompts the thought, I could pour on that! I even mentioned to my husband how cool that 2,000-pound boulder in the front yard would look if I poured on it. I didn’t get the response I wanted but was the one I expected.
I’m not talking about going out and buying something bright, shiny, and new. On the contrary, I sought out items that someone was tossing out, which I lovingly call “found items.” These are things you find at garage sales, thrift stores, in a forgotten corner of the shed, or even while out enjoying a nature walk.
Supplies I Used
Floetrol Latex Flood
Liquitex Varnish Gloss
Alcohol 99%
80 grit sandpaper
Spray varnish
Artist spatula
Acrylic paints (see each section below for details)
Shell
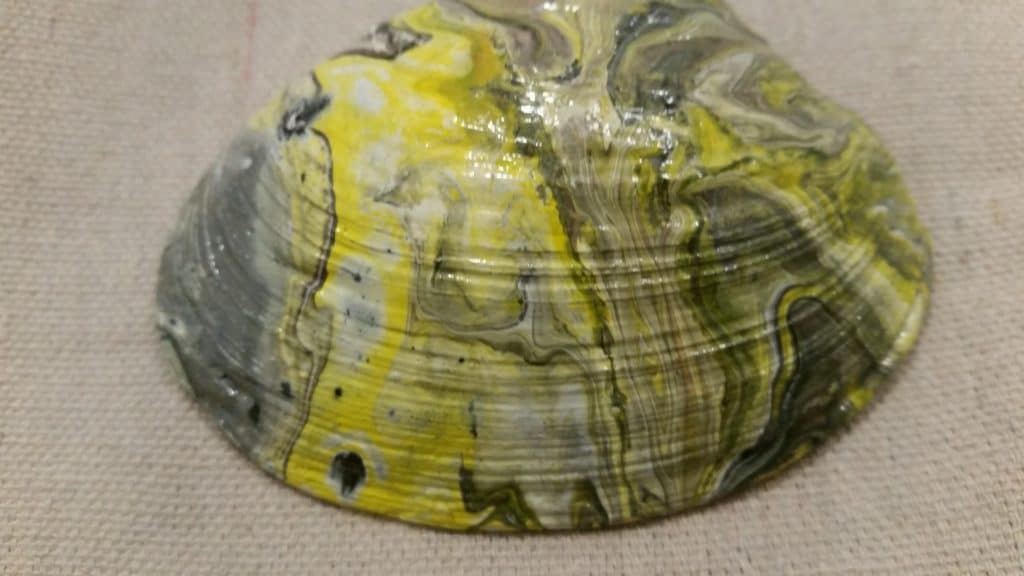
Occasionally I stroll along one of the beaches close to our home. There are always a ton of shells washing up, especially after the storms, and although I’ve been collecting them for a few years, I have never thought to pour on any. Brain fog, I guess! So, item one is a nice, plain white shell that “desperately” needs some color.
I didn’t need to gesso the shell. Since it was a rough surface already, I knew the paint would hold. Take in that amazing texture! Just like when working with natural wood, you can see and feel all those marvelous ridges.
I simply created a dirty pour (no base coat added), let it dry, cleaned it, and then finished the shell off with Liquitex Varnish.
Literally that simple. I didn’t even manipulate or tilt it. Note: If you try to pour on the inside of the shell, you will need to gesso first. Paints used: Artist Loft Titanium White, Deco Art Sea Glass, Winsome & Newton Mars Black, Liquitex Basics Cadmium Yellow.
Picture Cube
I purchased the next found item, a rotating picture cube, for 99 cents from Goodwill. (I think I saw them unfinished at Michaels a few years ago.)
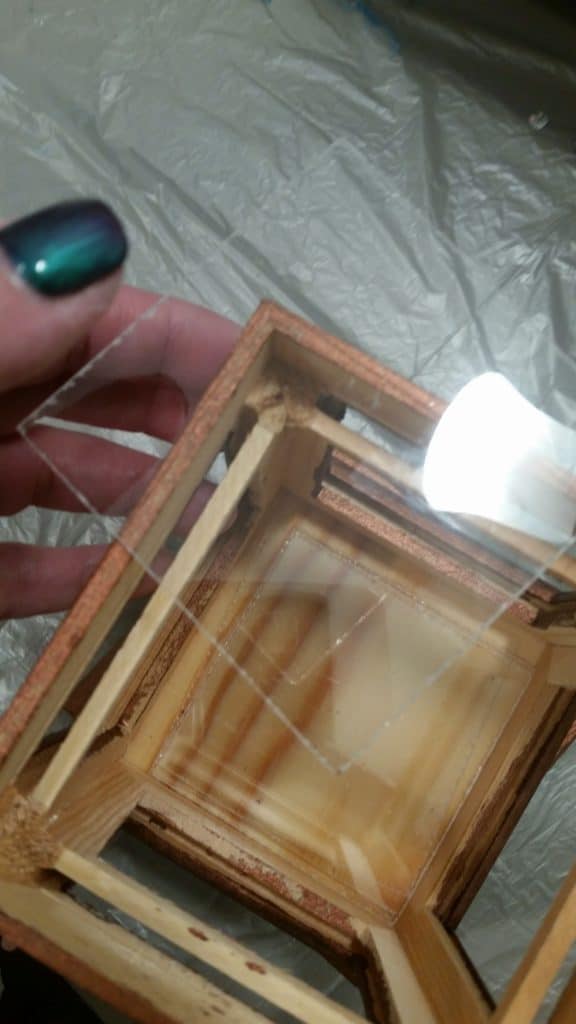
I brushed on some Liquitex Basics Burnt Umber to give it a stained look and pulled the four sliders out to do a simple mini dirty pour on each. Due to the size of the object, I didn’t worry about a base coat. (
Once all the pieces were dried and cleaned, I used Liquitex Varnish to finish them. It wasn’t as high-gloss as most items I use it on, so I’ll probably add a couple more coats to the sliding parts only. Paints used: Liquitex Basics Burnt Umber, Artist Loft Titanium White, Deco Art Sea Glass, Winsome & Newton Mars Black.
Scrap Wood
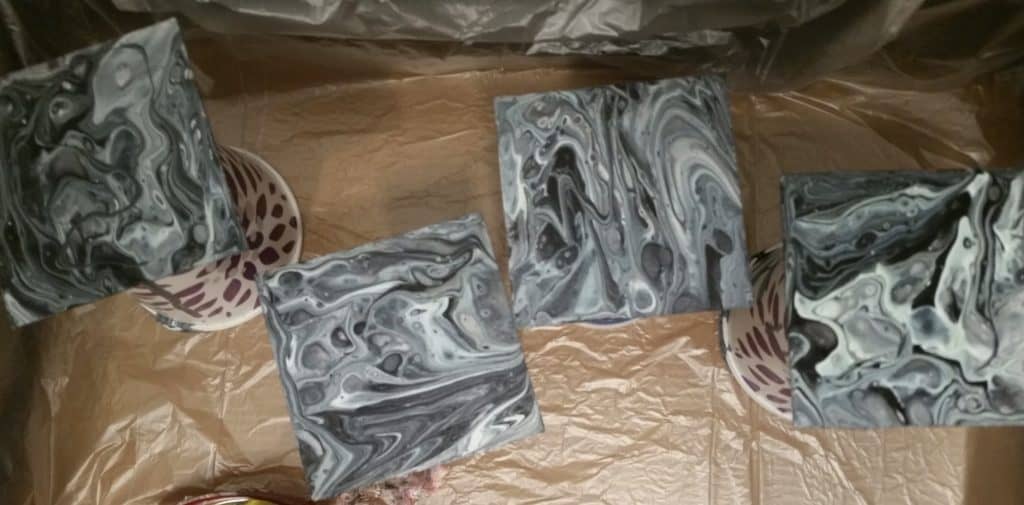
The third piece was a gift of garbage from my husband. Better than it sounds. He gave me several pieces of wood that he was ready to toss into the burn pile. So I took a 20-by-20 piece of plywood, sanded it until smooth, and sprayed it with a clear varnish to seal it. Then I did a simple dirty pour.
There were a couple of areas that I decided to swipe, but overall I felt happy with the result. Once dried and cleaned, I used Liquitex Varnish to finish. Paints used: Artist Loft Titanium White, Deco Art Sea Glass, Winsome & Newton Mars Black, Deco Art Primary Blue, Folkart Metalic Blue.
Planking
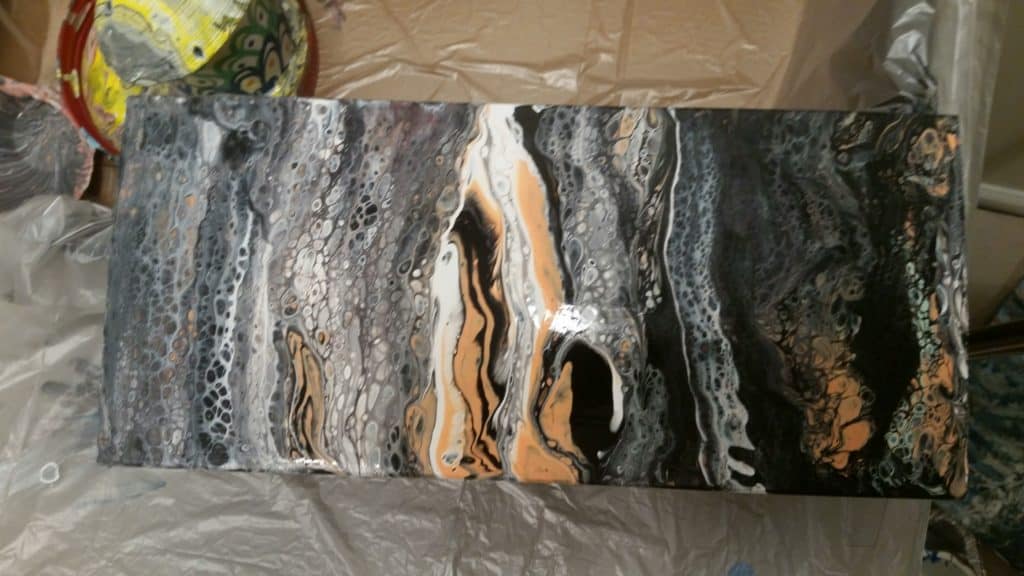
The fourth item was a smaller piece of planking (4 feet by 12 feet) that I found at the back of our property. I don’t know what type of wood it was, but there wasn’t much grain, so like I did with the plywood, I decided to cover it completely. Once again, I sanded it to create a smooth surface and then sprayed it with varnish to seal it prior to painting.
I decided to zig-zag the colors on half of the plank vertically, and the other half horizontally. Hated it! So I started swiping, one small stripe at a time, stopping just at the right point to see the middle strong colors and contrast making an incredible statement.
Once dried and cleaned, I sealed it with Liquitex Varnish. I actually like it, even though it has a lot of orange, and I really hate orange! Paints used: Artist Loft Titanium White, Deco Art Sea Glass, Deco Art Coral, Winsome & Newton Mars Black.
For all of the above projects I used a 1:3 mixture of paint to Floetrol with drops of water to thin as needed. No silicone used throughout.
Tile Board
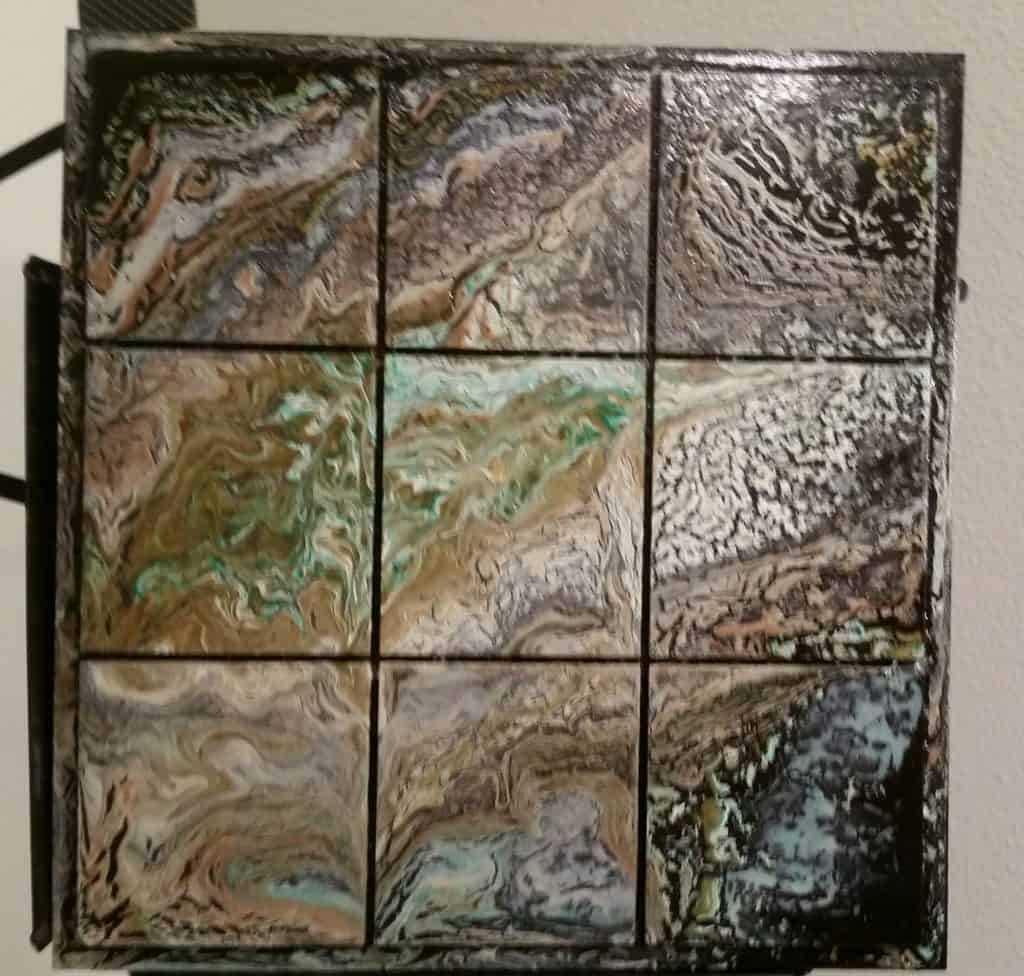
For my final found item, I was totally excited! This came from Goodwill for $2.99; it’s called a Tile Board Art Set, by Provo Craft. I was excited because it is basically a thick MDF board with cut-outs, which can be cut and used in any format (single tiles, four-patch, two to three in rows, or as I chose, leaving it as a nine-patch). I did find one online at Amazon for $14.
I used Rust-Oleum 249058 Painter’s Touch Multi Purpose Spray Paint, 12-Ounce, White Primer to prepare the tile board. I mixed my paints and created my pour cup, then set them aside.
Here’s what I used to create my pour cup:
- Artist Loft Mars Black 1:3 paint to medium.
- Liquitex Basics Burnt Umber 1:4 paint to medium
- Craft Smart Metallics Rose Gold and Pearl White, 1:2 paint to medium
- Deco Art Metalics Festive Green, 1:2 paint to medium
- Folk Art Metalics Emerald Green, 1:2 paint to medium
- Behr Interior Latex Tea Stain, 1:1 paint to medium with a few drops of water to thin
- Floetrol Flood Latex used as medium, No water, I wanted to keep it thicker than normal.
Next I mixed the black base layer. I had to mix this literally right before I started the base, as it is much thicker and dries really crazy fast, much more so than the normal fluid base layer.
Note: There are two different Elmer’s Glue All products used here, below. I don’t know if the same results would be comparable if only using one product. But, if you only have one Glue All, try it on a piece of old wood and see what happens before you use it on something you want to keep.
Mixing the base last: Artist Loft Mars Black 1 part: Elmer’s (Glue All) 2 parts: Elmer’s (Glue All Interior) 2 parts: Floetrol1 part. The mix was definitely thicker than normal.
I then sprayed two full sprays of 99 percent alcohol into the mix and again mixed thoroughly. Working fast and using a wooden stir stick, I filled in cracks between tiles, on the sides, and lastly on the tops of tiles. It was setting up really quick, and I didn’t have time to take pictures.
I started with a center tree ring pour, but because the black base is so thick, it doesn’t flow well. So I added three additional random smaller tree rings to fill in space. Obviously, if I had started with a larger amount in my pour cup, it would have been enough for one tree ring. I had one medium in middle about six inches wide, then added three additional (one three-inch and two two-inch rings).
Once I had poured my cup, it was pretty thick over top and you couldn’t even see the tile grooves as there was so much paint. I tilted it as much as possible, but the base is so thick, it wouldn’t move any more. I used my heat gun, running quickly over the surface; “and then” add 2 sprays of alcohol over entire project.
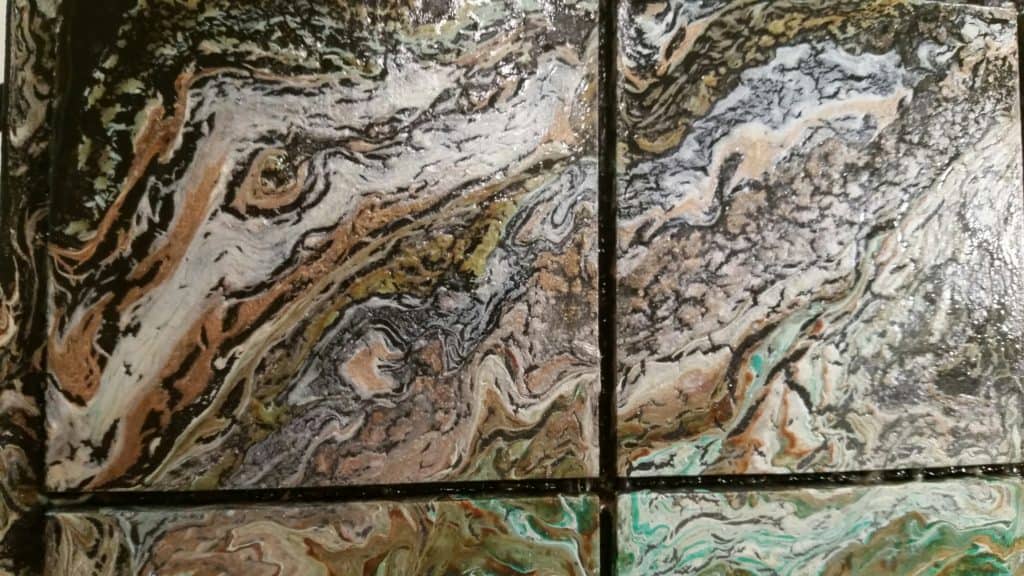
I let it set overnight, and must say I’m very happy with the results. Between the varied glues, alcohol, brands, and mixes of paints, a miracle happened as it dried. My pours were covering all tile grooves, but when it dried, they are nothing but black. I wasn’t expecting that; I thought the grooves would be the same as the tree pour paints.
Definitely an awesome surprise! The paint has cracked evenly across the project and definitely looks like wood to me from every angle! It automatically created its own varied texture as well.
I hope this inspires you to look at found items in a whole new way!
Since she began creating art in 2007, Tina Swearingen’s focus has evolved from repurposed conceptual art into the creativity and flow of acrylic pouring. Her pours are inspired by the movement and colors of Southern Arizona’s amazing thunderstorms, and the majestic beauty of the Pacific Northwest, which she now calls home.

Really interesting!
Thank you Angel, I had a lot of fun experimenting.
Hello. I tried outing on timber and it just kept peeling off. What am I doing wrong ?
Hi Narelle,your timber may have had a little oil on it. Peeling is usually a sign of previous oils or varnish, basically something slick which limits the paint to adhere to the surface. Try using a fine sandpaper (200-400 grit) which will clean the surface but also give just a bit of fine texture for the paint to adhere to.
Like you, I can’t draw (not a tiny bit), I get bored with same ol’ Pour, so I greatly appreciate your sharing your ideas!! These are fabulous. I’m working my way thru a big pile of CD’s of old software from the 90’s and a couple of pieces of garden art. Then going for a scavage run.
Where in NW are you? I winter in Tucson and summer in Renton, WA
Hi Dian, Thank you! Trying new things keeps me motivated. I lived in Casa Grande, Az for 50 years, then we moved to Gig Harbor 4 years ago. IF you want more ideas, I have another article coming out this week with more ideas for the non-drawing folks, “5 ways to salvage a pour”. ????
what did the alcohol do?
Marjorie, Alcohol typically will produce cells in a regular thin pour, but in this “heavy thick mixture” it cracks the paint giving it that aged wood effect.
What fun -inspiring ideas -hmmmmmmmmmm what to cover next LOL
Thank you!
Hi, i have a piece of veneer covered ply. Woukd you advise me to varnish before pouring? TIA
Shalaka, veneers are typically already a smooth surface and when you pour over them, they turn slick and your paint likely will not adhere well. I would highly suggest you Gesso the area you want to pour over first. I use Pro Art Gesso canvas primer from Amazon.com, but any good Gesso will work. Make sure the Gesso dries throughly before you start your pour.
I also pour on record albums