I fell in love with rock painting through a couple of different kindness rock groups that I found online. I participated in that for about one year and then I happened to be on the internet one day when I saw a video on acrylic pouring. I was mesmerized by this technique and wondered if I could use this method on my work? I decided that I was up for a challenge and that I would give it a try, on rocks!
Why not, I reasoned with myself and thought, what do I have to lose? So, I searched and watched any YouTube video or article I could find on acrylic pouring using other mediums; However, there really wasn’t much information available on the subject of rock painting.
Eventually, after a lot of research and trial and error, I found a way to take advantage of painting rocks using my own style.
I have been experimenting with acrylic pour techniques for just over two years now. I am loving every minute I spend to paint rocks.
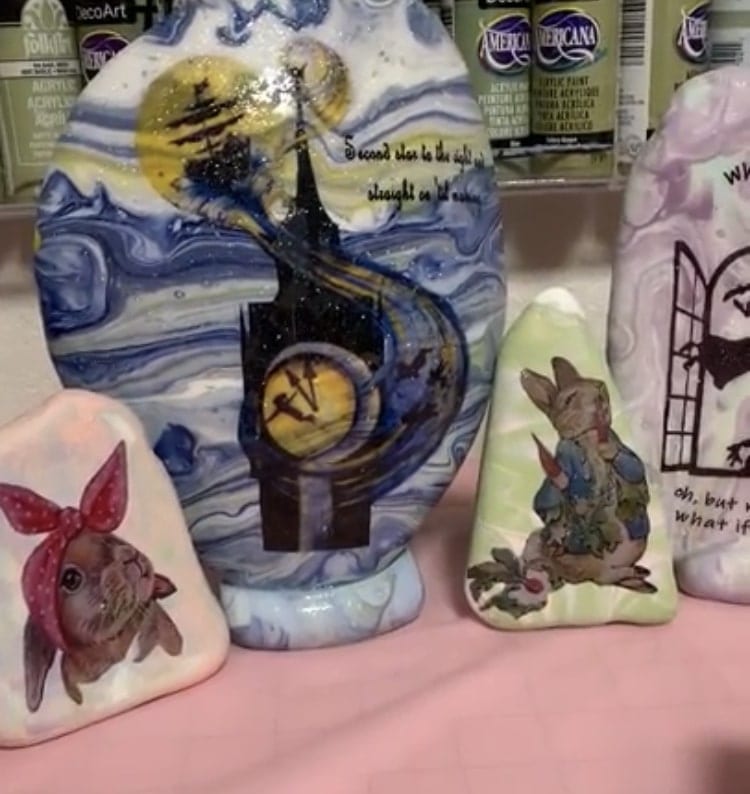
To prepare river rocks for acrylic pour:
- Dry brush the rocks to remove excess dirt and debris.
- Wash the rock(s) in dawn dish soap and a small amount of bleach, I use bleach to help destroy any bacteria or foreign matter on the rock.
- Rinse well, let dry on wire rack for at least 24 hours.
- Apply two coats of Gesso for good paint adhesion. Let that dry for 24 hours.
- After the rocks are gesso’d and dry, it’s important to handle them with gloved hands only. This helps to prevent oil or dirt from your hands transferring to the rocks.
All this while, I am mentally working on different rock painting ideas and inspirations that I have collected since I last painted rocks.
Let’s begin pouring!
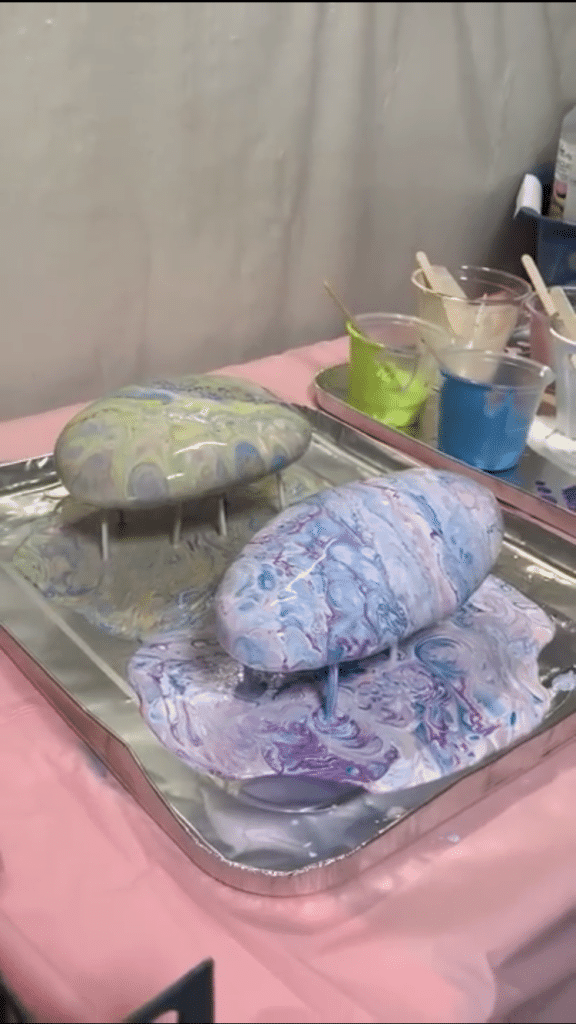
First, I set up my pouring area. I like to use plastic table cloths from the dollar store, aluminum foil lids for buffet pans and pizza savers to hold my painted rocks for drying.
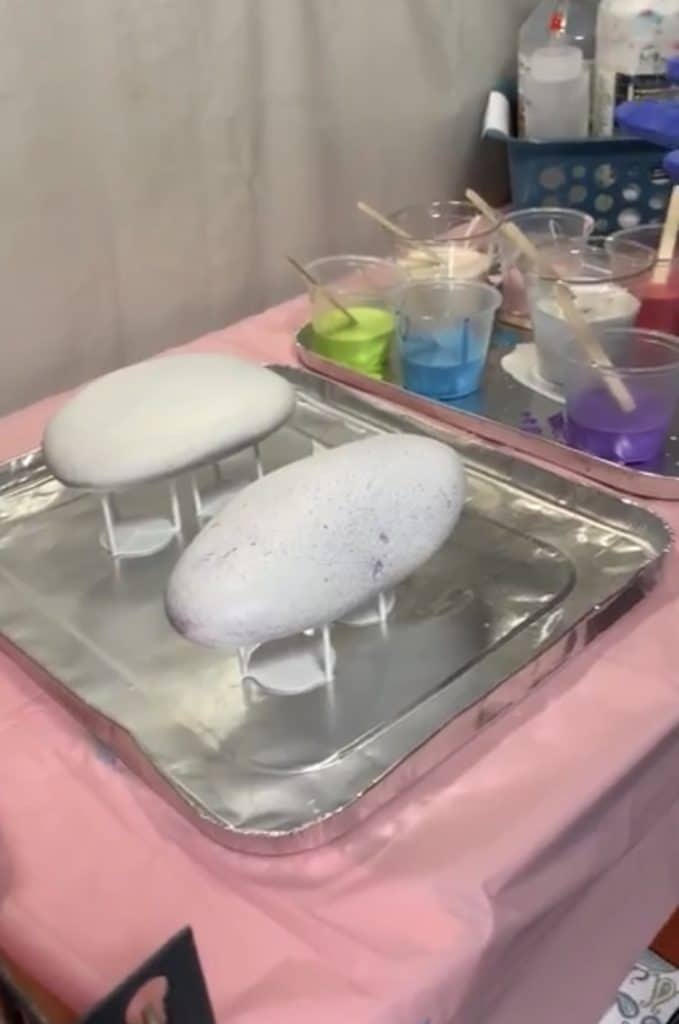
I choose the colors for the rock art based on the image I am going to put on it. I will use anywhere from three to seven colors for the pour. As far as rock painting supplies are concerned, I like to use white acrylic paint or pastel colors for my buffer paints (the colors that go between the different layers of acrylic paints)
Once all of this is completed, I will be ready to mix the paint.
Now back to paint mixing.
Floetrol is my mixing medium of choice. The amount needed for different paints varies from rock to rock. An easy rule of thumb is to mix the Floetrol and paint until the mixture is the thickness of heavy cream.
Double-check the mix by loading a stir stick with paint then tip so the paint can “flow” off the stick. If it is the consistency of a glob the paint is too thick and if it is runny it is you will need to thicken it up by adding more paint.
Some, heavy pigmented paints like artist’s grade paints will need considerably more medium. I have a mixture of 90% water and 10% Floetrol I use to help mix the heavy bodied paints, adding a little bit of this mixture before adding Floetrol helps with blending the paint. This mix will help to prevent breaking down the polymer binders of the paint, which can cause the paint to lose its color.
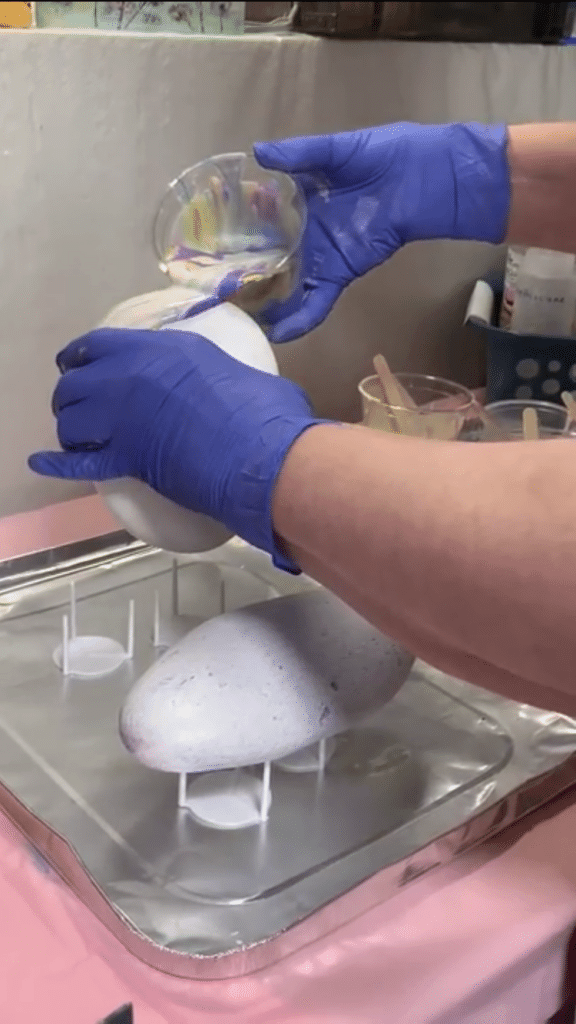
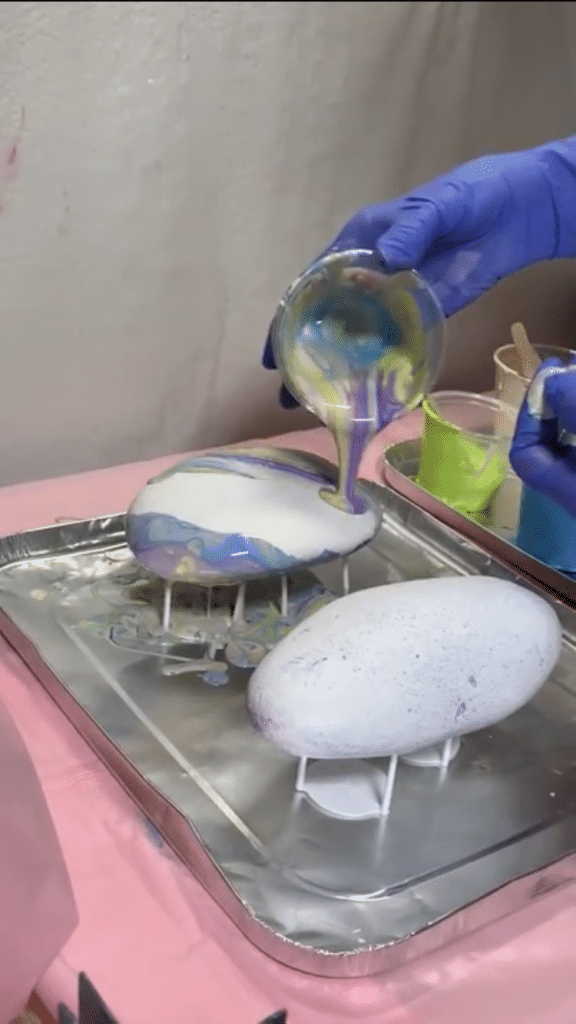
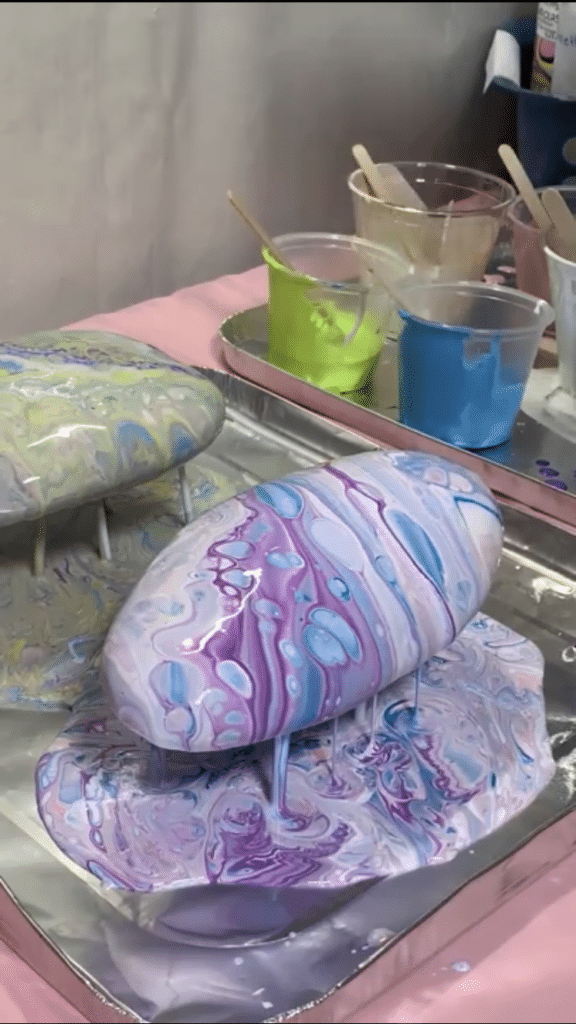
When I pour, I hold the rock with one hand and pour over the entire rock. Pouring this way gives the rock a more completed and even look. Place the rock on the upside-down pizza savers to dry for at least 24 hours or longer depending on the paint that was used in the process.
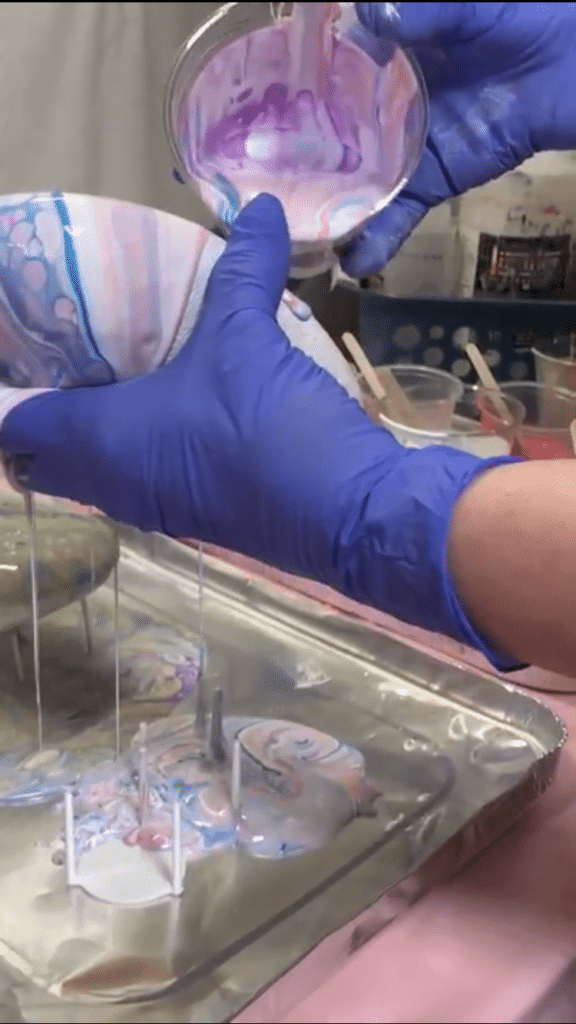
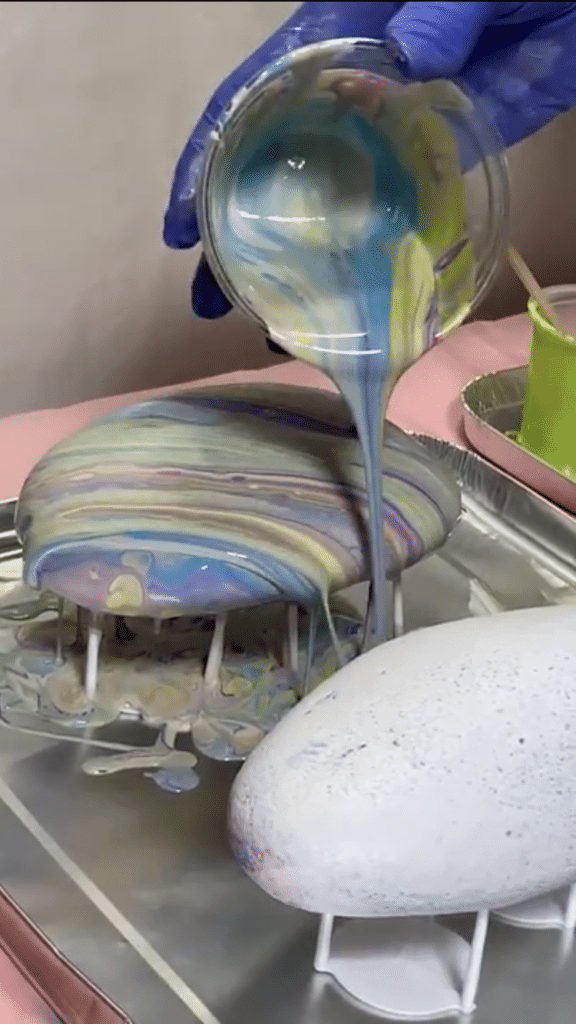
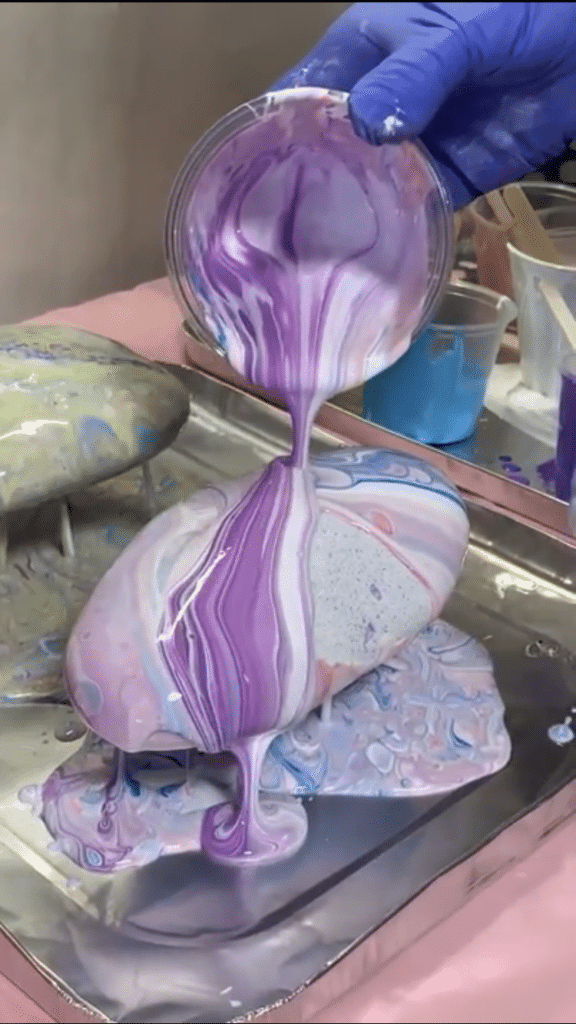
Thanks for taking time to pour rock with me!
Frequently Asked Questions About Rock Painting with Acrylic Paint
1.Will acrylic paint stick to rocks?
Yes, both water-based paints as well as acrlic paints stick well to flat rocks.
2Do you have to seal acrylic paint on rocks? What do you use to seal painted rocks?
Yes! Once you are done painting rocks, you should absolutely seal them to protect your paint in the long run. You can seal the painted stones using an acrylic varnish with UV protection. The idea is to use a polyurethane product, that doesn’t turn yellow when exposed to sunlight.
3.Do you need to prime rocks before painting?
Yes, before start to decorate rocks, it is crucial to prime them. You should start with a white base coat of primer, or a coat of acrylic paint. Not only will this give you a better surface to work on, but will also help enhance the look of your chosen paint colors.
4.What is a Dirty Pour?
Dirty Pour is just another name for Acrylic Pouring. It is essentially a paint pouring technique, wherein you mix mutiple paint colors in the same container, and then pour in on your chosen surface.
Please check out more of my art at the following link Painted Rocks By Cat
You are also welcome to come visit my Rock Auction Group, Rock That Art

This is so so so so good! I have an idea for a pour and your rock pouring is showing me it will be possible! So freaking pumped now. Thanks for this inspo!
Thanks for commenting! Would love to see what you have been inspired to do!
These are lovely and I am excited to give it a try but wondered what you do with the underside of the rock. Do you cover it with a material of some sort or do you paint that also?
Hi Jen, the back of the rock is poured at the same time as the front. That process gives the rock a completely finished appearance.
But how do you keep your fingerprints off?
If you placed a canvas under your rock you might also create a regular painting with the overflow…just a thought
Hi Marilyn, excellent suggestion. I will definitely give that a try. Thank you
Thank you !So great idea ..
Thank you!
These are wonderful! Thank you for posting! Do you add a protective finish after the rocks are cured or are they good to go just as they are?
Thanks in advance.
Elizabeth
Hi Elizabeth, I do I usually resin my rocks.
What brand of paints do you use? There is so much paint wasted and practice may be costly. Do you have some paints mixed w water and floetrol and some paints w just floetrol? Do you use one drop at a time for the right texture?
Looking forward to getting home from vacation & start a rock pour. I’ve been painting rocks since 2016. I also create pavers & paint them.
You do realize that taking rocks from a beach is against the law? And subject to fines?
Rocks serve a purpose – to cut down erosion. So next time you see a beach flooding…think of all the people gathering rocks for their pour.
Come on people, use your head. There’s a reason why local governments buy and lay down beach rock,
@ Chris
I’m not sure she said where she got her rocks from…….
@Chris – you realize you can BUY rocks at Home Depot, Lowe’s, Walmart garden center, Michaels (for smaller quantities)?
@ chris she doesn’t say get rocks at beach. she may not even be within a hundred miles of an ocean. rocks can be found in a few other places. I have seen them myself.
You can purchase river rocks at Home Depot, etc and on Amazon.
I must have missed where she said she used beach rocks! Good Lord. Haters gonna hate.
I think there are plenty of rocks for both! Don’t be such a hater!
I thought there was a video? I would have loved to see how you actually did it and how you avoided the “touch marks”. Thanks!
I thought there was a video? I would have loved to see how you actually did it and how you avoided the “touch marks”. Thanks!
Thanks, I have done some rock pouring, but didn’t do the bottoms. Where do you find the pizza savers?
You can but 200 on mason for $11.95
You can get them on Amazon as well.
I have been wondering how to do this, as I have been trying (without much success) to do pain pouring on canvases. That’s so much but I can’t seem to save this. Do you have a UTUBE channel. Beautiful by the way thanks for sharing x
Correction 200 on Amazon for $11.95
Where do you get the little plastic pizza thingies?
Very pretty. What do you do with the rocks once your done? What is their purpose?
Thanks for showing all us of how. You do beautiful work. I found you on Pinterest and followed your link. I am late to the game, seeing the dates on the previous comments. This type of art will never go away. People just tend to improve on what you taught them. I was wondering if glitter can be added either to the pour or afterward? I think I would love to see a vain run through the paint. Would that be a separate pour, do you think in something clear like pourable vanish? Thank you again. I hope you are still doing your artwork.