When you decide to get started to do some acrylic pours, you might alternately get inspired and then overwhelmed by the amount of talented and creative people out there. You might have trouble figuring out precise recipes and what basics you really need to get started. STOP! Beautiful acrylic pours are in your horizon, and it is easy. I started from watching one YouTube video, kept watching one after another, and experimenting. Now I find myself surrounded with beautiful art, selling my art, and sharing my love for art and acrylic pouring with others.
TIP #1
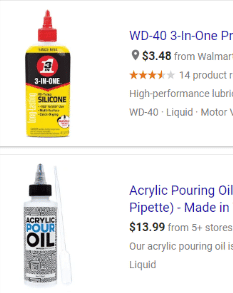
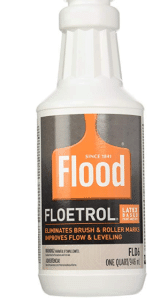
Start with a basic recipe of about 3 parts Floetrol to one part paint. Add in a couple of drops of silicone. Have lots of disposable gloves, cups, popsicle sticks, straws, and a blow dryer handy. Also, a torch is really cool and very helpful. It is cheap and really worth it. Have a space designated for mess. I use disposable plastic tablecloths for easy(er) clean-up.


TIP #2
Pushpins! Some people use a cooling rack to allow for the paint to drip off, but I found that once I have paint mixed, I end up doing many more canvasses than I originally intended, and I don’t have enough cooling racks. I like having multiple canvases ready, with pushpins in the back of each canvas so that the paint can drip off happily without drying to the table surface. Small containers for extra paint mixtures are also very helpful, so that you can save some valuable extras for another time.


TIP #3
The quality of the paint does matter, but in the beginning getting a basic variety of colors is necessary, and you will need lots and lots of black and white to experiment with negative space and for the background colors. You might want to pick up some metallic paint or fine glitter, which is easily available in Walmart or on Amazon .
TIP #4
The clearance at Michael’s. I have found beautiful odds and ends that I have used as embellishments or inspirations for pieces. I also have found great deals on select high quality paints or random paints (liquid acrylics, airbrush paints) that were very lucky finds and ended up really jazzing up my art.
TIP #5
Keep trying out new ideas and using a variety of surfaces and sizes. “The more you work, the luckier you get” definitely applies to acrylic pouring. There were many times that I had a wonderful plan and it flopped. Then, on a whim, I tried something else, just for fun, and that became my new favorite. Any tool or household item can and will be the next coolest thing in acrylic pouring. You can be the one to introduce that next thing as long as you keep playing around.
TIP #6
Keep watching, and learning, but keep experimenting. Always have something on your “I can’t wait to do” list. It’s easy to be an observer but much more invigorating to be a creator. Also, don’t be afraid of honest feedback. I ask my teenage daughters, they want me to succeed and they are brutally honest. I love it!


Have fun and the wonder of acrylic pouring will never end!

Eeta Travis is a Baltimore artist, elementary school teacher and mom of four teenage daughters.

Thanks for the tips and encouragement!!
I have wanted to learn to paint for years but haven’t tried. The acrylic pouring fascinates meme.
Thank you for the guidance. I am 100% addicted to Acrylic Art, so much so that I sell so I may buy more painting and medium. I started in February to calm my nerves, anxiety can be horrible. Mixing paint relieves so much stress, miracles do happen. I paint and try to do it well as a tribute to my son, he was killed in a traffic accident last September. Golden Colors sent me a box of paints and medium that are first quality. I want to thank them so very much for the help. Also make coasters, trivets, and jewelry.
We’re glad to help! And we see a lot of people turn to acrylic pouring to help deal with anxiety and stress, we’re glad it’s helping you, and so sorry about your son. That’s such a difficult problem to deal with. We wish you the best!
I’m sorry about your son.
Mixing the paint is the scariest part for me! I wish I could get over my fear of doing it alone, but I’m so afraid that I procrastinate terribly. ????
So sorry to hear about your son, I lost my grandson in May of 2019 in a motorcycle accident. I took up painting rocks and now I’m trying art pouring, but I use premix pain itis easier for me at 79years old.
I am but a beginner for about three months I asked him having a hard time trying to decide what paint to use to get good results yet I have a limited budget as I see you’re on Social Security so I don’t know what brands would be the best for me to use any suggestions would be a great help to me thank you everybody that puts on such beautiful videoTo learn how God bless you for doing what you can for us
Actually the wall mart craft paint section 50-68 cents a bottle is perfect. Mix it with elmers glue to save money.. the ratio is 3 part paint 2 part elmers ( buy the 64oz size it’s cheaper) and then mix and add water till u have that consistency that flows off but doesn’t run.
Also use alcohol for your cell creator. A splash in each color and then mixed in the color..
And don’t waste lots of money on canvas or boards.
Go to Home Depot ask the nice guys in lumber for a sheet of Masonite.(it’s called something else now) and then ask them if they don’t mind could they please cut it in 12×12 “ pieces… u will get 32 pieces all for about 9-14 dollars.
In Home Depot go to paint dept. pick up a quart of the cheapest primer they have and a paint brush. Go home and mix some primer about 6 oz with a tablespoon or so of elmers And some water about an ounce or so. and paint the smooth side of your 12×12’s don’t be fussy one Thin coat of paint Then a few hours later another coat. Then let them dry two days. Then pour pour pour. If you hate one after it’s dryer for 3 days u have a choice…. pour over it or paint primer over it. Doesn’t matter how many times u paint over or pour over. When u want to keep one..let it season for a week. then spend a little money on the Windsor newton spray varnish (michaels use those 30to 40% off coupons). Spray horizontally quickly then vertically (about 10 seconds ) keep about 18 inches from surface…let dry and season 1 week.
Wow nice information I been doing acrylic pours for two years but I am still learning every day. Thank you. Maria
@John Dean, Artist, If using silicone for cells though, doesn’t it have to be cleaned before varnishing? What’s the best way? Thx